

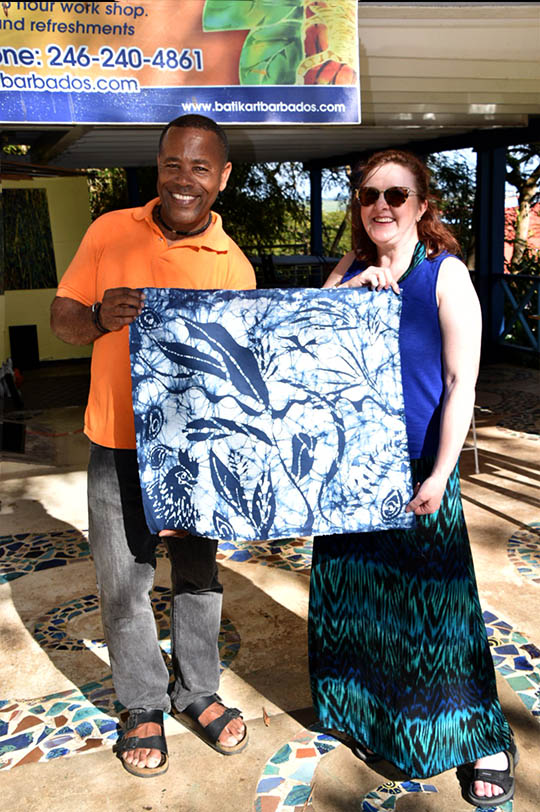
Last week while on vacation in Barbados, I had the pleasure of spending a day with Henderson Reece, learning to batik. “Hendy” is a marvelous artist and teacher. Check out his work on his website at http://www.batikartbarbados.com/
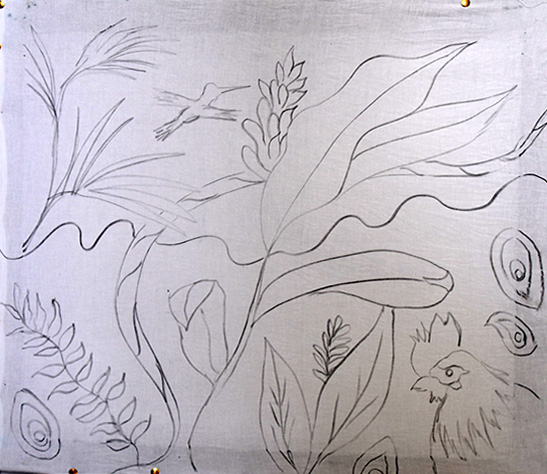
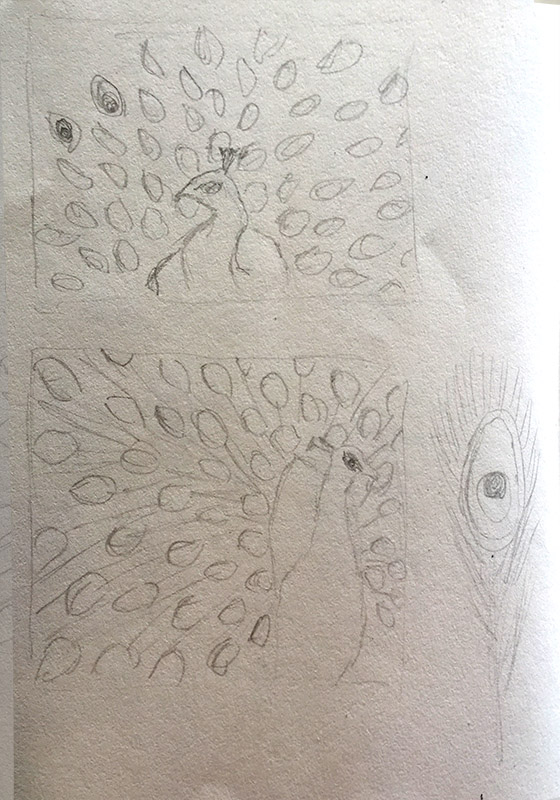
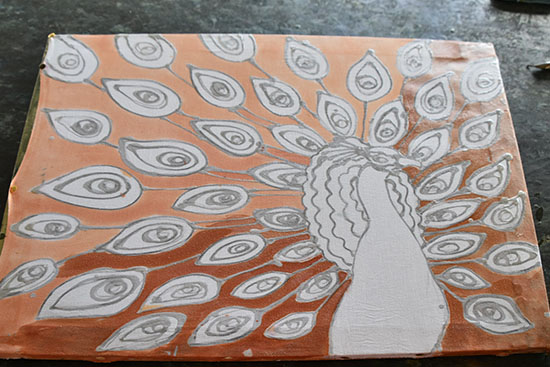
We started with a practice piece.. something to get used to using the tjantin (pronounced chantin), a tool to make thin lines of wax on the fabric. We used charcoal to draw on the cotton, which was stretched on a frame.
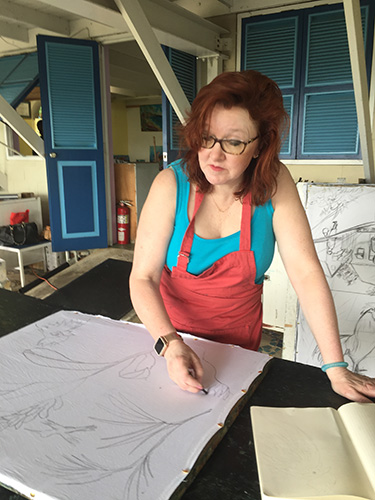
I looked out over the gorgeous landscape from Hendy’s open-air studio and drew some leaves & plants, a hummingbird and a rooster’s head, as well as lines and shapes for practice.
While I was working on my design, Hendy was heating up the wax.
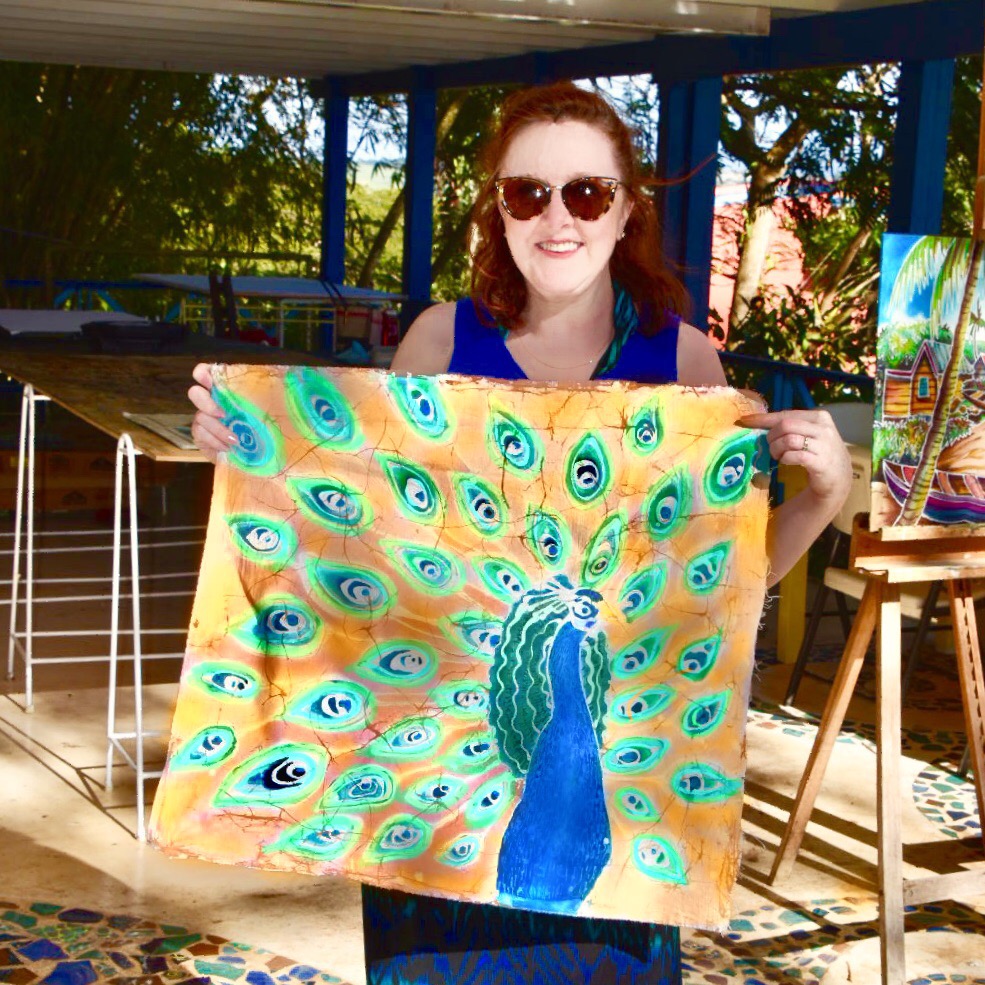
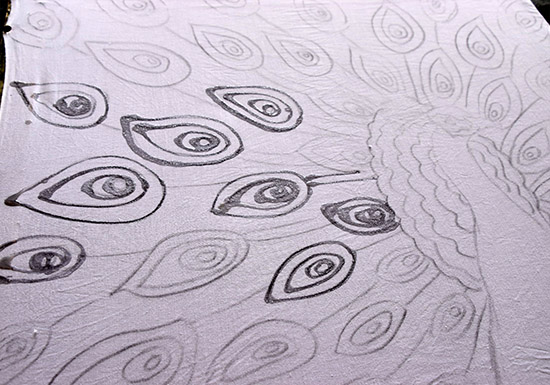
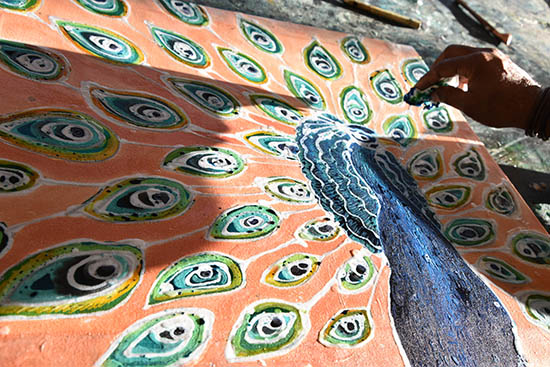
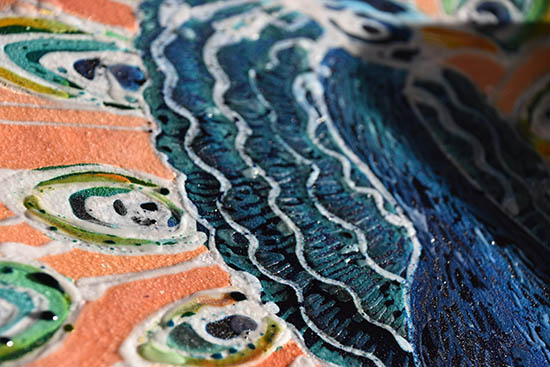
Concurrently, I then started drawing my design for my “finished piece.” I had taken photos of peacocks up at the Barbados Wildlife Reserve earlier in the week, and worked up some sketches for design ideas prior to coming to class.
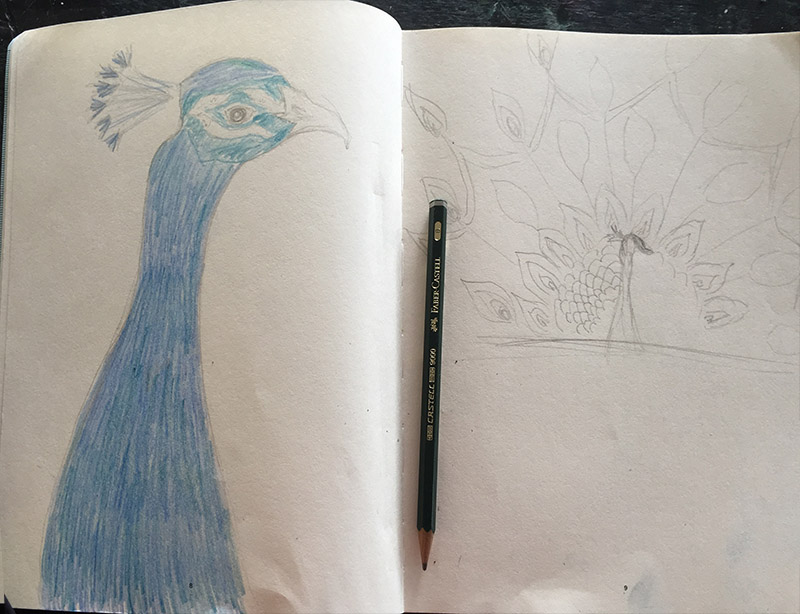
I’ve got to say, using the wax in the tjantin takes some practice! It goes to show how taking a workshop like this can be so valuable. The tjatin only holds a small amount of wax- a real Goldilocks dilemma! If too hot, the wax will spread into a thick unattractive line with blobs- if too cold, the wax won’t penetrate through the fabric and the dye colors won’t be contained within the shapes. It’s clear that getting the wax “Just Right” takes lots of practice!
Batik Art Process

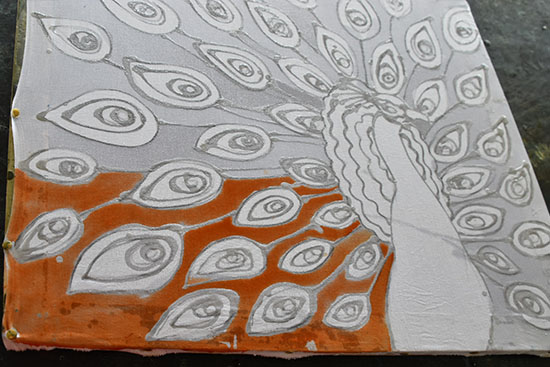
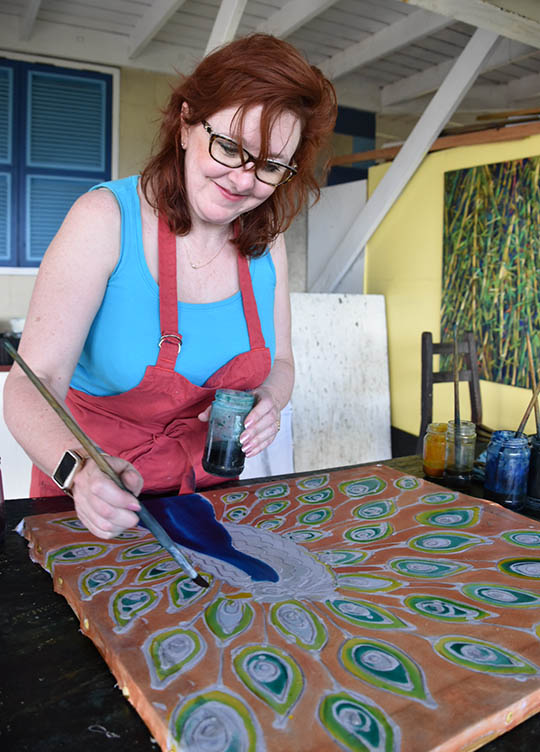
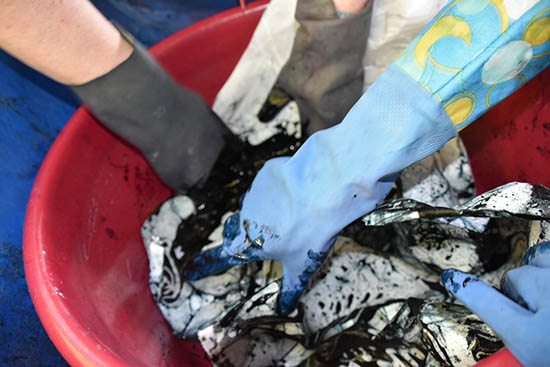
Now the dye on my peacock needs to set, so we went back to my practice piece. We painted wax over anything I wanted to stay white (the practice piece is only using 1 color of dye). Then I scrunched it a bit, to crack the wax and get the organic cracked lines through the piece. We then put it in a bucket with the Procion MX dye and saturated the piece, then hung it to dry.
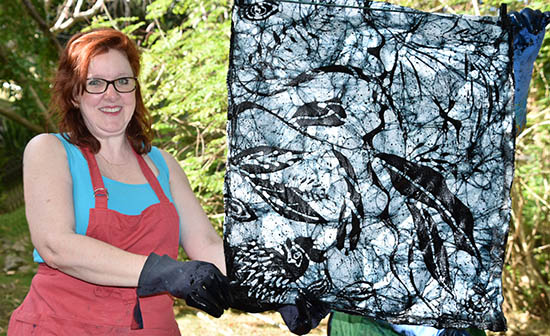
I love the look of the cracks over the piece! The final step in all of this is to boil the piece, which removes the wax.
Henderson Reese Barbados Batik Workshops
I’d highly recommend taking a class with Hendy if you’re in Barbados! Here’s a link to his workshops page that has a fabulous video showing his work and the batik workshop: http://www.batikartbarbados.com/workshop.php
He also sells his batik artwork, so you can get some masterful batik for yourself, without having to learn to do it! While his typical subject matter is based on Caribbean nature and people, he’s even done commission of a polar bear! Check out his website if you’re interested in getting a piece for your home.

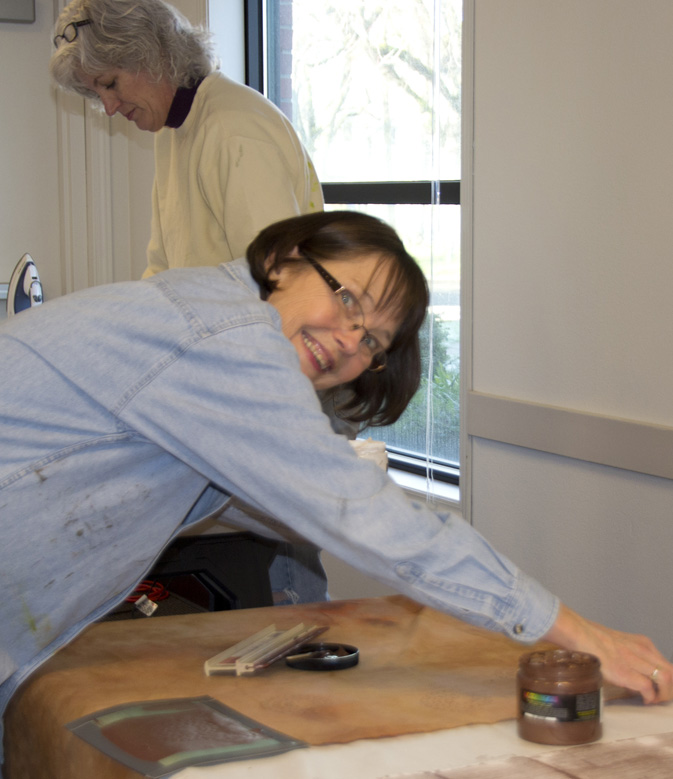
Today turned out fantastic at our CQA meeting! We had the following stations for making surface-designed fabrics to contribute to Stashfest:
Christina Fairley Erickson (me!): Shiva Oil Paintstick Rubbings, Stencils, Fabric Markers and Tsuneko Inks
Cameron Mason: Mono-printing with thickened dye
Colleen Wise: Thermofax silkscreening and foiling
Peg Swartzman: Oil Paintsticks with resists and stencil brushes
Kathy Cooper: Printing with Print blocks
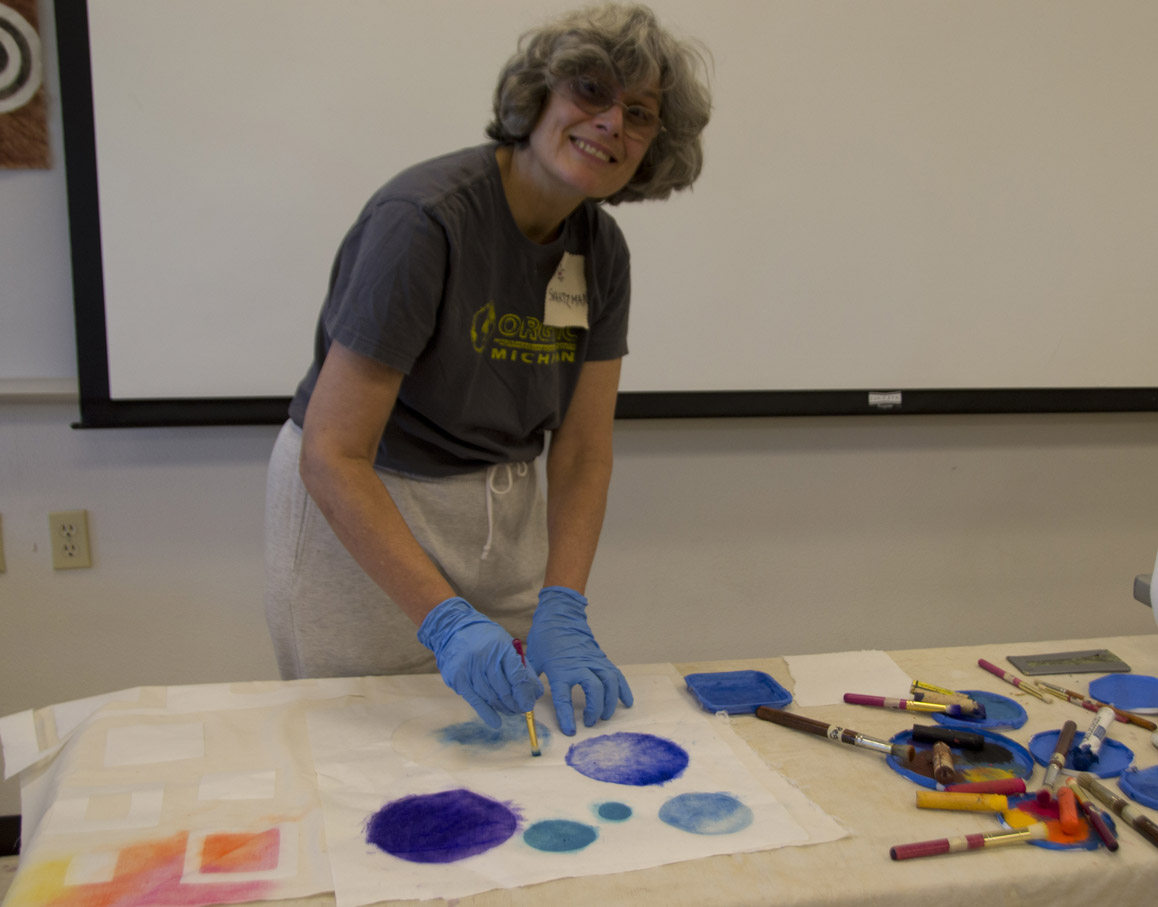 |
| Peg Swartzman teaching how to use Oil Paintsticks with Freezer paper resists and stenciling brushes for an elegant gradient effect |
 |
| Cameron Mason (far right) teaching mono-printing with thickened dyes to Roslyn Duffy (left) and Roberta Andreson (center right) |
 |
| Roslyn Duffy’s mono-print with thickened dye |
 |
| Flora Dalglish making Shiva oil paintstick rubbings at Christina’s station |
 |
| Debbie Babin designing with fabric markers after adding oilstick rubbings at Christina’s station |
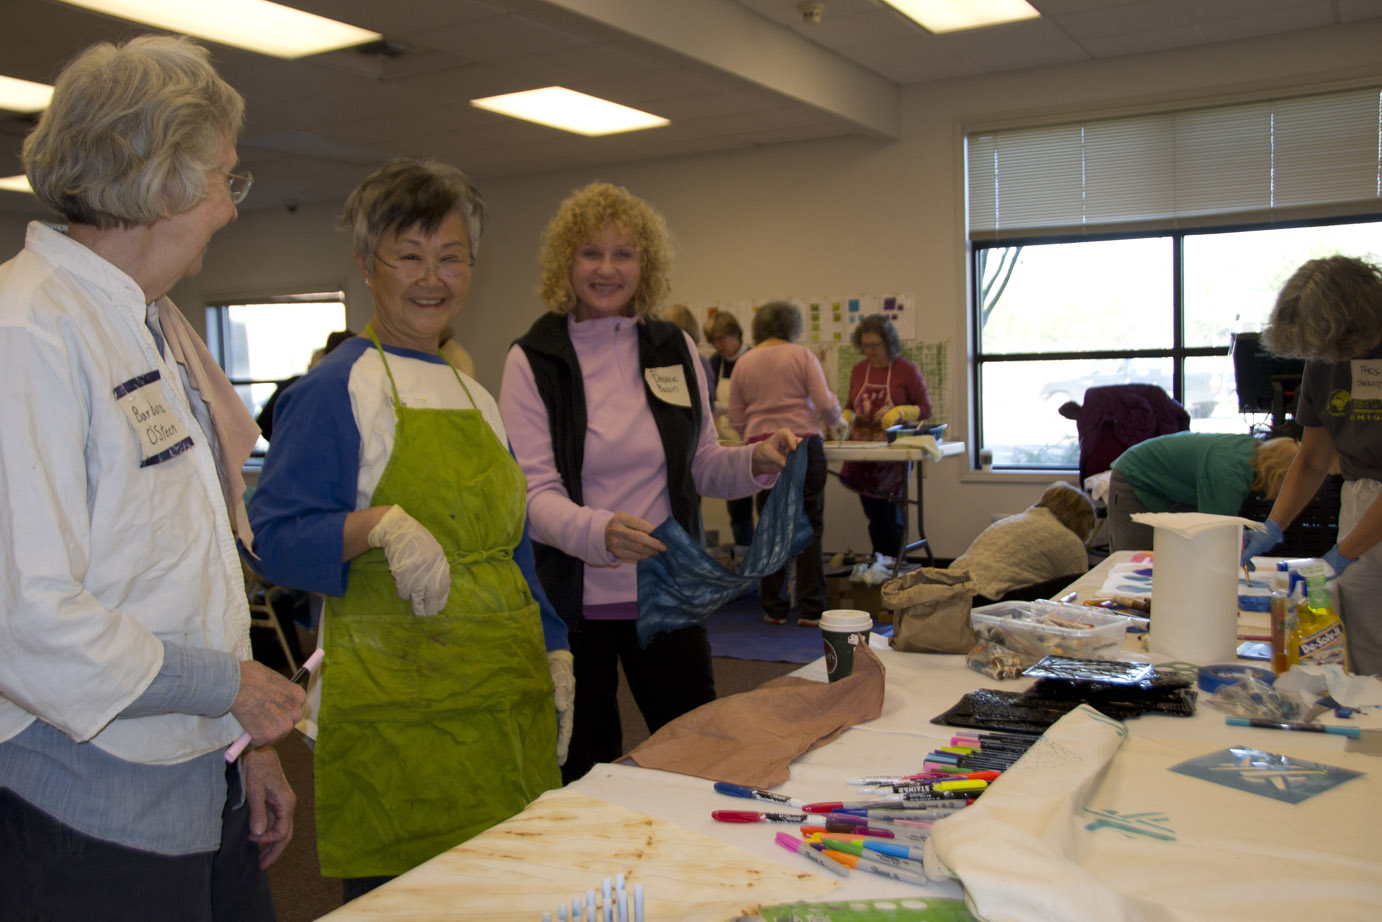 |
| Barbara O’Steen (left), Barbara Kanaya (center) and Debbie Babin (right) working at Christina’s stenciling, fabric pens, and oil stick rubbing station |
 |
| CQA President Marylee Drake (foreground) doing Thermofax screen printing with Colleen Wise (background) |
 |
| Some of our finished packets of fabrics to sell at Stashfest |
 |
| We labeled each packet with the artist’s name who made the fabric(s), size(s), and the processes used on each piece. |
 |
| Stashfest Creator and CQA Member, Patricia Belyea measured the fabrics and helped bundle them for sale |
Want the chance to buy some of these wonderful fabrics? Come to Stashfest April 6 and 7 up in LaConner!
You might also be interested in:
 |
 |
 |
| Making Fabric | Viewing for Inspiration | Making Fabric |
While I currently define myself as a “fiber and mixed media artist”, I struggle with the definition. I started early on as a seamstress,then as a costume designer. I moved to being a quilter for a short while, then specialized in art quilts. I’ve played around with many styles, but basically feel my niche is in representational art.
When I started falling in love with making my own fabric, I became a surface designer. But, I was still pretty wrapped up in using my fabrics in my quilts. Now, I’m moving even more to embroidery. Whether it’s dense machine embroidery, thread painting, intricate machine quilting, or hand work, stitch seems to give me a tactile grounding that no other medium has for me. But how do I define myself? Where does this work fit in?
I know that most shows that are quilt-centered are very strict about their definition of a quilt… 3 layers connected with stitch, often needing to be professionally bound in some way. If I decide to create a stitched piece and stretch it over a frame or canvas, then it won’t qualify. So the question is, how important is it to me to fit into the categories that show producers have come up with? Or even, how important is it to me to continue to exhibit? Is it more important to create and then find the right niche for my creations, rather than creating to fit particular guidelines?
While I don’t feel like I have a strong enough discernible style or large enough body of work to go into solo shows, I do enjoy having my work out in front of the public. The question is, will work that is not formally a “quilt” get accepted into shows? Do I feel I need to break out of confines of being defined as a quilter?
I don’t know that I have the answer for that yet. Maybe as I work out my goals for the upcoming year, it will become more clear to me. How do you define yourself? I’d love to hear your thoughts!
![]() Quick tip for productivity: I recently found the iPhone app “Evernote“. This is a way to organize all your notes, including Word docs, Adobe Acrobat PDFs, and simple text inputs. You can also use it online or download a version to your computer, as well. They all sync together. You can organize notes into notebooks (so I have one notebook for my studio, one for family, one for my blog, etc.) and put as many items within each notebook as you want. It’s a great tool!
Quick tip for productivity: I recently found the iPhone app “Evernote“. This is a way to organize all your notes, including Word docs, Adobe Acrobat PDFs, and simple text inputs. You can also use it online or download a version to your computer, as well. They all sync together. You can organize notes into notebooks (so I have one notebook for my studio, one for family, one for my blog, etc.) and put as many items within each notebook as you want. It’s a great tool!
 |
| Snow-dyed and then stenciled using oil paint-sticks |
A couple of friends and fellow CQA members met at my home today to do some surface design on fabrics to be donated to Stashfest, a fundraising event to benefit the La Conner Quilt and Textile Museum.
Patricia Belyea, on the organizing committee for Stashfest, spoke at our CQA meeting yesterday and really generated some enthusiasm for the event, as well as coming over to play with making fabric today. Patricia’s business, Okan Arts, imports yukata cottons from Japan, as well as promotes using these incredible Japanese fabrics. She also teaches and makes artisan quilts.
 |
| Snow-dyed with Procion MX and over-dyed with Dye-na-Flow |
My other guest today, Carolyn Higgens, is one of two Washington state representatives for SAQA or Studio Art Quilt Associates, another group which I belong to. Carolyn and I met some time ago in an ongoing Design series of classes by Lorraine Torrance.
 |
| Snow-dyed with Procion MX and over-dyed with Dye-na-Flow |
The most wonderful part of the three of us getting together was to find out the ties that we share… our commitment to promoting fiber art in our state. Carolyn’s blog “Fiber Arts in the Northwest” showcases some fascinating artists from the area. She hopes to expand to covering classes and events that are taking place in the Northwest.
 |
| Snow-dyed with Procion MX and over-dyed with Dye-na-Flow |
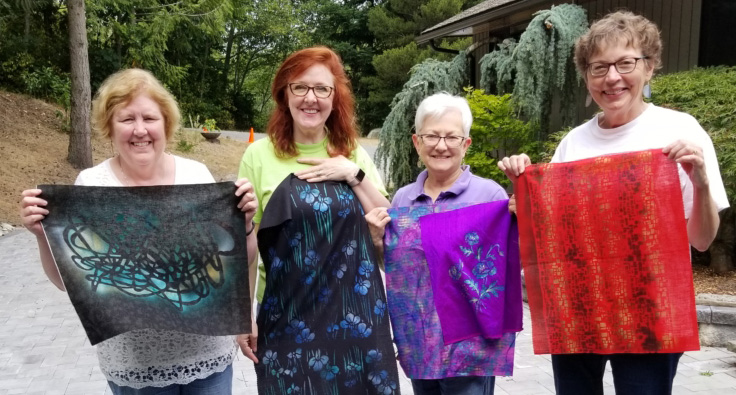
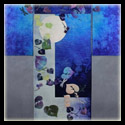
The photos here are some of the pieces of fabric which I’ve made to contribute to Stashfest on behalf of CQA. I love doing surface design! These four pieces were initially snow-dyed with Procion MX dyes, then I overdyed them with Dye-na-Flow. The top one was additionally stenciled with Shiva oil paintsticks and Seta-color transparent paint. I’m also going to be offering a tour of my studio, as one of the special “Stashfest Insider Visits” for sale as another aspect of the fundraiser. Anyone who purchases my studio tour will be given a choice of two different one yard pieces of hand-dyed/ surface designed fabric.
 |
| Freehand machine embroidery piece I’m working on for my 5 x7 challenge |
I also started my first piece for my 5 x 7 personal challenge. I know, I’m not really supposed to be starting this until 2013, but I wanted to get in the practice now! So, here’s a look at the start of my machine stitched zebra which I’m creating. I suppose I’m still a little anxious about committing myself to making something each week. Does it count if I make something larger than 5 x 7? For instance, if I finish a big project one week, but don’t do my 5 x 7? What do you think?