
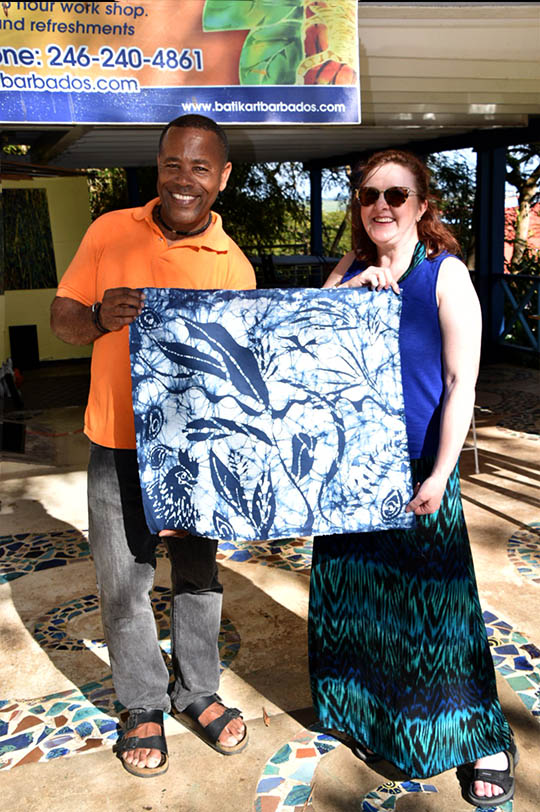
Last week while on vacation in Barbados, I had the pleasure of spending a day with Henderson Reece, learning to batik. “Hendy” is a marvelous artist and teacher. Check out his work on his website at http://www.batikartbarbados.com/
We started with a practice piece.. something to get used to using the tjantin (pronounced chantin), a tool to make thin lines of wax on the fabric. We used charcoal to draw on the cotton, which was stretched on a frame.
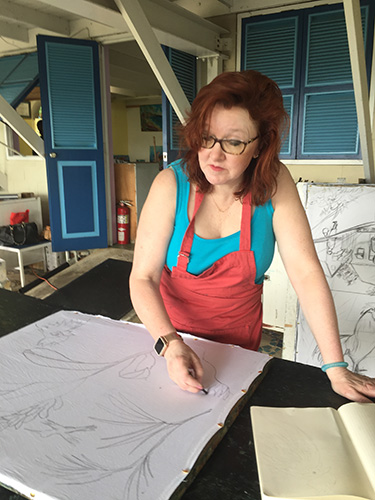
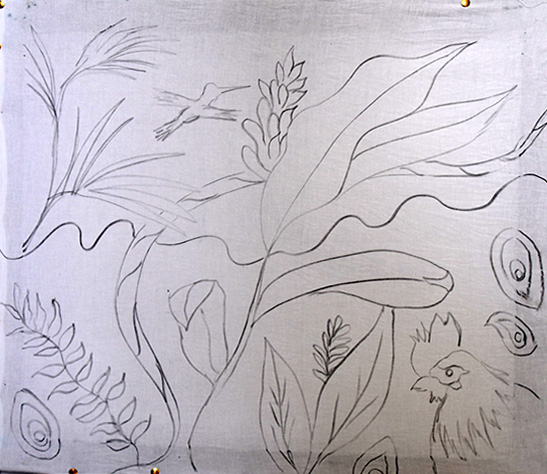
I looked out over the gorgeous landscape from Hendy’s open-air studio and drew some leaves & plants, a hummingbird and a rooster’s head, as well as lines and shapes for practice.
While I was working on my design, Hendy was heating up the wax.
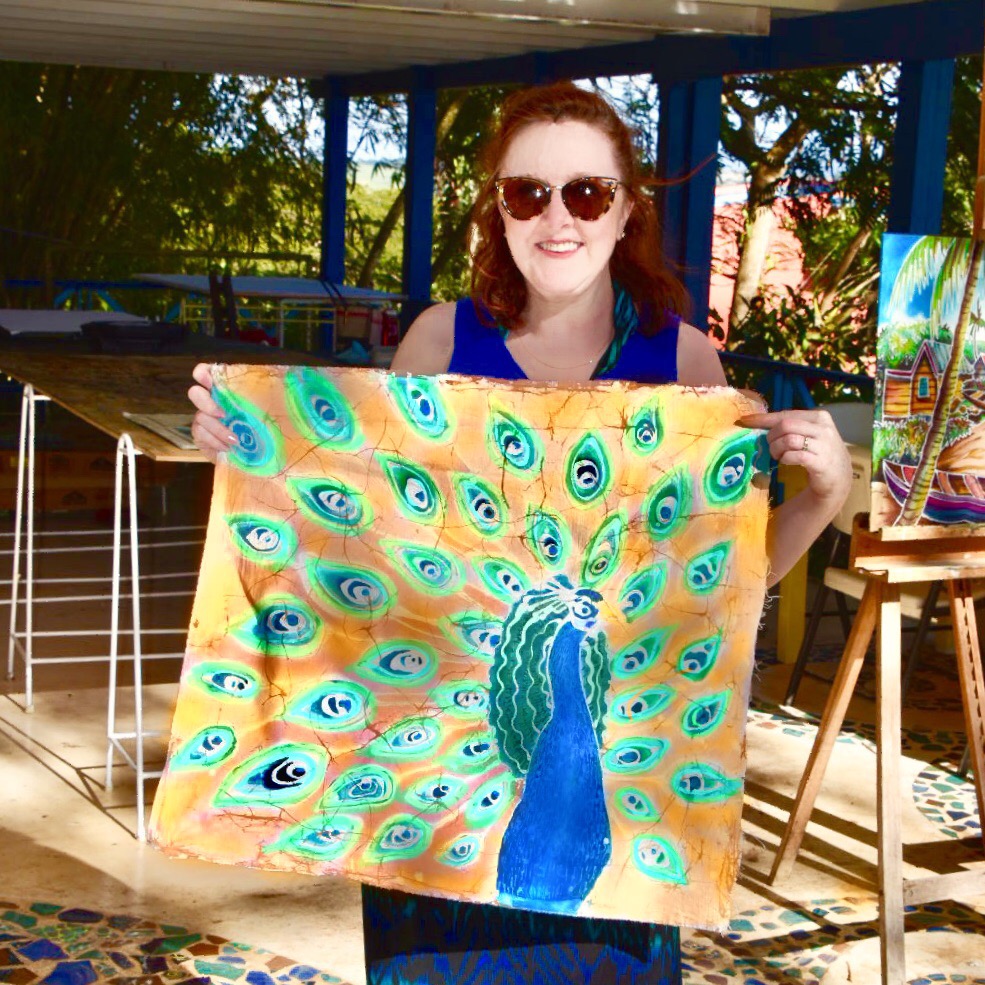
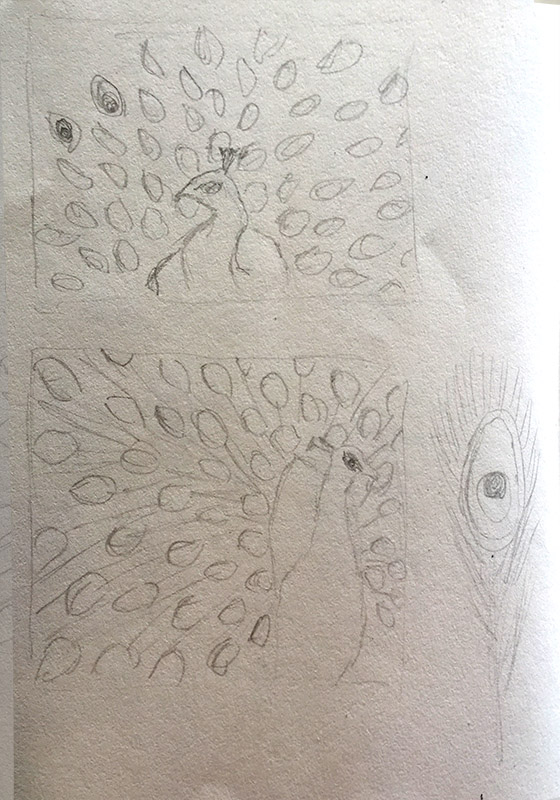
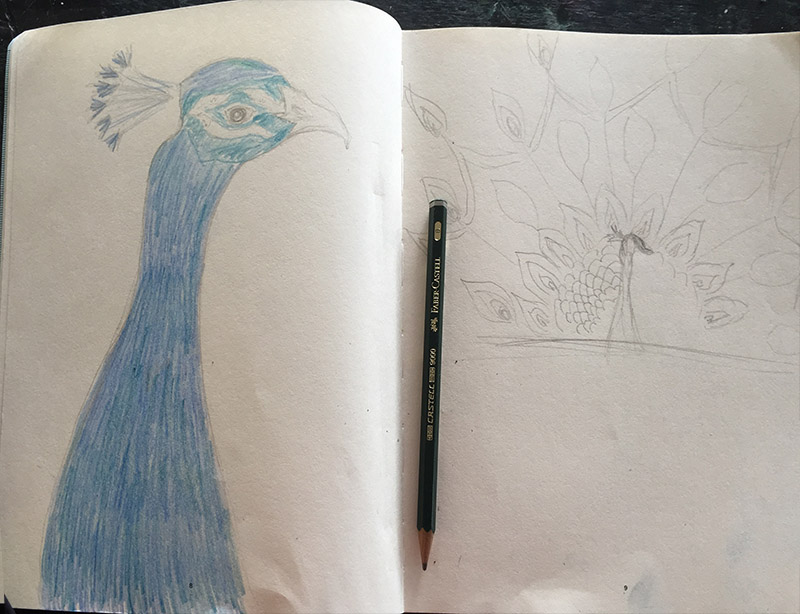
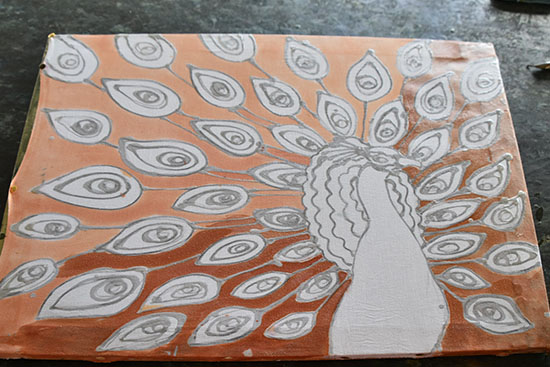
Concurrently, I then started drawing my design for my “finished piece.” I had taken photos of peacocks up at the Barbados Wildlife Reserve earlier in the week, and worked up some sketches for design ideas prior to coming to class.
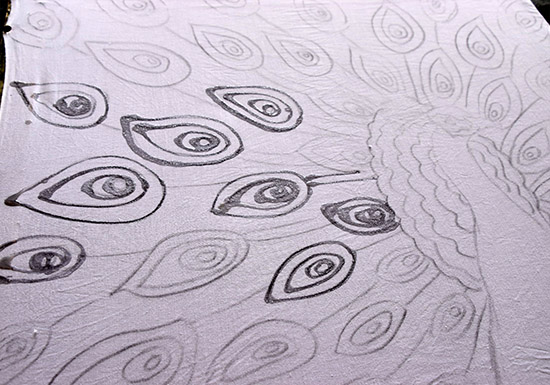
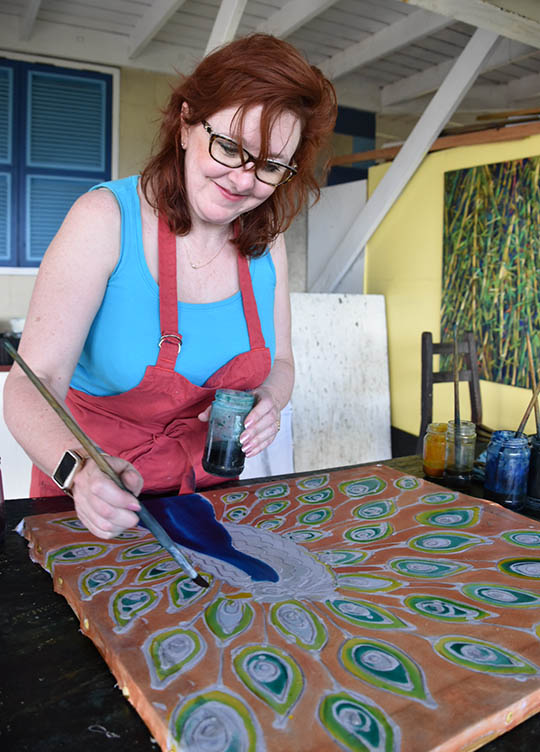
I’ve got to say, using the wax in the tjantin takes some practice! It goes to show how taking a workshop like this can be so valuable. The tjatin only holds a small amount of wax- a real Goldilocks dilemma! If too hot, the wax will spread into a thick unattractive line with blobs- if too cold, the wax won’t penetrate through the fabric and the dye colors won’t be contained within the shapes. It’s clear that getting the wax “Just Right” takes lots of practice!
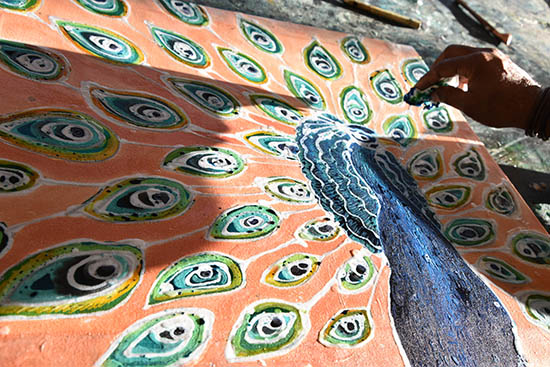
Batik Art Process

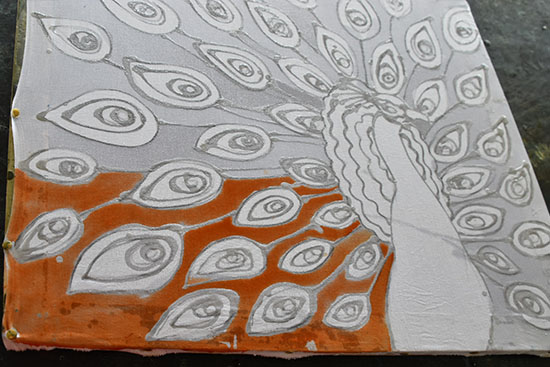
Now the dye on my peacock needs to set, so we went back to my practice piece. We painted wax over anything I wanted to stay white (the practice piece is only using 1 color of dye). Then I scrunched it a bit, to crack the wax and get the organic cracked lines through the piece. We then put it in a bucket with the Procion MX dye and saturated the piece, then hung it to dry.
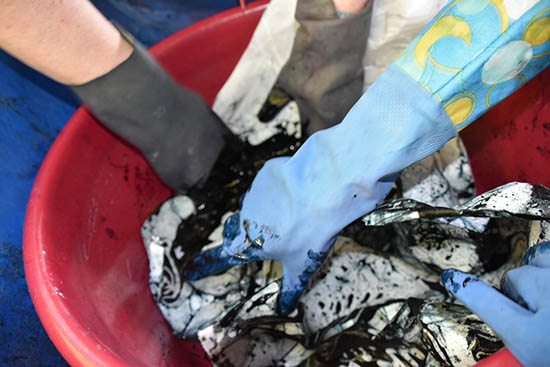
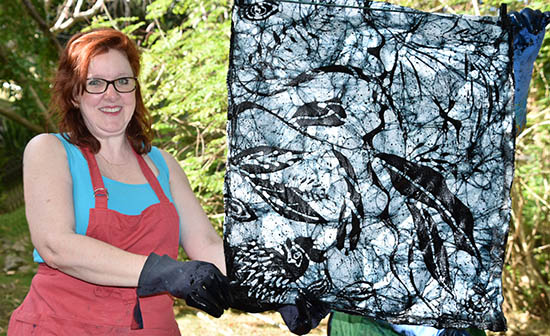
I love the look of the cracks over the piece! The final step in all of this is to boil the piece, which removes the wax.
Henderson Reese Barbados Batik Workshops
I’d highly recommend taking a class with Hendy if you’re in Barbados! Here’s a link to his workshops page that has a fabulous video showing his work and the batik workshop: http://www.batikartbarbados.com/workshop.php
He also sells his batik artwork, so you can get some masterful batik for yourself, without having to learn to do it! While his typical subject matter is based on Caribbean nature and people, he’s even done commission of a polar bear! Check out his website if you’re interested in getting a piece for your home.
As many of you know, I have been studying at the Gail Harker Center for Creative Arts for some time… I believe it’s 8 years now. I’m just finishing 2 1/2 years in the Level 3 Advanced Experimental Stitch course. Our class will be exhibiting coursework including assessment items, sketchbooks, presentation books, samples, and historical stitch studies at an exhibition on October 26-27.

Mark your calendars! We will also have an artist talk from 10:30-11:30 am on Saturday October 27.
UK Tour Day 3- Horniman Museum & Gardens

Karen Dodd’s “Coral:Fabric of the Reef” installation
When I plan my trips, every once in a while I throw in a ‘ringer’ – some place I may have heard obscure reference to, I’m unsure about what I’ll find and decide to try our just for kicks. It’s also good to plan some things which might really appeal to my husband Randy, who’s sweet and tolerent enough to accompany me on my textile exploits.
I read the description of the Horniman Museum and Gardens as a “quirky Victorian collection of artifacts” and thought it sounded like a unique adventure. Not only that, but they also have an aquarium, which appeals to both Randy and myself, having both studied marine biology in our pasts.

The Color Wheel Summer Bedding Garden at the Horniman Museum & Gardens
We arrived a bit before the museum opened, so first toured some of the elaborate gardens, including this “color wheel garden”, which was planted to complement one of their current special exhibitions “Colour: The Rainbow Revealed.”

The original Arts & Crafts style museum
The museum was founded in 1901 by Frederick John Horniman. Frederick had inherited his father’s Horniman’s Tea business, which by 1891 had become the world’s biggest tea trading business. The cash from the business allowed Horniman to indulge his lifelong passion for collecting, and which after travelling extensively had some 30,000 items in his various collections, covering natural history, taxidermied animals and birds, cultural artefacts and musical instruments.

Victorian era natural history exhibitions seek to explain and confirm Darwin’s theory of evolution.
The original museum was designed by Charles Harrison Townsend in the Arts and Crafts style. The collection now exceeds 350,000 objects.
After viewing the gardens, their lovely aquarium, and the interactive colour exhibit (geared towards children), we moved on to the natural history gallery. We were greated by a fabulous sculptural textile collection by artist Karen Dodd.

Pinpoint by Karen Dood
Karen’s work explores the beauty, fragility and vulnerability of coral and coral reefs. Some of the pieces are brightly colored, showing the vibrant interdependent reef life. Other pieces are subdued, representing the destruction of the reef and lifeless coral skeletons.
Karen uses hand-dyed and discharged (colour removal) wool blankets, which are folded, twisted, felted, wrapped & bound, and stitched. The discharging of colour, corresponds to the bleaching of coral in our oceans, as the coral comunities die. She uses fragmentation, shadowing, felting processes, stitching, and holes or gaps to increase the textural nature of each piece, while representing the loss, deterioration, and (hopefully) possibility of regeneration of the coral reef.

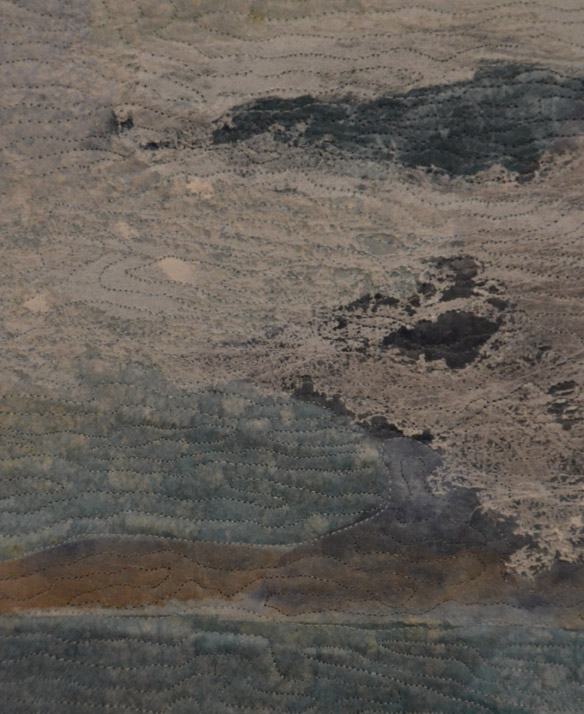
Pinpoint, detail

‘Crinkle Return’ by Karen Dodd

‘Crinkle Return’ detail by Karen Dodd

‘A Stitch in Time’ by Karen Dodd

‘A Stitch in Time’ detail by Karen Dodd

‘Lighting the Shadows’ by Karen Dodd
Check out https://www.karen-dodd.com/ Karen’s website to see more in this incredible series!

Today was all about the High Fiber Diet… and I’m not talking about food! Our local Bellevue Arts Museum or ‘BAM’ is currently hosting a Biennial exhibition which is featuring Fiber this year! BAM has considered one of its roles to include recognizing “the enduring and uninterrupted role of craft in shaping the aesthetic landscape of the region” (from the High Fiber Diet exhibit pamphlet.) Today they hosted an all day Symposium with incredible speakers and moderators which left me itching to come home and create! Since today was our normal day for our Contemporary QuiltArt Association meeting, we choose to meet at the symposium instead… which gave BAM a sold-out crowd!
 |
| “Oyster Light” by Barbara Lee Smith |
 |
| “Oyster Light” detail by Barbara Lee Smith |
One of the well-known moderators was Barbara Lee Smith, a resident of a small island in the Puget Sound. Barbara’s piece, “Oyster Light” is made from painted, collaged, and stitched synthetic fabric- a translucent, non-woven industrial fabric that looks like Japanese paper. Her sewing lines “echo the currents of sea and air, the topography of the earth, mapping the work with stitches that literally and figuratively finish it.”
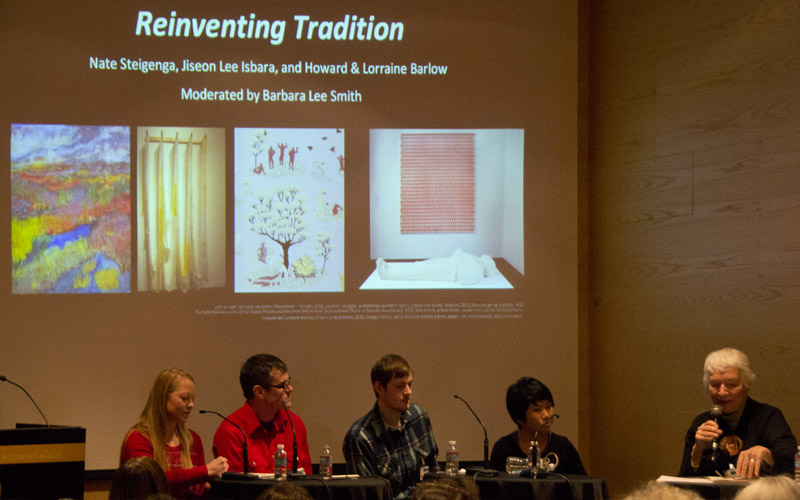 |
| Lorraine Barlow, Howard Barlow, Nate Steigenga, Jiseon Lee Isbara and Barbara Lee Smith (from left to right) at BAM Symposium 2/09/2013 |
Barbara moderated a talk called “Reinventing Tradition” with four of the other artists in the show. It was fascinating to hear the viewpoints and how tradition has influenced some very cutting-edge fiber artists.
 |
| “The Infallible Accounts of the Tilapia People and the Dead Which Soon Outnumbered Them: a Toile De Jouy” by Nate Steigenga |
One of the artists on the panel, Nate Steigenga, won the John and Joyce Price Award for Excellence for the BAM show, earning him his own solo show in the future. The fascinating thing about his piece is that it is reminiscent of a traditional quilt… sort of a tree of life feel, but when you get up close it’s much closer to something you’d see Hieronymus Bosch create with fabric! It’s actually a twist on Toile de Jouy, a type of fabric with an intricate scene printed on it. This artwork is made from bedsheets and pillow shams are backed with ironed-on drawer liners, which gives shade and depth to semi-transparent fabrics. Nate uses an exceptionally fine collage technique (many of his pieces are tooth-pick wide slivers.)
While I appreciate the process that went into the piece, as well as the black humor, I find it somewhat disturbing… I could stare at Barbara Lee Smith’s piece all day, but this left me somewhat disquieted. But perhaps that is the point.
 |
| Detail from Nate Steigenga’s artwork |
 |
| Detail from Nate Steigenga’s artwork |
There really is so much to say about all the pieces at this exhibition that it will probably take me many, many posts to share them all with you.
In a way, it was somewhat daunting. Here are “real” fiber artists… at least to this museum’s tastes. Art should be an expression of oneself and each piece in this exhibit is so different that it’s can be overwhelming. A few of the people discussed the sense of the the exhibit being “loud” since there is so much (44 artists… many with huge sculptural pieces) and that it isn’t a body of work that all goes together.
I found some of the work inspirational, some of it to be admired for technique, and some awe-inspiring for the scale or complexity which the artist achieved. But, most importantly, it was wonderful to be immersed in a community of artists with a “common thread” running through us all. Seeing all my CQA friends, meeting many of the artists with pieces in the show, it reminded me of how important it is to get out of the studio from time-to-time and see others who are involved in your genre of art.
I’ll post more photos from the exhibit soon.
You Might Also Be Interested In:
 |
 |
 |
| Complex Threads 1 | Complex Threads 2 | Viewing for Inspiration |
 My dear friends are celebrating their Silver Wedding anniversary on Valentines day next week. As I was one of the bridesmaids in their wedding, I’m packing the family up and heading to visit them in San Francisco for the party. While I did live in the city for a short time, that was half a lifetime ago… so it’s hard to decide what all we will do while we’re there.
I’m looking now for a few good options on the fiber or quilt frontier in the Bay Area to explore. I was very sad to hear of Kasuri Dyeworks of Berkeley CA closing several years back. I still have some of the remarkable fabrics I purchased from them. I also just missed the Museum of Craft and Folk Art (SF) which closed at the end of 2012.
So here are some options I’ve found:
San Jose Museum of Quilts and Textiles This sounds like a good prospect, although the upcoming exhibits don’t really sound like they are totally up my alley.
The Lacis Museum of Lace and Textiles (Berkeley)
Art Fibers Fine Yarn (San Francisco)
Dharma Trading Company Store (San Rafael) This may be a bit too far, but I love buying my dyeing supplies from Dharma.
Anyone have experience with any of these places (positive or negative) or have a place in the San Francisco Bay Area that they’d highly recommend? I’d love some guidance and promise to share whatever I find!
 I’ve been thinking once again about designing with a specific theme in mind. If you have entered into juried shows that have a theme, you know the dilemma. How literal do I need to make this piece to fit the theme? Or perhaps you’ve just skipped entering those shows.
 Since my preferred style in which to make art is representational or pictorial, I don’t usually have a great difficulty with making something to fit a theme. My struggle is more about whether I really want to make a piece or not for that show.
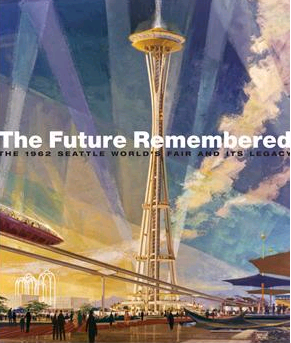
As an example, I’d like to share about the 50th Anniversary Celebration of the Seattle Center. In 1962, Seattle was the home of the World’s Fair… the grounds on which the fair was held is the Seattle Center. Most notably, Seattle’s best-known landmark, the Space Needle was built for this 6 month festival and exhibition.
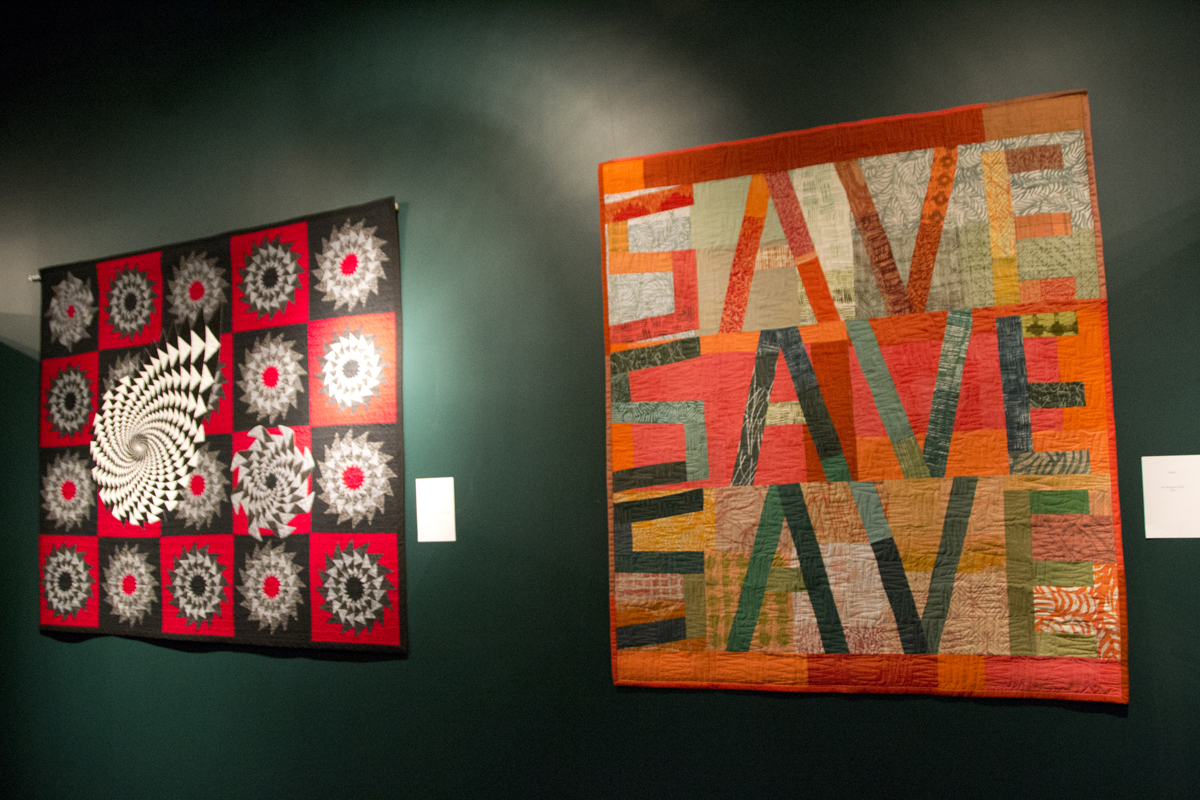 |
| Helen Remick’s “Spinning Out, Spinning In 1” (left) and Margaret Liston’s “Save” (right) |
Seattle Center put out a call to artists for large proposals to show during the 6 months of the Next 50 Celebration. The theme of the overall exhibit and performances was “Illuminating Today’s Challenges, Imagining Tomorrow’s Possibilities.” The call was set up as a two-tier process. You sent in an extensive original proposal through Café (Call for Entry), including a series of images representative of your art.

As I am the Exhibitions Co-Chair of the Contemporary QuiltArt Association, I prepared this proposal for our group. The second tier was like a call-back for an audition. Except now, you had to do an elaborate proposal, including budget, recommendations on where within the Seattle Center grounds that your exhibit would take place, showing how your art would benefit and reflect the theme of the Next Fifty, and finally a video to support your claims of your work.
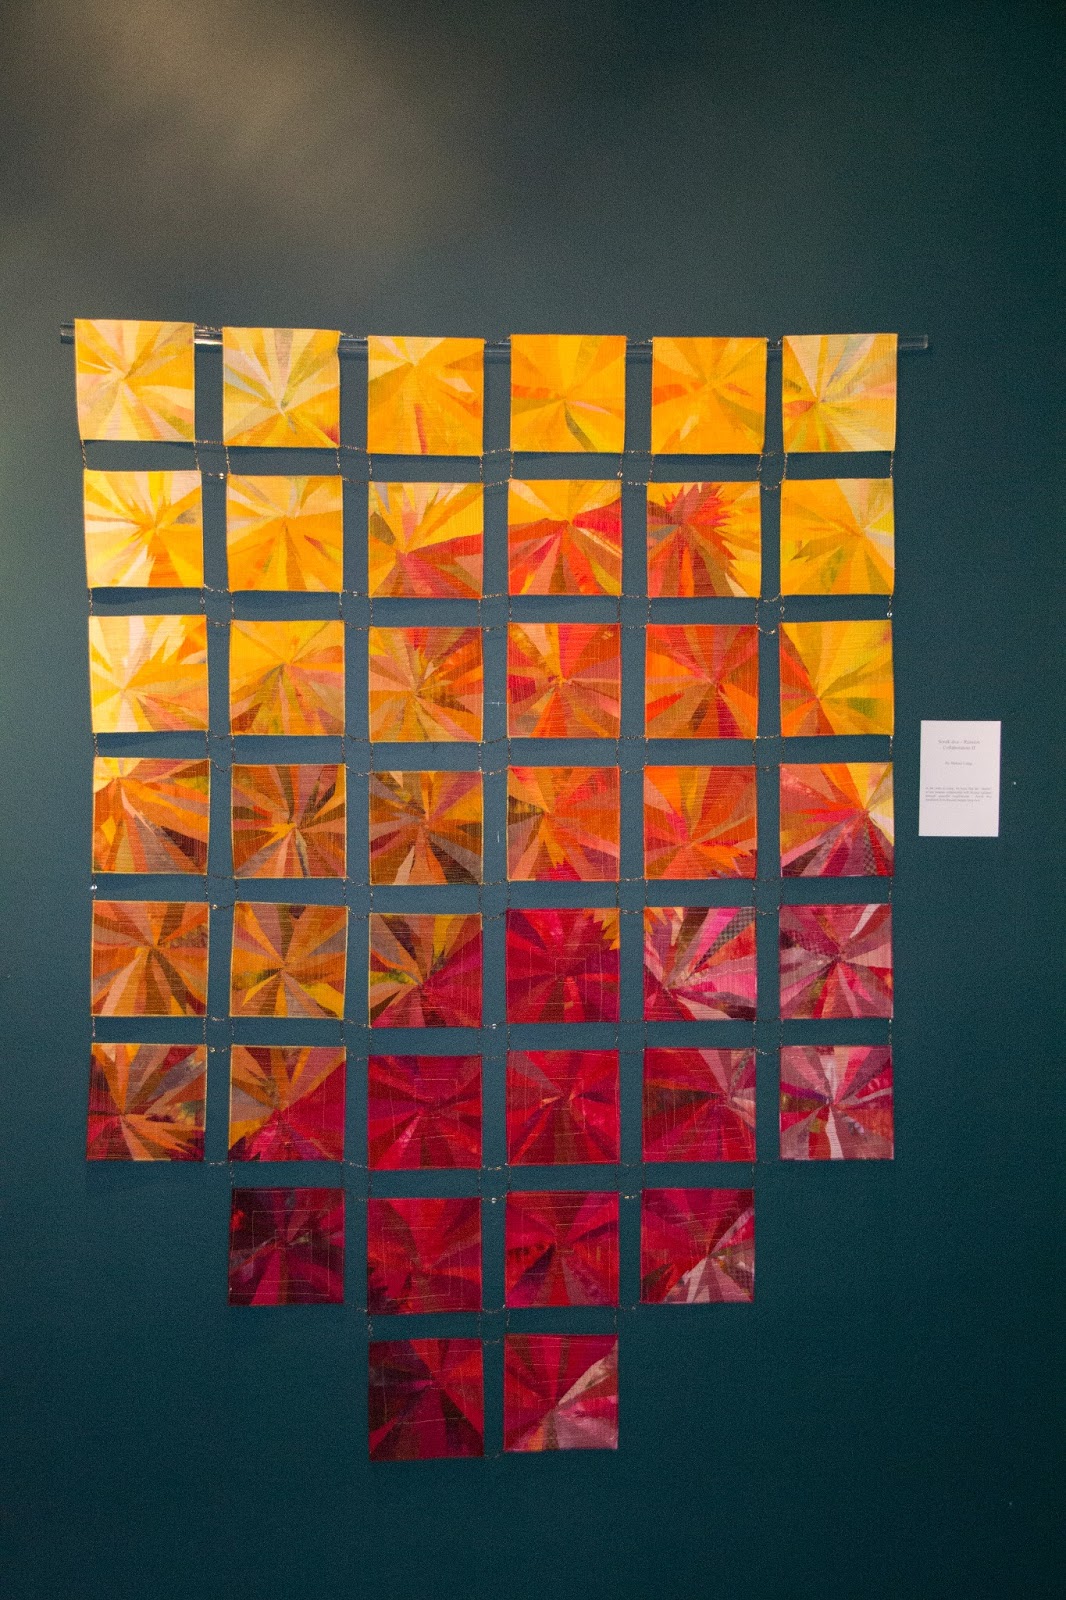 |
| Melisse Laing’s “Sorok dva – Russian Collaboration II” |
In the end, we did get chosen for an exhibition, but we did not receive any of the grant money… not a big problem as our group doesn’t typically get paid to exhibit. But when it came down to the “theme”, they decided they wanted to be even more specific. The dates chosen for our group’s exhibition were during September and October (2012). Each month of the celebration had a focus… September’s theme was “Commerce and Innovation” and October’s was “Civic Action.” So, the name given for our exhibit was “Possibilities: Fiber Artists Look at Innovation and Civic Action.” Can you imagine trying to get a group of quilt artists to tackle that as a theme? (Imagine a great big eye-rolling from me here.)
 |
| Artist and CQA President Marylee Drake with her piece “Gearing Up for the Future” |
But, somehow our artists always come through with a wonderful show as you can see from the photos above. Tomorrow, I’ll talk about and share some photos of the process I went through to make my piece “Graphene – The Miracle Material.”
You might also be interested in:
Designing for a Theme
A Day of Art
Making Fabric
While I currently define myself as a “fiber and mixed media artist”, I struggle with the definition. I started early on as a seamstress,then as a costume designer. I moved to being a quilter for a short while, then specialized in art quilts. I’ve played around with many styles, but basically feel my niche is in representational art.
When I started falling in love with making my own fabric, I became a surface designer. But, I was still pretty wrapped up in using my fabrics in my quilts. Now, I’m moving even more to embroidery. Whether it’s dense machine embroidery, thread painting, intricate machine quilting, or hand work, stitch seems to give me a tactile grounding that no other medium has for me. But how do I define myself? Where does this work fit in?
I know that most shows that are quilt-centered are very strict about their definition of a quilt… 3 layers connected with stitch, often needing to be professionally bound in some way. If I decide to create a stitched piece and stretch it over a frame or canvas, then it won’t qualify. So the question is, how important is it to me to fit into the categories that show producers have come up with? Or even, how important is it to me to continue to exhibit? Is it more important to create and then find the right niche for my creations, rather than creating to fit particular guidelines?
While I don’t feel like I have a strong enough discernible style or large enough body of work to go into solo shows, I do enjoy having my work out in front of the public. The question is, will work that is not formally a “quilt” get accepted into shows? Do I feel I need to break out of confines of being defined as a quilter?
I don’t know that I have the answer for that yet. Maybe as I work out my goals for the upcoming year, it will become more clear to me. How do you define yourself? I’d love to hear your thoughts!
![]() Quick tip for productivity: I recently found the iPhone app “Evernote“. This is a way to organize all your notes, including Word docs, Adobe Acrobat PDFs, and simple text inputs. You can also use it online or download a version to your computer, as well. They all sync together. You can organize notes into notebooks (so I have one notebook for my studio, one for family, one for my blog, etc.) and put as many items within each notebook as you want. It’s a great tool!
Quick tip for productivity: I recently found the iPhone app “Evernote“. This is a way to organize all your notes, including Word docs, Adobe Acrobat PDFs, and simple text inputs. You can also use it online or download a version to your computer, as well. They all sync together. You can organize notes into notebooks (so I have one notebook for my studio, one for family, one for my blog, etc.) and put as many items within each notebook as you want. It’s a great tool!