

 2019
2019UK Tour Day 3- Horniman Museum & Gardens

Karen Dodd’s “Coral:Fabric of the Reef” installation
When I plan my trips, every once in a while I throw in a ‘ringer’ – some place I may have heard obscure reference to, I’m unsure about what I’ll find and decide to try our just for kicks. It’s also good to plan some things which might really appeal to my husband Randy, who’s sweet and tolerent enough to accompany me on my textile exploits.
I read the description of the Horniman Museum and Gardens as a “quirky Victorian collection of artifacts” and thought it sounded like a unique adventure. Not only that, but they also have an aquarium, which appeals to both Randy and myself, having both studied marine biology in our pasts.

The Color Wheel Summer Bedding Garden at the Horniman Museum & Gardens
We arrived a bit before the museum opened, so first toured some of the elaborate gardens, including this “color wheel garden”, which was planted to complement one of their current special exhibitions “Colour: The Rainbow Revealed.”

The original Arts & Crafts style museum
The museum was founded in 1901 by Frederick John Horniman. Frederick had inherited his father’s Horniman’s Tea business, which by 1891 had become the world’s biggest tea trading business. The cash from the business allowed Horniman to indulge his lifelong passion for collecting, and which after travelling extensively had some 30,000 items in his various collections, covering natural history, taxidermied animals and birds, cultural artefacts and musical instruments.

Victorian era natural history exhibitions seek to explain and confirm Darwin’s theory of evolution.
The original museum was designed by Charles Harrison Townsend in the Arts and Crafts style. The collection now exceeds 350,000 objects.
After viewing the gardens, their lovely aquarium, and the interactive colour exhibit (geared towards children), we moved on to the natural history gallery. We were greated by a fabulous sculptural textile collection by artist Karen Dodd.

Pinpoint by Karen Dood
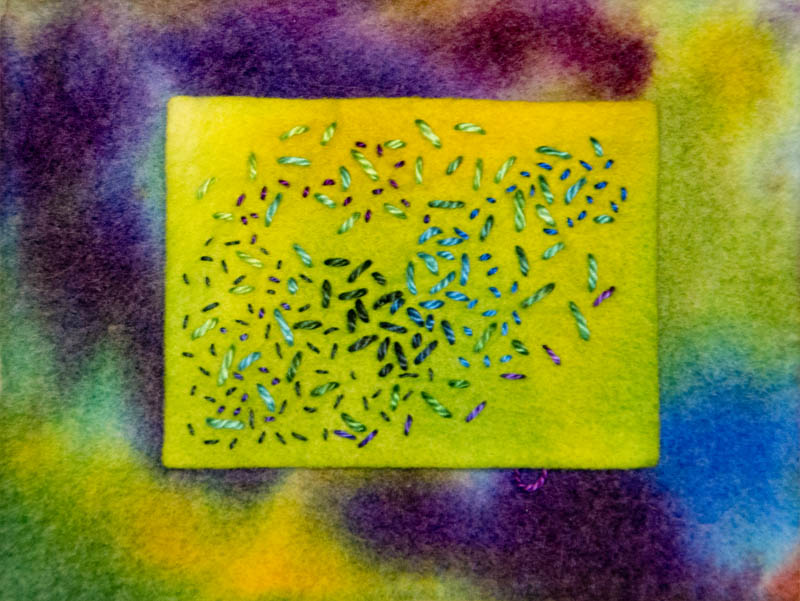
Karen’s work explores the beauty, fragility and vulnerability of coral and coral reefs. Some of the pieces are brightly colored, showing the vibrant interdependent reef life. Other pieces are subdued, representing the destruction of the reef and lifeless coral skeletons.
Karen uses hand-dyed and discharged (colour removal) wool blankets, which are folded, twisted, felted, wrapped & bound, and stitched. The discharging of colour, corresponds to the bleaching of coral in our oceans, as the coral comunities die. She uses fragmentation, shadowing, felting processes, stitching, and holes or gaps to increase the textural nature of each piece, while representing the loss, deterioration, and (hopefully) possibility of regeneration of the coral reef.

Pinpoint, detail

‘Crinkle Return’ by Karen Dodd

‘Crinkle Return’ detail by Karen Dodd

‘A Stitch in Time’ by Karen Dodd

‘A Stitch in Time’ detail by Karen Dodd

‘Lighting the Shadows’ by Karen Dodd
Check out https://www.karen-dodd.com/ Karen’s website to see more in this incredible series!
 |
| Christina standing below hand-dyed embroidery threads |
I’m back from five days in “stitch heaven” with Gail Harker. The class, “Experimental Hand Stitch” focuses on Procion MX dyeing of embroidery thread and a wool/acrylic felt to stitch on, and then learning some of the basic embroidery stitches and how to use them in a contemporary context.
 |
| My friends”, Debbie and Rebecca, dyed felts and threads |
The felt and threads are vibrant and beautiful. Gail feels that having your materials inspire you is important, so she helps her students understand their color choices and combinations to be successful with the dyeing process.
 |
| Some of my dyed felts and threads |
I basically stuck with an analogous color scheme from yellow-green through red-violet. If you’re unfamiliar with analogous color schemes, it means that you pick colors that are adjacent to each other on the color wheel. So the colors I worked with were greens, blues, and violets.
After our dyeing days, we started doing small stitch samplers. Each stitch will have its own page in a small stitch book (we even learned how to bind our books!) We also worked on documenting our samples within a sketchbook, including what threads we used, any observations we have, needles that were chosen, etc.
 |
| Some of my incomplete pages with the sketchbook documentation pages and sample threads |
Some of our samples were also worked on sketchbook pages which we dyed and then fused together, so they are quite stiff. We then poked holes in the sketchbook pages along the line which we wanted to stitch, and then added the stitch afterwards. It was so fun… it reminded me of when I was a little girl and had cards with pictures on them and holes to “stitch” through (really it was more like lacing.)
 |
| French Knots (in process) by Christina Fairley Erickson |
While none of these samples is complete yet, you can get an idea of what they’ll look like here. I have additional ones started, but these are the most complete. The other thing which was different and interesting was the freedom which we were encouraged to take with each piece. For instance, in years past, French knots were expected to have the thread wrapped neatly around the needle two times. With contemporary hand stitching, however, we can make a variety of sizes and different textures and effects by wrapping a thread more times around the needle, or by wrapping it loosely, rather than tight.
 |
| Running Stitch (in process) by Christina Fairley Erickson |
 |
| Seed Stitch (in process) by Christina Fairley Erickson |
 |
| Blanket Stitch by Christina Fairley Erickson |
 |
| Open Chain Stitch (in process) by Christina Fairley Erickson |
Each of the pages is about 5″x 7″, so they fit in well with my 5 x 7 Challenge! I’ll be getting my final Salsa piece finished up this week, then I’ll need to work on the sashing and binding of all the Salsa blocks into a finished quilt.
You Might Also Be Interested In:
 |
 |
 |
| Dyeing to Embroider; | Recognizing our Limits & Not Giving Up |
Hand Stitch Variations |
Check Out these other Great Blogs:
Anything Goes – Quilt ‘n Sew at Stitch by Stitch
Wow… another fantastic day of mostly working with Procion MX dyeing at the Gail Harker Center for Creative Studies. To be completely honest, I’m pretty tired… this can be hard work. So, I’m going to keep it short and sweet tonight, and just put up some images and descriptions of the processes and projects we worked on.
 First, our hand-dyed embroidery threads are totally luscious! Here they are drying in our classroom. We had to rinse them out and then set the color in hot water with Synthropol today.
We then started dyeing wool-rayon felt, which we’d cut into pieces prior to class, and will be making into hand-stitched books.
 |
| Felt with dye poured on (wet) |
The felt totally soaks up the dye… you have to pour it on and it looks horrible and dark for the most part.
 |
| Rinsing out the felt |
After allowing it to sit for a few hours, we rinsed it out and also set the dye with Synthropol. Since the felt soaks up so much water, we had to carefully wrap it in towels to help dry it. You don’t want to press or agitate it very much, or it starts the felting process. We then left it to completely dry overnight.
 |
| Felt dyeing |
 |
| Rinsed felt for hand-made stitch books, laid out to dry |
We also worked with painting dyes on sketchbook pages. We do these in 2-page “spreads” so that they will go together when the book is opened. We then fuse pages together, to make the pages stiff and able to be stitched on. We started working on a few pages by drawing a design on them, then punching holes through the paper with a darning needle. We then can easily put our stitches through the holes.
 |
| Some sketchbook pages painted with dye |
I believe we’re done with the dyeing now… on to more stitchwork tomorrow!
 |
| A two-page spread for a sketchbook, painted with Procion MX dye |
You Might Also Be Interested in:
 |
 |
 |
| New 5 x 7 Challenge Pieces |
Complex Threads 2 | Developing the Creative Habit |
Check out these other Great Blogs!
For great ideas on freemotion quilting, check out Leah Day’s FreeMotion Quilting Project
I spent a little time this past weekend preparing some more fabrics to sell at Stashfest, as a donation to both the La Conner Quilt and Textile Museum and the Contemporary QuiltArt Association. These pieces were mostly started at our CQA meeting playdate, where we got together to create fabrics for this fun event.

This first piece was one that I made with a variety of techniques and materials. It is approximately 1 yard square of raw silk. I started with doing different stencil images using fabric marking pens. From there, I added some bits of Shiva Oil Paintsticks, with a rubbing plate. The final step was to overdye it with Dye-Na_flow.
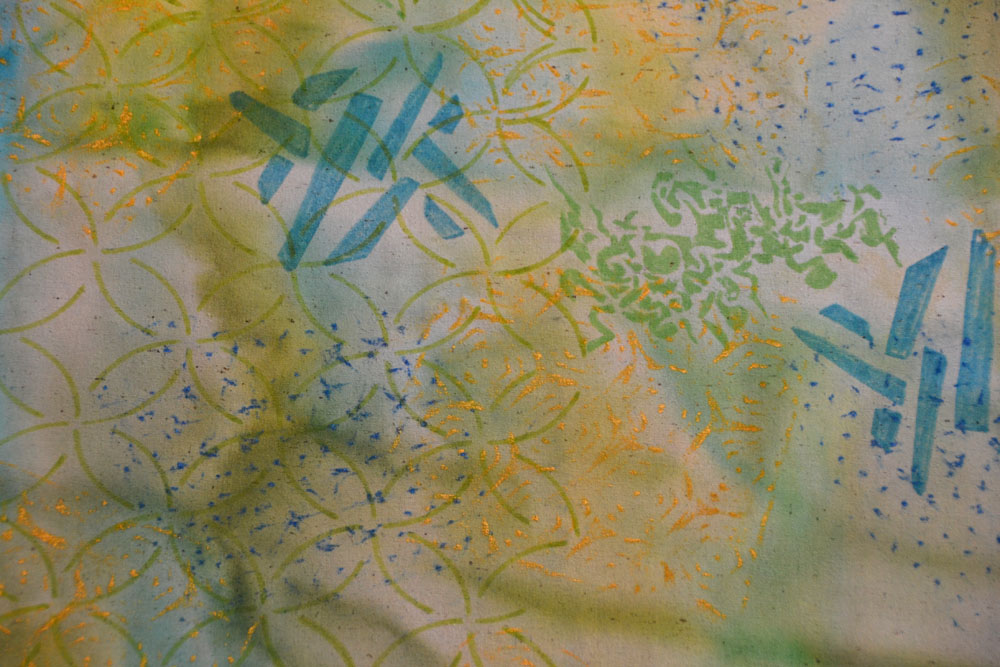
It’s a little easier to see the detail in a close-up shot.

This lovely piece was created by one of the other members of CQA, using Shiva Oil Paintsticks and a rubbing plate. I love how she overlapped the designs, giving it a “spirograph” effect. I brought it home from the playday, ironed it to set the oil paint, and then overdyed it. The darker stripes of the fuscia dye that I used are created by bunching the fabric when it is drying. You’d think the darker would be in the gullys between areas that are bunched higher up, but instead, the dye actually travels up to the higher areas.
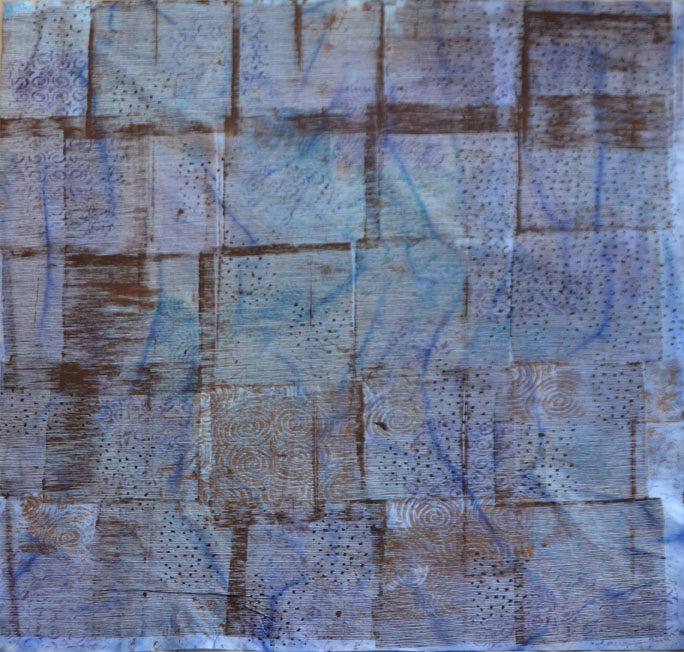
This piece is also harder to appreciate without the detailed photo, but it’s really fantastic! Again, another CQA member did the surface design and then I overdyed and ironed to set the colors. This was made with a thermofax silkscreen, which created the brown lines. Some of these were overlapped, making the darker brown sections.
In the detail photo below, you can see the block prints and shiva paintstick rubbings that also decorate this piece. About a yard square, this is made of white cotton, which I’ve then dyed.

 This final photo is of four roughly fat-quarters of raw silk, which I’ve dyed in various green shades. If I have time, I’ll probably add more surface design to them as well.
 Speaking of time… I’m off to a 5 day class in the morning at Gail Harker’s Center for the Creative Arts. I’m finishing up the 100 level certificate classes this week (with Experimental Hand Stitch) and will be going on to the 200 level coursework starting in May. That series will take about 2 years to complete, with classes every 3 months (and lots of homework in between!) If you’re interested in seeing the kind of work that comes from Gail’s students, check out my posts on her student’s exhibition, Complex Threads. I’ll update you on how the class is going this week!
You Might Also Be Interested In:
 |
 |
 |
| CQA Surface Design Party | Viewing for Inspiration | Complex Threads 1 |
Between link parties from WIP (work in progress) Wednesdays at Freshly Pieced and Freemotion Fridays on the Freemotion Quilting Project, we’ve got a great start in generating interest in the 5 x 7 challenge for 2013!
 |
| Hand-painted and block-printed fabrics and papers by Christina |
I’ve been struggling with how to juggle getting a project done while designing and/or conceptualizing one or more others. It’s not like I don’t do this all the time in my everyday life… What woman doesn’t? Even my studio has a minimum of 4-5 things going at a time-some on the design wall, others in various states of completion. But when you come down to a commitment to produce a finished product each week, my stomach gets a bit tight, I wonder if I’ll be able to persevere throughout the year, and I feel a bit frantic about wanting to work ahead and get a bunch done, so that if things come up, I won’t end up with nothing to show for the week. But that seems a bit off-target. After all, the idea is to learn to consistently produce art, right?
 |
| Christina’s gradation run of sunshine yellow Procion MX dye |
So, I’m taking a deep breath and thinking about how I’m going to do my next piece. I also think that I’ll allow myself to work on design ideas in my sketchbook, which I can then decide whether I want to produce in a more finished form at a later date. But I won’t actually have more than the current week and the coming week’s projects in any phase of production.
What I’m wondering is what would be the best way to balance getting my “other” projects complete. After all, I do have other goals for 2013 which I need to make progress on. I didn’t even put in additional time for dyeing and surface design in my goals, nor did I mention any of the pieces I have in various stages of completion, other than a vague mention of “ramping up my pictorial quilts” and having a couple pieces completed to enter in various shows.
As an example, in a little less than two weeks, my small art-quilt group (the Fiber Funsters) has our next meeting where we reveal our second challenge quilt. (Details about this challenge are posted on my blog post “The Fiber Funsters 10×16 Group Challenge.”) The current challenge is based on the word “Celebrate.” It seemed appropriate for the holiday season and I had hoped to incorporate something which would work both for this theme and “Salsa!” the theme of the CQA Mighty Tieton show coming in early summer. However, it just didn’t really work for me. I designed a piece using photos from a cathedral door with a chili-pepper wreath on it, but when it was shrunk down to 10″ x 16″, it just didn’t work for me. I may still create that piece in a larger format for the Salsa show, however. So, now I’m working on something more abstract and playful with my hand-dyed and painted fabrics. With time running short, I’m going to have to get a lot of time in behind my sewing machine this weekend!
 |
| Hand-painted and block-printed fabrics and papers by Christina |
Realistically, what I’m talking about is time management. With my background in business, I understand and can get focused when I think about it in this way. I can schedule my sewing sessions, make a timeline for when I have to get things complete, and have to-do lists for each step of each project. The main thing is not to get mired down in the daily muck of being run by your plans and schedules. That, after all, doesn’t really allow for free-flowing creativity. However, it can be very useful for managing showing your artwork and possibly for getting more accomplished (I haven’t really tried it for managing my work in the studio.)
How do you manage your time, projects and priorities? Do you work on one project or many?