As a special supporter (or “Stashfest Friend”) of the La Conner Quilt and Textile Museum, I was honored to attend a tea this afternoon.  A lovely group of supporters, board members, and quilt aficionados enjoyed getting to know each other a little bit and were the first to see a new collection of antique quilts that the museum recently acquired. Here are a few which I thought you might enjoy!

This pattern called “pickle jar” is pretty intricate and the colors are so vibrant.  Hard to believe that this incredible quilt dates back to 1910!
 
This 1932 “bluework” quilt is exquisite.  The patterns were so different from anything I’ve seen from that era. The part I was most surprised with was how the quilter used a dense field of French Knots to create the filling/dark shading of the cross.
 

Here is part of the area filled with French Knots.

Here’s a close-up of some of the incredible embroidered blocks.


This log cabin block quilt from 1865 is particularly unique because it’s a two-sided quilt… quite unusual for that time period.

This incredible piece has feathered triangles and appliquéd flowers and leaves as a large wide border. It’s in pristine condition… for a quilt that will be celebrating two centuries in a few decades.  It was made in the 1840s.

Here’s another piece from the 1840’s.  What makes this quilt special is that it is a very early example for broderie perce. This technique is done by cutting out a part of a printed fabric and appliquéing it onto a background, such as the center piece you see here.  The fabric was also used to make the large diamond shape border around the quilt.
 
The full 1840 broderie perce quilt.
 

This cherry quilt from the 1890’s is Mennonite.


A wonderful and unique example of redwork embroidery from the 1890’s.

Hope you enjoy this step back in history.  It’s amazing to see what was done so many years ago… how women expressed their artistic selves, even when it wasn’t considered art.
I’m staying up on Whidbey Island for the rest of the week, while I attend my first session of the Level Two series in hand and machine stitch and design at the Gail Harker Center for Creative Arts.  I’ll do my best to keep up with what all I’m working on this week,
Barbara O’Steen, Marylee Drake, and Rosalyn Duffy at the
Contemporary QuiltArt Association’s (CQA) booth

This past aweekend I enjoyed going to Stashfest, the fund-raiser for the La Conner Quilt and Textile museum.  As a contributor in several ways for this event, it was exciting to see it come to fruition.

The biggest effort I was involved in was in making fabric with the Contemporary QuiltArt Association (CQA), as a vendor for Stashfest.  I got an early entry and have photos to share of all the fantastic unusual fabrics that were available at this event.

Donna DeShazo from CQA with more of our handmade fabrics

Ice-dyed and other hand-dyed fabrics

More of the CQA collection
Annie Lewis with her fabulous hand silk-screened fabrics

Hand-dyed Kona Cottons

Hand-dyed Kona Cottons

Vintage Kimono Silks

Margot Myer’s NW Batiked Cottons

Barbara Kanaya (of CQA)
working at Mary Ogwell’s booth

Mary Ogwell’s West African cottons

Patricia Beleya’s Japanese Yukata fabrics

Early-bird shoppers get a spring on all the unique fabrics!

Patricia Beleya’s incredible Yukata fabrics

Rack of “insider visits” for sale- studio tours
of NW Quilt Artists (mine on top!)

Business starting to pick up as doors open

I’ll be getting some photos up soon from a new fiber exhibition that I went to last week, as well as my finishing my Salsa quilt and the start of a freemotion quilting practice quilt.  Make sure and stop in this coming weekend and link your blog up for Design Wall Weekends!

You Might Also Be Interested In:

CQA Surface Design Party Viewing for Inspiration Designing, Stenciling & 
Making Marks on Fabric

I spent a little time this past weekend preparing some more fabrics to sell at Stashfest, as a donation to both the La Conner Quilt and Textile Museum and the Contemporary QuiltArt Association.  These pieces were mostly started at our CQA meeting playdate, where we got together to create fabrics for this fun event.

 This first piece was one that I made with a variety of techniques and materials.  It is approximately 1 yard square of raw silk.  I started with doing different stencil images using fabric marking pens.  From there, I added some bits of Shiva Oil Paintsticks, with a rubbing plate.  The final step was to overdye it with Dye-Na_flow.

It’s a little easier to see the detail in a close-up shot.

 This lovely piece was created by one of the  other members of CQA, using Shiva Oil Paintsticks and a rubbing plate.  I love how she overlapped the designs, giving it a “spirograph” effect.  I brought it home from the playday, ironed it to set the oil paint, and then overdyed it.  The darker stripes of the fuscia dye that I used are created by bunching the fabric when it is drying.  You’d think the darker would be in the gullys between areas that are bunched higher up, but instead, the dye actually travels up to the higher areas.

This piece is also harder to appreciate without the detailed photo, but it’s really fantastic!  Again, another CQA member did the surface design and then I overdyed and ironed to set the colors.  This was made with a thermofax silkscreen, which created the brown lines.  Some of these were overlapped, making the darker brown sections.

In the detail photo below, you can see the block prints and shiva paintstick rubbings that also decorate this piece.  About a yard square, this is made of white cotton, which I’ve then dyed.

This final photo is of four roughly fat-quarters of raw silk, which I’ve dyed in various green shades.  If I have time, I’ll probably add more surface design to them as well.  

Speaking of time… I’m off to a 5 day class in the morning at Gail Harker’s Center for the Creative Arts.  I’m finishing up the 100 level certificate classes this week (with Experimental Hand Stitch) and will be going on to the 200 level coursework starting in May.  That series will take about 2 years to complete, with classes every 3 months (and lots of homework in between!) If you’re interested in seeing the kind of work that comes from Gail’s students, check out my posts on her student’s exhibition, Complex Threads.  I’ll update you on how the class is going this week!

You Might Also Be Interested In:

CQA Surface Design Party Viewing for Inspiration Complex Threads 1

Today turned out fantastic at our CQA meeting!  We had the following stations for making surface-designed fabrics to contribute to Stashfest:

Christina Fairley Erickson (me!): Shiva Oil Paintstick Rubbings, Stencils, Fabric Markers and Tsuneko Inks
Cameron Mason: Mono-printing with thickened dye
Colleen Wise: Thermofax silkscreening and foiling
Peg Swartzman: Oil Paintsticks with resists and stencil brushes
Kathy Cooper: Printing with Print blocks

Peg Swartzman teaching how to use Oil Paintsticks with
Freezer paper resists and stenciling brushes for an
elegant gradient effect

Cameron Mason (far right) teaching mono-printing with
thickened dyes to Roslyn Duffy (left) and Roberta Andreson (center right)
Roslyn Duffy’s mono-print with thickened dye
Flora Dalglish making Shiva oil paintstick
rubbings at Christina’s station

Debbie Babin designing with fabric markers after adding oilstick rubbings
at Christina’s station
Barbara O’Steen (left), Barbara Kanaya (center) and Debbie Babin (right)
working at Christina’s stenciling, fabric pens, and oil stick rubbing station
CQA President Marylee Drake (foreground) doing
Thermofax screen printing with Colleen Wise (background)
Some of our finished packets of fabrics to sell at Stashfest
We labeled each packet with the artist’s name who made the fabric(s), size(s),
and the processes used on each piece.


Stashfest Creator and CQA Member, Patricia Belyea
measured the fabrics and helped bundle them for sale

Want the chance to buy some of these wonderful fabrics?  Come to Stashfest April 6 and 7 up in LaConner!

You might also be interested in:

Making Fabric Viewing for Inspiration Making Fabric

Sketched in pencil first from a photo, then traced to
fabric and thread sketched by Carol

First, I want to share Carol’s first 5 x 7 Challenge piece. Check out Carol’s blog: LandscapeLady – Art Quilts from Vermont.  I think she’s done a wonderful piece and is working on a fantastic quilt of a dog in the style of David Taylor.

I recently saw a couple of David’s quilts at the Material Men show at the LaConner Quilt and Textile Museum.  They were truly breathtaking, at least for those of us who love pictorial / representational quilts.  The show featured 16 male quilt artists… not just because they are men, but because they are also exceptional artists.  I brought my husband and sons along to this exhibit and my husband was particularly intrigued with how he felt the men expressed themselves differently in the quilt medium than women do.  Some was thematic, some was stylistic, and some just gave a different impression or vibe than you might see at your local quilt show.

This evening I’m packing up my truck to bring a slew of surface design materials to the CQA meeting tomorrow morning.  We’re having a surface design party to make fabric to sell at Stashfest, a fundraiser for the LaConner Quilt and Textile Museum.  I made some last month with a few friends (see Making Fabric) and suggested to the group that we do it as a big group activity this month.  We’re going to have stations with thermofax silk-screening  Shiva oil paintsticks and rubbing plates, stencils with fabric markers for drawing and Tsukineko inks, foiling, and mono-printing with thickened dye.  We should have a wonderful assortment of fabrics to sell in April.

As part of my contribution to Stashfest, a tour of my studio will be up for sale!  Call “Stashfest Insider Visits” people can purchase tours of many different artist’s studios.  I’ve been working on studio organization, so now I’ll have to get really serious!

Last bit for this evening… I started a Fiber Artist Journey Facebook group, where we can also share photos and discussions.  Please click the link and “Like” the group to stay in touch!

You might also be interested in:

Making Fabric Viewing for Inspiration CQA Surface Design Party

Gaches Mansion in 1891

Yesterday, I mentioned how I’d gone to the LaConner Quilt and Textile Museum.  This treasure in the Northwest is located in the fabulous Gaches mansion, which was built in 1891.  Unfortunately, this landmark suffered a horrendous fire in 1973 and it was questionable whether the mansion would be torn down or rebuilt.  Luckily for all of us, a group of LaConner residents were successful in getting the mansion recorded on the National Register of Historic Places and getting a grant for restoration.

Gaches Mansion Fire in 1973

The history of the mansion and the quilt museum which now occupies the historic building is quite fascinating… You can find it in the Museum’s History Section of their website.

Gaches Mansion today

The museum is now closed through mid-February for interior renovation.  The main cost is for a fire-suppression system… rather a necessity, don’t you think?  As of today, Jan 3, 2012, they still need to raise $950 more for the fire suppression.  If you want to donate to a worthy cause, please go to their website and click the “Make a Donation” button.

Dragon Moon Kimono by Cathy Erickson

The quality of the shows at the museum is incredible.  I was able to see two exhibitions.  The first was the “Best of the Festival” featuring all the amazing award-winning quilts from the yearly  LaConner Quilt Fest, an International juried show.  The entrants in this show include so many award-winning quilters that they have made “Masters” divisions for those who have won major awards in the past versus the Open divisions (so up and rising quilters will get their chance to win without having to compete against the Masters.)  The winner of the “Best Machine Quilting” for the whole show was Cathy Erickson (mentioned in yesterday’s post) with her “Dragonfly Moon Kimono” pictured here.

Detail of Cathy Erickson’s “Dragon Moon Kimono”

When you look at the detail of this quilt, you can get a sense of how utterly amazing Cathy’s quilting is.  She is a master at micro-quilting. The little overlapping circles (a common Japanese-styled quilting pattern) are only about 1/4″ across.  If I hear of Cathy doing any classes or demonstrations, I’ll be sure to let you know (as soon as I get signed up!)

I guess my main point tonight is just how important it is to expose yourself to art that you find inspirational.  Because of seeing Cathy’s quilt last week, I was inspired to try out micro-quilting.  Of course, not everyone has such a resource practically in their backyard, but that’s what is wonderful about the internet and blogging is that you can find inspiration every day.  I hope you’ll go ahead and start on your own 5×7 challenge piece today and be ready to reveal your first week’s art on Tuesday January 8.

By the way, thanks to Carol from “Landscape Lady” who recommended that we get a flickr group for sharing our photos.  I’m setting it up and will have it ready before Tuesday.  More on the shows I saw in La Conner coming soon!

You might also be interested in:
52 Week Challenge to Readers
Getting Started Might be the Hardest Part
Designing for a Theme

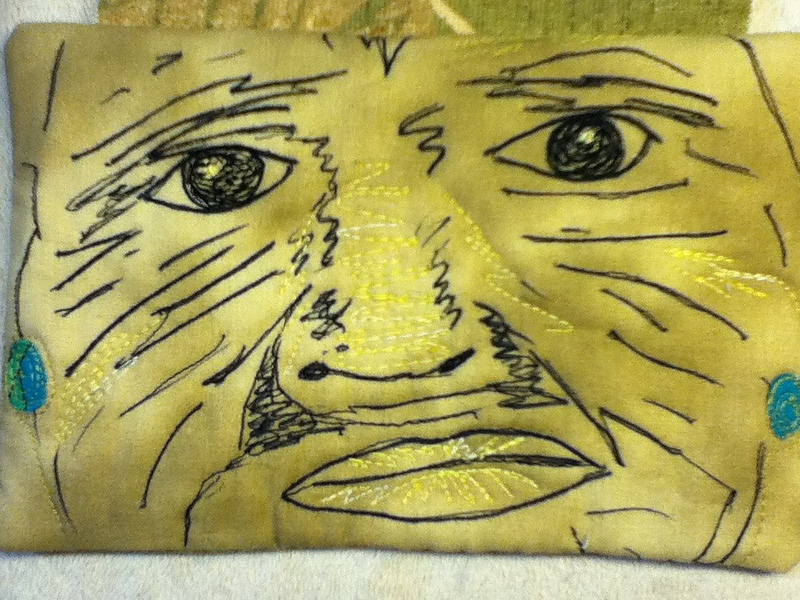
When I first discussed my 52 week 5″ x 7″ challenge here on this blog, I really didn’t think much beyond my desire to get myself in the practice of creating and being accountable to do my work each week to my readers.  However, since then I’ve recognized that many of you also may have the same issues as I:  not enough time, too many competing demands for the little time we have, the desire to develop ourselves as artists, and the big one… fear of failure.

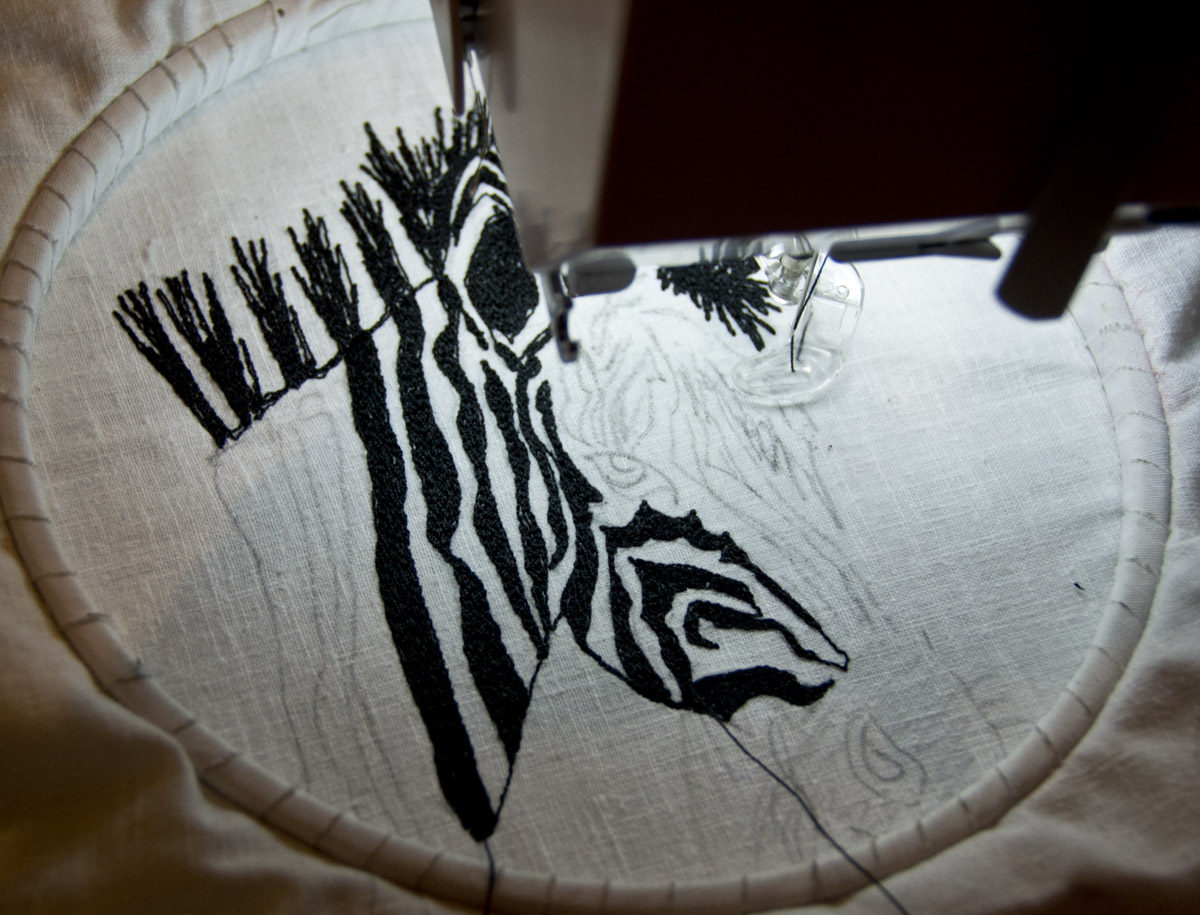
Well, I’ve made the commitment and have extended the invitation and I hope you’ll join me in going for the challenge!  I admit I’m a little ahead, as I started my first week’s piece back in early December.   I finished up my freehand machine embroidered Zebra over the holidays and today I spent my studio time making a “pillowcase binding”, practicing micro-stippling, and starting the quilting for the piece.

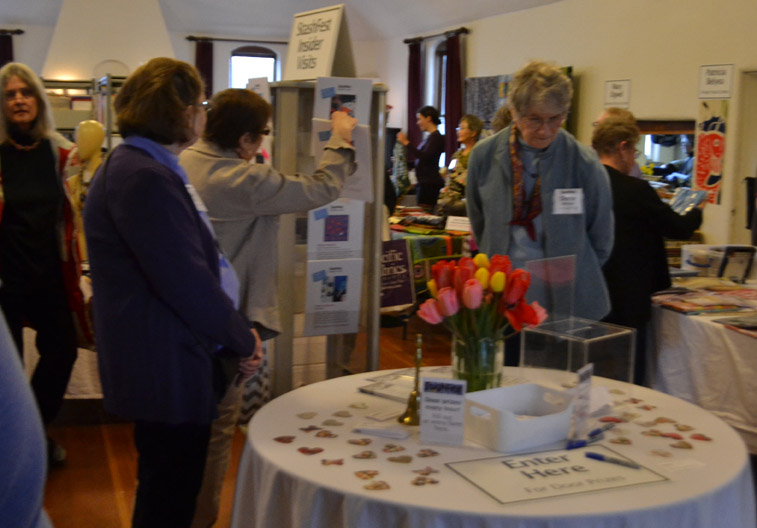
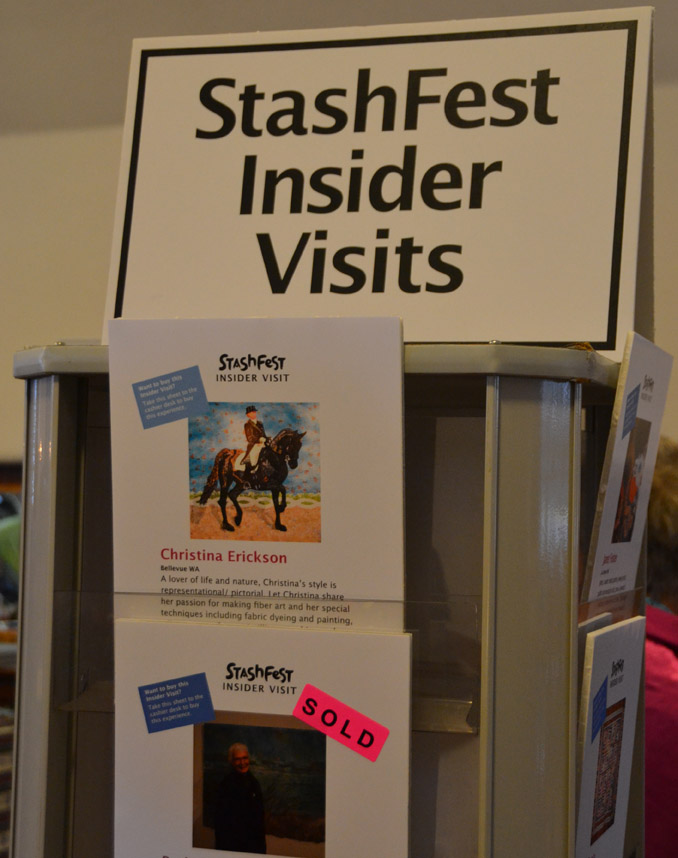
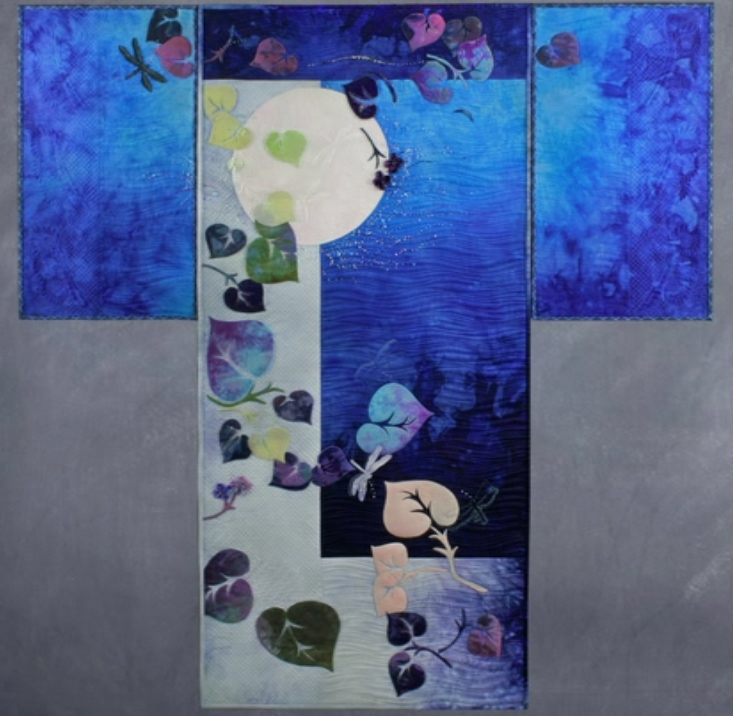
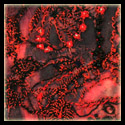
I was inspired this last week when I went to the LaConner Quilt and Textile Museum and saw a piece there that was made by Cathy Erickson (no relation, but she’s also a member of CQA.)  Cathy’s quilt on display had won the best machine quilting for the LaConner International QuiltFest last October, and it’s no surprise.  Cathy has some of the most beautiful micro-quilting that I’ve ever seen.  If you’re not aware of micro-quilting, it is quilting designs in miniature… almost microscopic.  Lines may be as close as 1/16″ apart.  In general, you need to use lighter weight threads to get this incredible lace-like effect.

To get some practice, I started with one of my favorite blogs, Leah Day’s Free Motion Quilting Project and found her instructions and video on Microstippling.  I did a sampler using Leah’s instructions and then made several samples of micro-quilting, using different pattern ideas… one with a squared edge stipple, one like grasses, one irregular stripes (like the zebra) and another grid pattern.  I looked at each of them alongside my zebra and then chose one for my quilting background.  Which one do you think I picked?  Tune in next week….

I also found from Leah’s site a wonderful blog which shares work in progress each Wednesday.  It’s called “Freshly Pieced“.  Make sure to check it out!

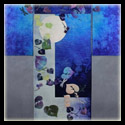
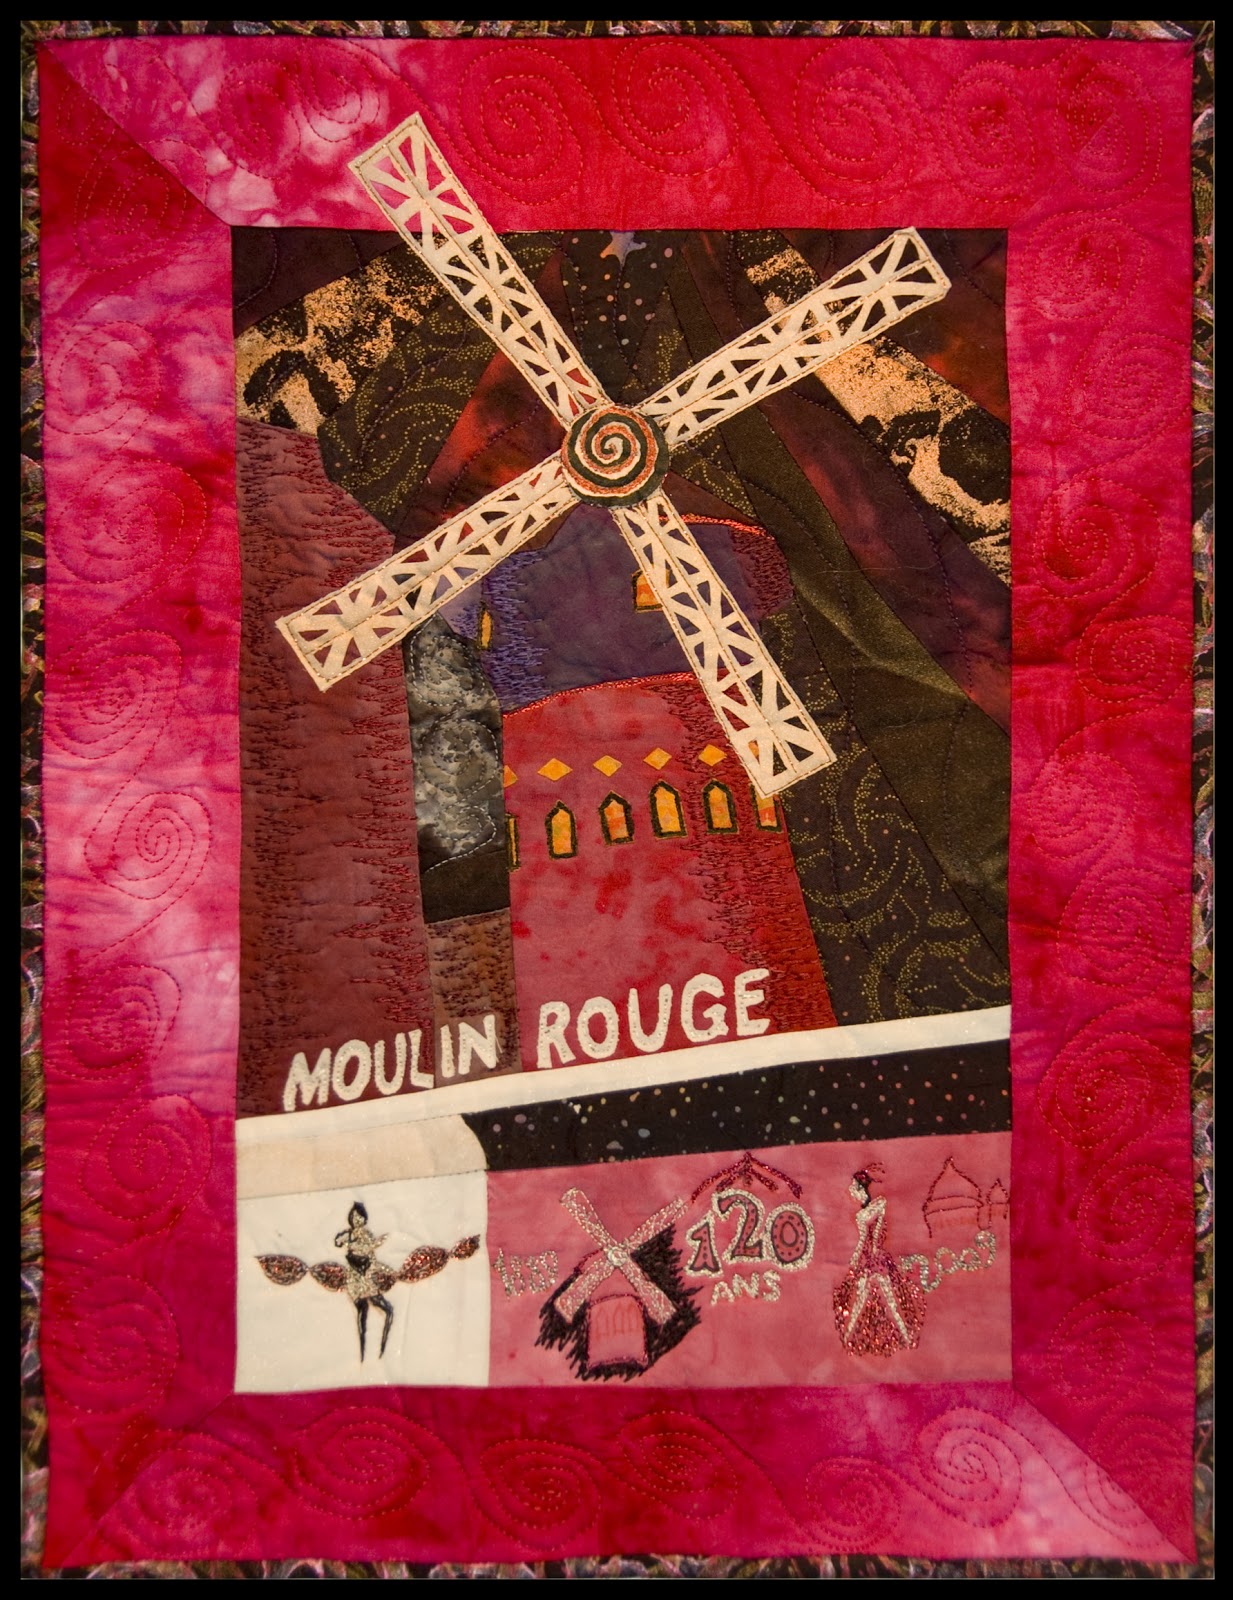
Tonight I spent a little time thinking about my next design.  As you may know, I’ve had windmills and the Moulin Rouge on the brain for many years.  Since the late 19th century, the Moulin Rouge has been an inspiration for artists.  It has symbolized the bohemian lifestyle and served as a gateway to Montmartre, the neighborhood in Paris where writers, artists, and philosophers congregated.  Most notably, Henri Toulouse-Lautrec captured many scenes of the Moulin Rouge in the 1890’s, helping to assure its fame through his lithographic posters.   Most people are familiar with the Can-Can, a dance popularized at the Moulin Rouge.  My quilt pictured here is the exterior of this famous windmill (Moulin in French) at night, from a photo I took in Paris in 2009.  The reader board image, freehand machine embroidered, of “120 ans” is celebrating the 120th anniversary of continuous operation of the infamous nightclub.

So, I was playing around with colored pencils and here is my potential for next week’s 5×7 challenge.  I’m thinking of doing the four areas in between the windmill blades in two pieced groups of complementary colors (blue & orange, violet & yellow). I’m still considering how I want to do the windmill blades.

I think getting started is the hardest part… I feel a little bit of trepidation about whether I’ll be able to sustain my production or not.  Anyone else sharing this fear?  I can’t wait to see what you create!

Great news!  Today at our Contemporary QuiltArt Association board meeting, I presented the information and ideas for the Mighty Tieton show coming up in May.  The board was very excited about the show and potential of concurrent events, and voted to accept Art-Cloth as entries, as well as quilts.  Next, I’m going to need to figure out the logistics of putting out a call to artists outside of our organization, for outdoor / installation pieces.

From Mandy Greer’s “The Silvering Path”

Our speaker today, Mandy Greer, makes incredible huge installation pieces, costumes and performance art, mainly crocheted.  She recently returned from an artist residency in Iceland and has created some incredible new work.  Mandy shared a look at sources of inspiration with us, as well as luscious rich photos of her pieces, such as these shown here.  She had to leave rather shortly after her presentation, but I plan to get in touch with her to find out about the possibility of her being interested in coming to Tieton.  
“Dare alla Luce”- Mandy Greer 2008 at Bellevue Arts Museum
After our meeting, I swung by Nancy’s Sewing Basket on Queen Anne hill in Seattle, which has an incredible supply of fine fabrics, mainly dressmaking/ tailoring types of collections.  I needed to pick up some wool felt for the Elizabethan Embroidery class I’m taking up at Gail Harker’s Center for Creative Arts next week.
Jessica Dodge at her studio
From there, I headed to West Seattle, to go to the Open Studio/Sale of an artist friend whom I’ve known for  almost 30 years, Jessica Dodge.  Jessica actually gave me art lessons when I was in my early 20’s, in drawing and painting.  Her incredible oils painted in reverse on window glass vibrantly engage the viewer.  
To complete an already full day, I’m working on dyeing and painting fabrics tonight for a Play-date with other CQA artists here at my home tomorrow.  Our organization has partnered with Stashfest, a fundraising effort for the LaConner Quilt and Textile Museum.  CQA artists are making hand-dyed, painted, printed, silk-screened or other specialty fabrics to see at Stashfest, with the proceeds of the sales being split between the museum and CQA.  So, back to the dye studio for a little more late night fun!