I’ve been thinking once again about designing with a specific theme in mind.  If you have entered into juried shows that have a theme, you know the dilemma.  How literal do I need to make this piece to fit the theme?  Or perhaps you’ve just skipped entering those shows.

Since my preferred style in which to make art is representational or pictorial, I don’t usually have a great difficulty with making something to fit a theme.  My struggle is more about whether I really want to make a piece or not for that show.
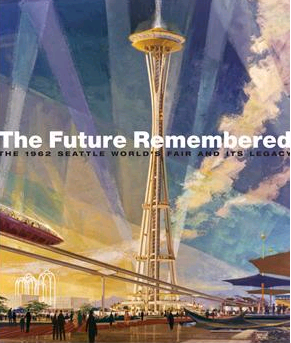
As an example, I’d like to share about the 50th Anniversary Celebration of the Seattle Center.  In 1962, Seattle was the home of the World’s Fair… the grounds on which the fair was held is the Seattle Center.  Most notably, Seattle’s best-known landmark, the Space Needle was built for this 6 month festival and exhibition.

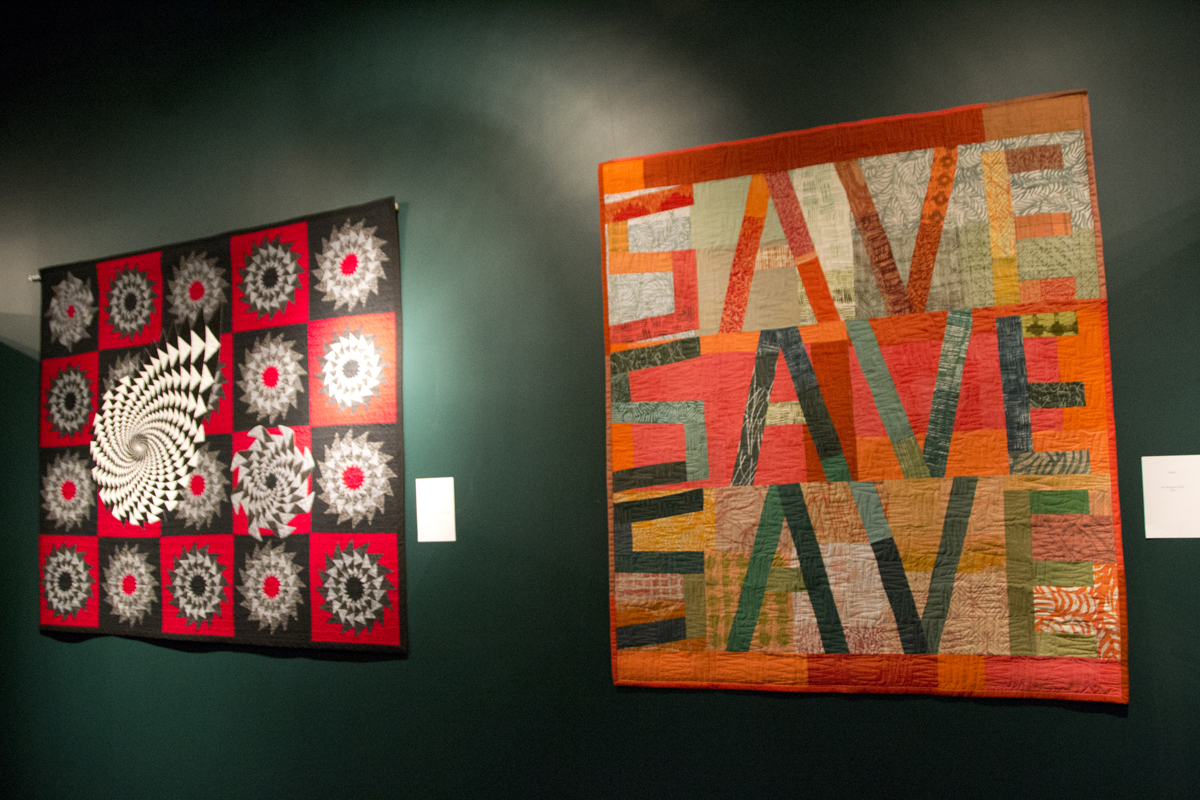
Helen Remick’s “Spinning Out, Spinning In 1” (left)
and Margaret Liston’s “Save” (right)

Seattle Center put out a call to artists for large proposals to show during the 6 months of the Next 50 Celebration.  The theme of the overall exhibit and performances was “Illuminating Today’s Challenges, Imagining Tomorrow’s Possibilities.”  The call was set up as a two-tier process.  You sent in an extensive original proposal through Café (Call for Entry), including a series of images representative of your art.  


As I am the Exhibitions Co-Chair of the Contemporary QuiltArt Association, I prepared this proposal for our group.  The second tier was like a call-back for an audition.  Except now, you had to do an elaborate proposal, including budget, recommendations on where within the Seattle Center grounds that your exhibit would take place, showing how your art would benefit and reflect the theme of the Next Fifty, and finally a video to support your claims of your work.    

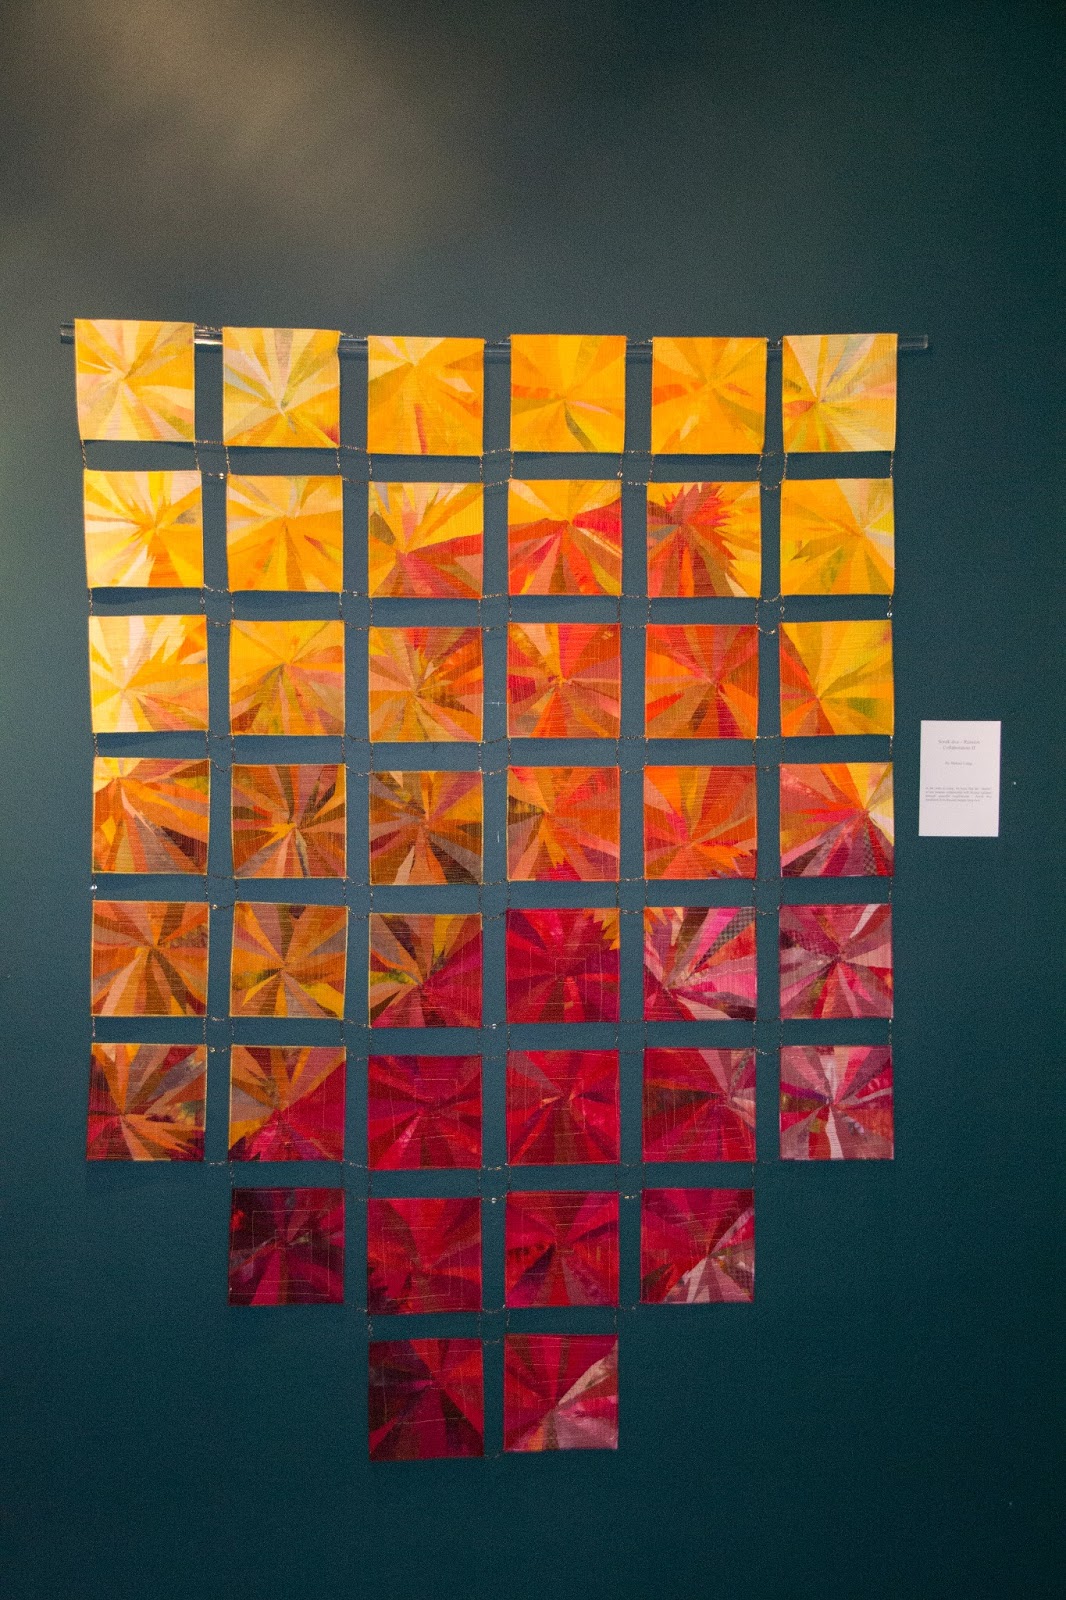
Melisse Laing’s “Sorok dva – Russian Collaboration II”


In the end, we did get chosen for an exhibition, but we did not receive any of the grant money… not a big problem as our group doesn’t typically get paid to exhibit.  But when it came down to the “theme”, they decided they wanted to be even more specific.  The dates chosen for our group’s exhibition were during September and October (2012).  Each month of the celebration had a focus… September’s theme was “Commerce and Innovation” and October’s was “Civic Action.”  So, the name given for our exhibit was “Possibilities: Fiber Artists Look at Innovation and Civic Action.”  Can you imagine trying to get a group of quilt artists to tackle that as a theme?  (Imagine a great big eye-rolling from me here.)

Artist and CQA President Marylee Drake with
her piece “Gearing Up for the Future”

But, somehow our artists always come through with a wonderful show as you can see from the photos above.  Tomorrow, I’ll talk about and share some photos of the process I went through to make my piece “Graphene – The Miracle Material.”

You might also be interested in:
Designing for a Theme
A Day of Art
Making Fabric


I’ve been continuing to explore hand-stitch this last week and completed another sampler.  I’m not really sure where I’m going to be using this in my work this year, I’m just certain that I am.  I’ve seen so many spectacular pieces that were enhanced by using hand-stitch.   I’ve also noticed that show judges seem to appreciate the extra effort that an artist has put in, when there are hand-stitch elements.  Here are the stitches (on acrylic felt- not hooped):

Top row:

  1. Double Knot Stitch (aka Old English knot, Palestrina or Smyrna Stitch)
  2. Cable Chain Stitch.  This is like chain stitch, but with a link in between the chains
  3. Fern Stitch (aka Fern Leaf Stitch)
  4. Paris Stitch (aka Open Square Stitch)
  5. Fence Stitch (aka Bosnian Stitch)
  6. Tnorn Stitch
  7. Cross Stitch (aka Berlin or Sampler Stitch)
  8. Braid Stitch
  9. Singalese Chain
  10. Wheatear Stitch
  11. Fishbone Stitch (on leaves)

Bottom row:
  1. Whipped Backstitch
  2. Threaded Backstitch
  3. Double Threaded Backstitch
  4. Chain Stitch with Backstitch running through center
  5. Double Knot Stitch
  6. Petal Stitch
  7. Scroll Stitch
  8. Ladder Stitch
  9. Long Armed Cross Stitch
  10. Vandyck Stitch (aka Flat Variable Stitch)
  11. Long & Short Stitch (top leaf in oranges)
  12. Stem Filling Stitch (bottom leaf in blues)

I’m partially doing this work as I’m taking another hand-stitch course at the Gail Harker Center for Creative Arts in March.  I’m looking forward to getting more ideas in how to incorporate the hand stitches into my work.

Speaking of Gail’s classes, this Thursday, Jan 10 from 5-8 pm, the opening of “Complex Threads: Students of Gail Harker Center for Creative Arts” will be happening at the Schack Art Center in Everett WA.  If in the area, be sure to check it out!

You might also be interested in:
How to make a knotted blanket stitch (video)
More embroidery samples
Stitchwork Samplers

Between link parties from WIP (work in progress) Wednesdays at Freshly Pieced and Freemotion Fridays on the Freemotion Quilting Project, we’ve got a great start in generating interest in the 5 x 7 challenge for 2013!

Hand-painted and block-printed fabrics and papers
by Christina

I’ve been struggling with how to juggle getting a project done while designing and/or conceptualizing one or more others. It’s not like I don’t do this all the time in my everyday life… What woman doesn’t? Even my studio has a minimum of 4-5 things going at a time-some on the design wall, others in various states of completion. But when you come down to a commitment to produce a finished product each week, my stomach gets a bit tight, I wonder if I’ll be able to persevere throughout the year, and I feel a bit frantic about wanting to work ahead and get a bunch done, so that if things come up, I won’t end up with nothing to show for the week.  But that seems a bit off-target.  After all, the idea is to learn to consistently produce art, right?

Christina’s gradation run of sunshine yellow Procion MX dye

So, I’m taking a deep breath and thinking about how I’m going to do my next piece.  I also think that I’ll allow myself to work on design ideas in my sketchbook, which I can then decide whether I want to produce in a more finished form at a later date.  But I won’t actually have more than the current week and the coming week’s projects in any phase of production.

What I’m wondering is what would be the best way to balance getting my “other” projects complete.  After all, I do have other goals for 2013 which I need to make progress on.  I didn’t even put in additional time for dyeing and surface design in my goals, nor did I mention any of the pieces I have in various stages of completion, other than a vague mention of “ramping up my pictorial quilts” and having a couple pieces completed to enter in various shows.

As an example, in a little less than two weeks, my small art-quilt group (the Fiber Funsters) has our next meeting where we reveal our second challenge quilt.  (Details about this challenge are posted on my blog post “The Fiber Funsters 10×16 Group Challenge.”)  The current challenge is based on the word “Celebrate.”  It seemed appropriate for the holiday season and I had hoped to incorporate something which would work both for this theme and “Salsa!” the theme of the CQA Mighty Tieton show coming in early summer.  However, it just didn’t really work for me.  I designed a piece using photos from a cathedral door with a chili-pepper wreath on it, but when it was shrunk down to 10″ x 16″, it just didn’t work for me.  I may still create that piece in a larger format for the Salsa show, however.  So, now I’m working on something more abstract and playful with my hand-dyed and painted fabrics.  With time running short, I’m going to have to get a lot of time in behind my sewing machine this weekend!

Hand-painted and block-printed fabrics and papers
by Christina

Realistically, what I’m talking about is time management.  With my background in business, I understand and can get focused when I think about it in this way.  I can schedule my sewing sessions, make a timeline for when I have to get things complete, and have to-do lists for each step of each project.  The main thing is not to get mired down in the daily muck of being run by your plans and schedules.  That, after all, doesn’t really allow for free-flowing creativity.  However, it can be very useful for managing showing your artwork and possibly for getting more accomplished (I haven’t really tried it for managing my work in the studio.)

How do you manage your time, projects and priorities?  Do you work on one project or many?

You might also be interested in:
Making Fabric
Scope Creep
The Art of Organization

Gaches Mansion in 1891

Yesterday, I mentioned how I’d gone to the LaConner Quilt and Textile Museum.  This treasure in the Northwest is located in the fabulous Gaches mansion, which was built in 1891.  Unfortunately, this landmark suffered a horrendous fire in 1973 and it was questionable whether the mansion would be torn down or rebuilt.  Luckily for all of us, a group of LaConner residents were successful in getting the mansion recorded on the National Register of Historic Places and getting a grant for restoration.

Gaches Mansion Fire in 1973

The history of the mansion and the quilt museum which now occupies the historic building is quite fascinating… You can find it in the Museum’s History Section of their website.

Gaches Mansion today

The museum is now closed through mid-February for interior renovation.  The main cost is for a fire-suppression system… rather a necessity, don’t you think?  As of today, Jan 3, 2012, they still need to raise $950 more for the fire suppression.  If you want to donate to a worthy cause, please go to their website and click the “Make a Donation” button.

Dragon Moon Kimono by Cathy Erickson

The quality of the shows at the museum is incredible.  I was able to see two exhibitions.  The first was the “Best of the Festival” featuring all the amazing award-winning quilts from the yearly  LaConner Quilt Fest, an International juried show.  The entrants in this show include so many award-winning quilters that they have made “Masters” divisions for those who have won major awards in the past versus the Open divisions (so up and rising quilters will get their chance to win without having to compete against the Masters.)  The winner of the “Best Machine Quilting” for the whole show was Cathy Erickson (mentioned in yesterday’s post) with her “Dragonfly Moon Kimono” pictured here.

Detail of Cathy Erickson’s “Dragon Moon Kimono”

When you look at the detail of this quilt, you can get a sense of how utterly amazing Cathy’s quilting is.  She is a master at micro-quilting. The little overlapping circles (a common Japanese-styled quilting pattern) are only about 1/4″ across.  If I hear of Cathy doing any classes or demonstrations, I’ll be sure to let you know (as soon as I get signed up!)

I guess my main point tonight is just how important it is to expose yourself to art that you find inspirational.  Because of seeing Cathy’s quilt last week, I was inspired to try out micro-quilting.  Of course, not everyone has such a resource practically in their backyard, but that’s what is wonderful about the internet and blogging is that you can find inspiration every day.  I hope you’ll go ahead and start on your own 5×7 challenge piece today and be ready to reveal your first week’s art on Tuesday January 8.

By the way, thanks to Carol from “Landscape Lady” who recommended that we get a flickr group for sharing our photos.  I’m setting it up and will have it ready before Tuesday.  More on the shows I saw in La Conner coming soon!

You might also be interested in:
52 Week Challenge to Readers
Getting Started Might be the Hardest Part
Designing for a Theme

When I first discussed my 52 week 5″ x 7″ challenge here on this blog, I really didn’t think much beyond my desire to get myself in the practice of creating and being accountable to do my work each week to my readers.  However, since then I’ve recognized that many of you also may have the same issues as I:  not enough time, too many competing demands for the little time we have, the desire to develop ourselves as artists, and the big one… fear of failure.

Well, I’ve made the commitment and have extended the invitation and I hope you’ll join me in going for the challenge!  I admit I’m a little ahead, as I started my first week’s piece back in early December.   I finished up my freehand machine embroidered Zebra over the holidays and today I spent my studio time making a “pillowcase binding”, practicing micro-stippling, and starting the quilting for the piece.

I was inspired this last week when I went to the LaConner Quilt and Textile Museum and saw a piece there that was made by Cathy Erickson (no relation, but she’s also a member of CQA.)  Cathy’s quilt on display had won the best machine quilting for the LaConner International QuiltFest last October, and it’s no surprise.  Cathy has some of the most beautiful micro-quilting that I’ve ever seen.  If you’re not aware of micro-quilting, it is quilting designs in miniature… almost microscopic.  Lines may be as close as 1/16″ apart.  In general, you need to use lighter weight threads to get this incredible lace-like effect.

To get some practice, I started with one of my favorite blogs, Leah Day’s Free Motion Quilting Project and found her instructions and video on Microstippling.  I did a sampler using Leah’s instructions and then made several samples of micro-quilting, using different pattern ideas… one with a squared edge stipple, one like grasses, one irregular stripes (like the zebra) and another grid pattern.  I looked at each of them alongside my zebra and then chose one for my quilting background.  Which one do you think I picked?  Tune in next week….

I also found from Leah’s site a wonderful blog which shares work in progress each Wednesday.  It’s called “Freshly Pieced“.  Make sure to check it out!

Tonight I spent a little time thinking about my next design.  As you may know, I’ve had windmills and the Moulin Rouge on the brain for many years.  Since the late 19th century, the Moulin Rouge has been an inspiration for artists.  It has symbolized the bohemian lifestyle and served as a gateway to Montmartre, the neighborhood in Paris where writers, artists, and philosophers congregated.  Most notably, Henri Toulouse-Lautrec captured many scenes of the Moulin Rouge in the 1890’s, helping to assure its fame through his lithographic posters.   Most people are familiar with the Can-Can, a dance popularized at the Moulin Rouge.  My quilt pictured here is the exterior of this famous windmill (Moulin in French) at night, from a photo I took in Paris in 2009.  The reader board image, freehand machine embroidered, of “120 ans” is celebrating the 120th anniversary of continuous operation of the infamous nightclub.

So, I was playing around with colored pencils and here is my potential for next week’s 5×7 challenge.  I’m thinking of doing the four areas in between the windmill blades in two pieced groups of complementary colors (blue & orange, violet & yellow). I’m still considering how I want to do the windmill blades.

I think getting started is the hardest part… I feel a little bit of trepidation about whether I’ll be able to sustain my production or not.  Anyone else sharing this fear?  I can’t wait to see what you create!

At the National Quilt Museum, Paducah, KY

Here’s a call to all you other artists out there!  I’m starting a 52 weeks of art challenge for myself and others to get creating consistently throughout the year.

I went through 3 years of design training by Lorraine Torrence, an art quilter, pattern-maker, and graduate with a Masters in Fine Arts.  Lorraine started the first session with a story from one of her teachers about a study for art students done in a university.  In it, the upper-level students were told to either 1) make one piece of art for the semester, but have the quality be their focus or 2) don’t worry about quality, the grade the second group was going to be based on quantity… make as much art as they can and show the result at the end of the semester.  The result?  The work from the second group was by far of greater quality… not every piece, of course, but just the fact of repetition and developing a practice of making art regularly helped the artists really become much more than an effort at doing one really good piece.

Should you wish to participate in this challenge, you need to do the following:

  1. Make 1 piece of artwork in a 5″ x 7″ format (13 cm x 18 cm) each week.  This can be in any media.  I recommend trying to incorporate specific design principles into each piece or play with things you haven’t focused on previously.
  2. Post your photos to  http://www.flickr.com/groups/5x7_artist_challenge/ I may even add these photos on the blog as examples as we progress.
  3. Post a comment that you’re participating in the challenge at: http://fiberartistjourney.blogspot.com/p/2013-5-x-7-challenge.html  This will help you by having you state your intention publically and be accountable to the group.
  4. Do your best!  Nobody’s perfect and we all have things come up… but the more you participate, the more successful you will be in your personal artistic journey.
Christina at the National Quilt Museum  with the Museum
Curator, Judy Schwender and Christina’s Quilt
“Friesian Dream Come True”
Here’s proof of how making a focused commitment can work… I saw a call to artists for Equestrian Art Quilts for a special exhibit at the National Quilt Museum in Paducah, KY.  They planned this show to coincide with the World Equestrian Games (WEG), which was being held in Lexington, KY (for the first time ever on American soil.)  As both a horsewoman and quilter, I couldn’t let this opportunity by, even though I’d never attempted to show on a national level before.  Not only did I get accepted to the show, I was able to go visit (as well as go to the WEG), meet the curator, and see all the amazing Paducah show winners that that museum has in their permanent display.  
I hope you’ll join me in the challenge… whether starting this week or anytime later in the year.  It’s going to be a fabulous journey!

You might also be interested in:
52 Weeks of Art- A Personal Challenge
Fiber Funsters 10 x 16 Group Challenge

Frozen bush from Dec 2008
No snow yet this year!

     I’ve been working on putting my artistic goals down on paper (or in electrons) for some time now:

So, the clock is ticking towards midnight (and 2013) and I’m ready to state my goals and intentions, as well as to ask you to respond back to me what you are going to commit to doing.

Goals 2013:
1.      Find and define my artistic voice or style. 
a.      The first way I will work on this is through my work with Gail Harker.  Seeing the work of other students of Gail’s, I am struck with how each student makes artwork that is unique to each of them.  I believe Gail has an incredible skill in teaching her students skills and processes, as well as how to make design decisions, without specifically teaching them to make artwork that is a particular style or that is similar to anything that she herself makes. 
b.      From my previous studies, one of the main things I’ve learned is that one’s artistic voice is found through practice, practice, practice.  To this end I will do the following:
Ø  Make a5” x 7” composition each week, working to enhance both my design and technical skills
Ø  Make a 10” x 16” composition every 2 month as part of the Fiber Funster’s challenge
Ø  Do all the coursework from Gail’s classes with a serious attitude toward excellence
c.       Document my progress in my blog at least weekly (preferably daily) as well as documenting all my work for Gail.
d.  Open the 5″ x 7″ challenge to anyone who is reading this blog to give others support, encouragement, and critiquing.  
2.      Ramp up my pictorial / representational quilts.
           
What does “ramp up” mean to me? 
a.                  Increase my technical skill/proficiency to a high degree
b.                  Increase my composition skill-how the composition is placed/cropped, color usage, understanding innately and using good design principles with my compositions (balance, unity, contrast, value, movement, focal point, relationship (color, size, value, shape, texture, style, theme), visual bridges/elegant choices, integration.
c.                  Make and execute a plan to develop an intentional body of work that is authentic and expresses meaning to me.   Meaning includes work that expresses my interests, my feelings, and my values.  I will work on exploring meaning through writing about my work on my blog.
Beautiful icicles
3.   Work at increasing my competency at working in a clean and organized studio space.
           
4.     Explore opening my own Etsy storefront to sell my work by July 30, 2013

5.      Work towards my goal of having a solo show by September 2015.
     Steps to have a solo show:
            a.  Minimum of 12 finished pieces reflecting my integrated artistic voice
            b.   Find venues that would consider my work
                  i.    Talk with other textile artists to find out where they’ve shown
                  ii.   Make a running list of galleries 
                  iii.   Visit galleries and talk with gallery owners
            c.  Increased technical competence
            d.  Continued showing at national and local levels
            e.  Professionally marketing myself as an artist
                  i.     Re-do my artist statement
                  ii.    Update my website
                  iii.   Write out a description of key phrases to describe my work
                  iv.    Write up descriptions & diagrams on how to display my work
                  v.     Write/send out press releases on my shows (build reputation)
                  vi.    Create an artist portfolio
                  vii.   Develop 10 ways to promote my art
             f.   Continue working as CQA Exhibitions co-chairperson through March 2014, to gain knowledge and experience on putting on exhibitions.
Hope you’re warm and safe
for the holiday!
6.   Complete at least 1 art quilt or art cloth to enter in the Salsa! show at Mighty Tieton.

7.    Complete at least 1 other medium-large piece and enter it in 1+ shows.

8.     Complete at least 1 driftwood art sculpture to enter in the show in May.

Well, that’s my year for you (and a little beyond.)  I’d love your support and comments, as well as hearing what you have planned for the upcoming year!

Hugs and Happiness in the New Year to all of you!


I’ve had a love of the ocean and shorelines for most of my life.  The tidepools brimming with life, seaweeds washed ashore, and piles of driftwood to climb and explore.  So when I saw a class offered several years ago on “Driftwood Art”, I was intrigued and wanted to try it, not even knowing what it was.  I suppose I imagined that I would make pieces of driftwood sticks into finished wood that I would hand my quilts off of.  Was I ever wrong!

I finally got started in my first class last spring.  It’s an ongoing class; many of the students have been doing it for year.  The Northwest Driftwood Artists are the group behind the classes which I take. They have a specific method (the Luron Method) of taking driftwood pieces and bringing out the inner beauty of the wood, rather than carving or changing the wood’s nature.  

The process is rather painstaking.  You clean and scrape the piece of driftwood, removing all the dead outer wood, until you get to the rich inner heartwood and can see the wood’s grain.  Next, you sand (and sand, and sand) the piece.  Finally, you rub the finalized sculpture with a beeswax-turpentine mixture to bring out the color.  Sound easy?  I’m still working on my first piece after about 10 months!  Maybe I’m a slow learner….

What I am good at is finding some incredible pieces of driftwood.  I probably have enough pieces now to last the rest of my life, at least at the rate I’m going now.

While the photos here are of beautiful raw driftwood (much of it too large to get home to my studio), the exemplify what is looked for in making driftwood sculpture: an interesting pattern and grain of the wood, and hopefully some luscious coloring .

To see some of the fabulous completed pieces, go to the Northwest Driftwood Artists website.  I hope to have my first piece completed in time for the annual show in May.


You might also be interested in:
Sunshine and Sand
Golden Hour at Penn Cove
Skagit Skies

Looking South towards Penn Cove

Have you heard of the photographer’s Golden Hour?  This is the hour right at sunrise and also right before sundown.  With the sun low on the horizon, shadows are either non-existent or elongated due to the sun’s small angle with the horizon to create interesting effects.  The lighting is more diffuse, softer, and a much warmer hue, as the sunlight is traveling through more of the atmosphere and reduces the direct light and increases indirect light from the sky.  The light then appears more reddish as the blue light becomes scattered.

South-west – Hayrolls at Penn Cove at twilight

Yesterday we were driving up on Whidbey Island, WA, right at the golden hour.  Around here, that means about 4-5 pm during the winter, due to our Northern latitude.  The fields with their giant rolls of hay reminded me of some of the paintings of haystacks by Monet.

Monet painted around thirty haystack scenes, at differing times of year and lighting.  He exhibited a group of 15 of these together in 1891 at the Paris gallery of Paul Durand-Ruel, and they were immediately considered a significant breakthrough for Monet.

Hayrolls at the Golden Hour

Monet would work on many canvases at the same time… he’d line them up and switch to another canvas when the lighting changed.  Working from the first light of dawn up until the final hints of light at dusk, Monet sought the essence of how light transformed different objects, such as the haystacks.

Hayrolls and Penn Cove

I like to imagine that if Monet were here at Penn Cove, he would have been just as excited as I was to see the incredible plays of light on the hay, sky, and water.

You might also be interested in:

Dealing with Rejection (more on Monet)
Sunshine and Sand
Skagit Skies

Light is starting to disappear
Monet’s “Hayricks” 1865

End of Day, Autumn – Claude Monet

End of Summer – Claude Monet
Haystacks at Sunset- Claude Monet

OK, it’s time to get down and finish up my goals for 2013… yeah!  But first, that requires me to do a little soul-searching and figure out what I’m doing wrong and right in my artistic life (uh oh.)

Where am I stuck? 
            One area where I’ve made some incremental progress on is in my studio clean-up and organization, however, I’m still stuck to a certain degree with this.  Most times, I find it difficult to get into my studio to work.  In the past, I frequently have had it so disorganized and messy in my studio and my dyeing room that I can’t work or I just don’t want to go in.  I have so many things I’d like to do that I’m overwhelmed.  I sometimes feel as though I should finish projects I’ve already started. I don’t know whether to consider it a blessing or not, but I have enough space in my home to spread out… so my sewing gets moved out of my studio to our rec-room and the dyeing can also end up there.  Anyone else struggle with being overwhelmed with their stuff and their space?  
            I’m also somewhat stuck with not being certain how much I should be attempting to show, how much time to devote to just increasing technical competence, how much time just creating for my own artistic pleasure versus trying to fit into a show theme, or whether my work as CQA (The Contemporary QuiltArt Association‘s Exhibitions co-chair will actually serve my artistic career.  I’m not sure whether taking a break from showing will serve me, however.  I think having a full artist résumé looks good to those interested in your art work.    
            Another area in which I’m struggling is in my definition as an artist.  While I’m comfortable with the definition of “fiber artist”, I’m unsure whether I should still focus on making quilts or whether I should or am moving beyond them.  This is a big dilemma for me.  Do I stop doing “quilt” art?  If so, does that mean that I’ve moved beyond CQA (which has become a rather big part of my life at this point.)  I know I love doing embroidery, but does it have even less potential for artistic recognition as art quilts?  If I focus on other areas than quilt art, where would I show?
What is working?
I am feeling like I’m in the process of moving on to the next level in my art.  I’ve increased my technical competence over the last year.  Specifically, I’m much more skilled in machine freehand quilting as well as dyeing.  I’ve gained a lot of knowledge through my working on the CQA Exhibitions.  I have a good strong understanding of color.  I have a strong work ethic and desire to be successful.  This helps me fit in time although I have a lot of demands for my attention… husband, two teen boys, work, CQA exhibitions, SDA (Surface Design Association)  steering committee and small group leader in WA state, and numerous hobbies and passions beyond my fiber art.

One of the thousands of photos I’ve taken for design inspiration
I’m very excited to have been able to work with Gail Harker this year and to be starting the Level 2 of her diploma program in May 2013.  I’ve come to recognize that most classes and teachers don’t have much more to offer me, unless I need to learn a particular technique, since the majority of classes just teach you to quilt in that particular teacher’s style.  The difference with Gail is that she teaches techniques and design in such a way that all of her students end up developing their own style and their work looks uniquely their own.    


Processes I have used/done quite a bit and am comfortable and confident with:
  • Sewing, piecing, quilting, free-hand embroidery, machine applique with my Bernina 730
  • Fabric painting (using brushes, syringes, spray bottles, stamps, stencils, silkscreens) with Jacquard textile paints and Lumiere and using resists with fabric painting (freezer paper or objects)
  • Printing on fabric with ink-jet printer
  • Intensive and in depth study of color, including color mixing, making tints/shades/tones, color theory, and color combinations (dyads, equilateral and isosceles triads, tetrads, hexads, monochromatic, analogous, complementary, near-complementary, complementary triads, modified triads, adjacent-complementary tetrads, and analogous complementary color schemes.)
  • Highly proficient with Adobe Photoshop CS5 Professional
  • Immersion dyeing (Procion MX)
  • Multiple dye-baths
  • Using different methods to create pattern in immersion dyeing (pole wrap, clamping, bunching, folding, pleating, shibori)
  • Making printing blocks from found objects
  • Stamping and making my own stamps from found objects
  • Stenciling
  • Making thermofax screens and silk-screening with them
  • Photography (digital SLR) particularly nature scenes and macro photography (See Skagit Skies and Sunshine and Sand)
  • Drawing/sketching
  • Monoprinting

Technical Skills I need to develop:
 I think there are a lot of skills that I should develop, but I’m not particularly worried about them.  I think as I continue to work with Gail, I will have lots of practice and increase competency over time.  I do, however, feel I need to get more intentional about my design process.  My understanding of design elements while strong, is not necessarily intuitive in my working in fiber art.  I think I often am so driven to get going on a project that I don’t put the thought into it that could make an okay design into something with much more impact.  Or I’m pushing to get something made for a deadline, so I don’t end up with as good an effort as if I were to just be making it for my personal artistic pleasure.

I’m currently working on hand embroidery techniques, which I’m enjoying and expect will work its way into my art pieces, rather than just a samples.
And another.
Although I have a long list of potential topics I could make art about, as well as thousands of images for inspiration, I’m not particularly worried about my being too overwhelmed with possibilities  I feel confident that my work with Gail will help me narrow my focus over time.

More to come:
I’m not 100% certain that I’ve covered everything in these categories yet, but will revisit and think about it more over the next few days, in case there is anything to add.  I’ll look more at my specific successes over 2012 have been as well as my 2013 goals tomorrow.   
I’d love to hear about where you’re stuck, what’s working for you, and what you feel you need to develop this year in the comments section below!

You might also be interested in:

Questions to Ponder for Writing Your Goals
Goals for the Upcoming Year
The Art of Organization