Christina’s completed Batik Peacock

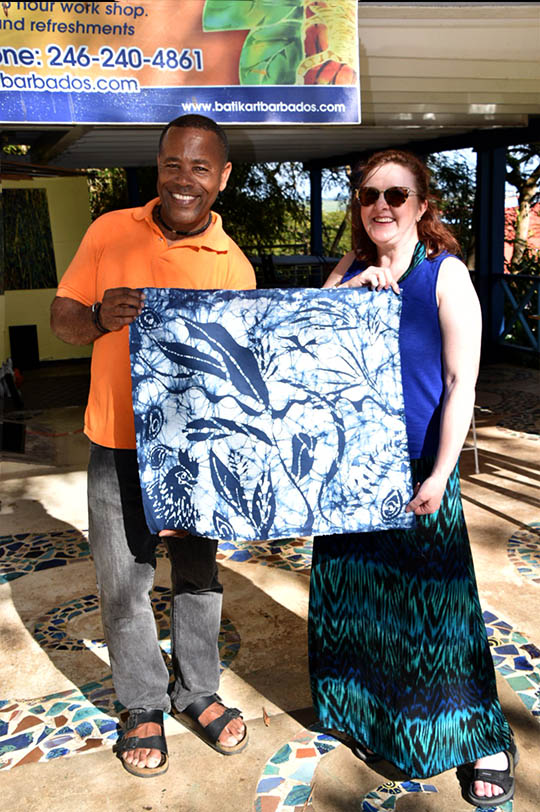
Last week while on vacation in Barbados, I had the pleasure of spending a day with Henderson Reece, learning to batik. “Hendy” is a marvelous artist and teacher. Check out his work on his website at http://www.batikartbarbados.com/

We started with a practice piece.. something to get used to using the tjantin (pronounced chantin), a tool to make thin lines of wax on the fabric. We used charcoal to draw on the cotton, which was stretched on a frame.

Christina Erickson drawing on practice Batik piece

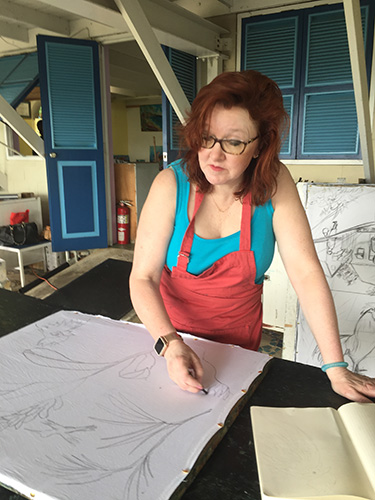
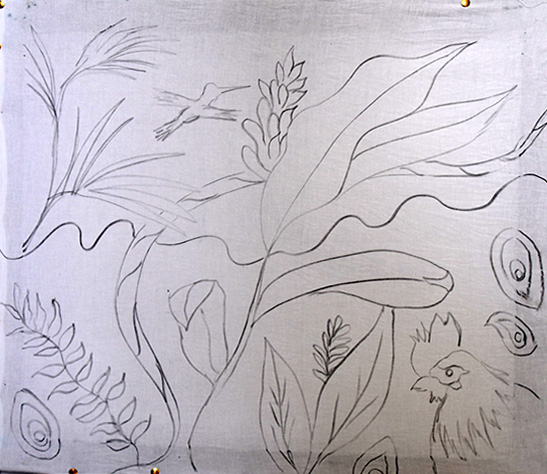
I looked out over the gorgeous landscape from Hendy’s open-air studio and drew some leaves & plants, a hummingbird and a rooster’s head, as well as lines and shapes for practice.

While I was working on my design, Hendy was heating up the wax.

Lines, leaves & birds to practice on - Christina Erickson Batik
Lines, leaves & birds to practice on

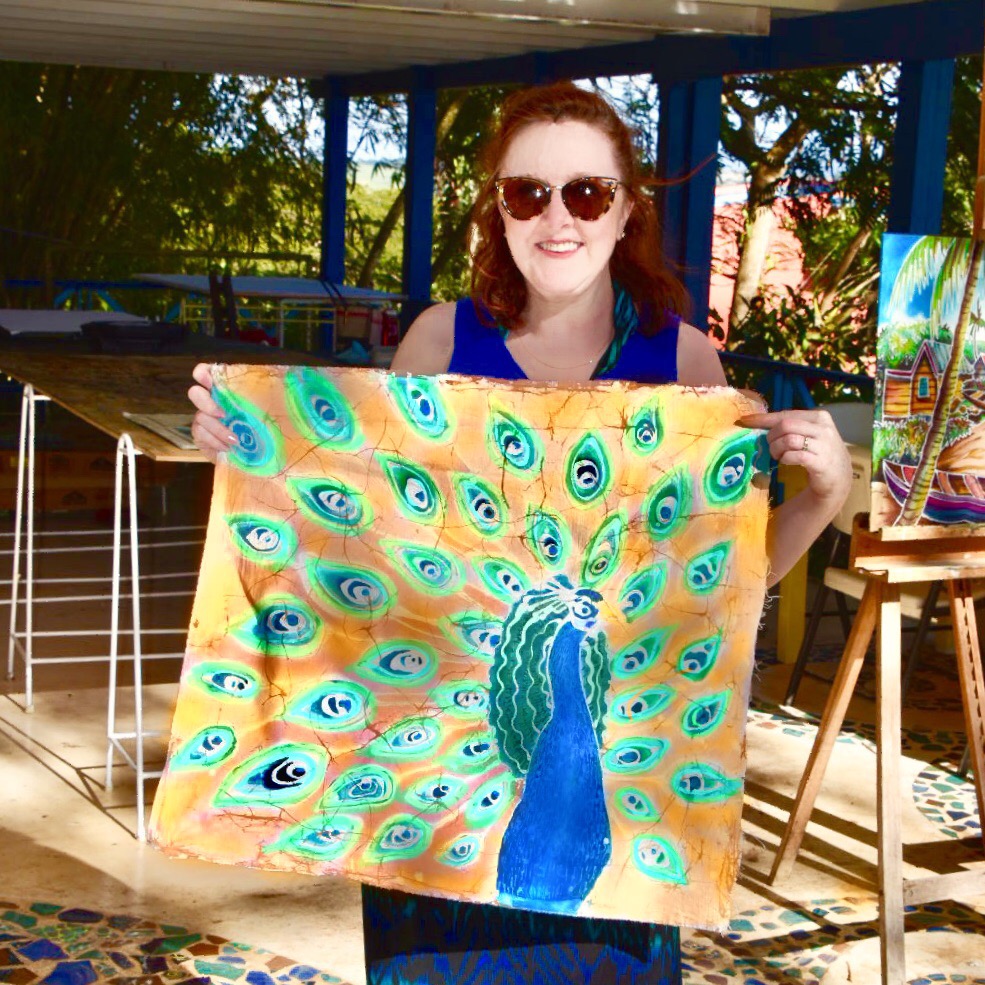
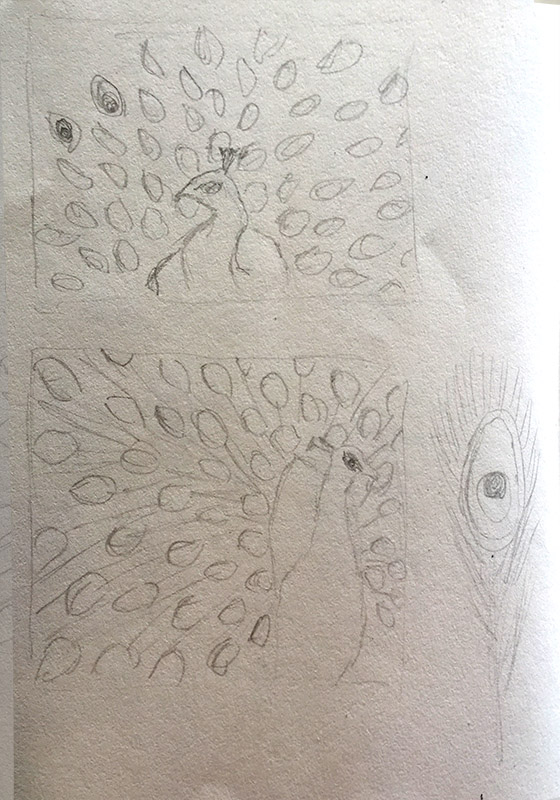
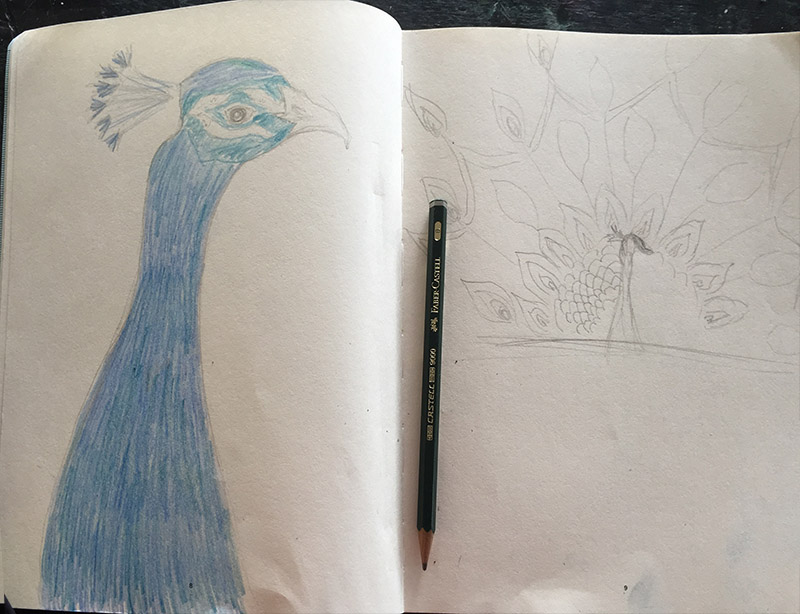
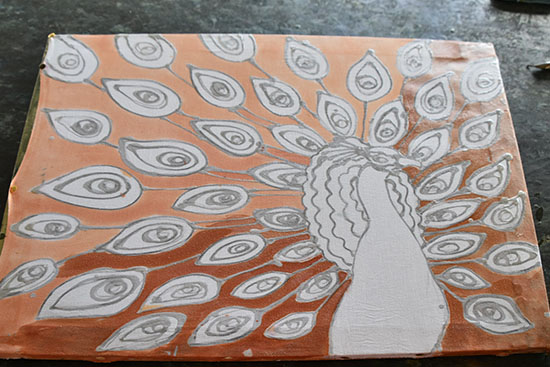
Concurrently, I then started drawing my design for my “finished piece.” I had taken photos of peacocks up at the Barbados Wildlife Reserve  earlier in the week, and worked up some sketches for design ideas prior to coming to class.

Christina Erickson's sketchbook Peacock designs
My sketchbook designs of peacocks
Christina Erickson's sketchbook Peacock designs
More peacock sketchbook drawings

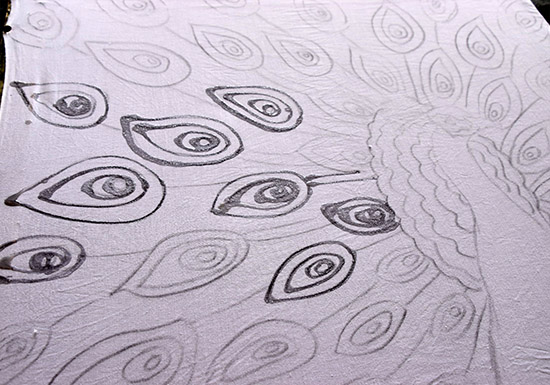
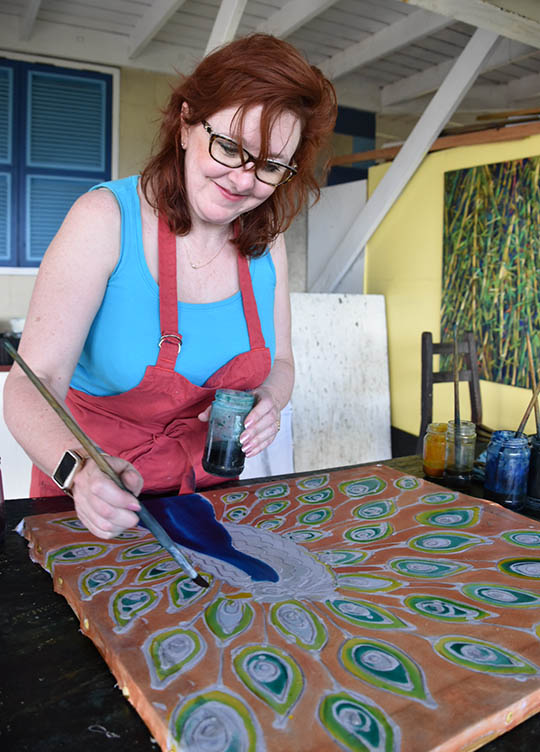
I’ve got to say, using the wax in the tjantin takes some practice! It goes to show how taking a workshop like this can be so valuable. The tjatin only holds a small amount of wax- a real Goldilocks dilemma! If too hot, the wax will spread into a thick unattractive line with blobs- if too cold, the wax won’t penetrate through the fabric and the dye colors won’t be contained within the shapes. It’s clear that getting the wax “Just Right” takes lots of practice!
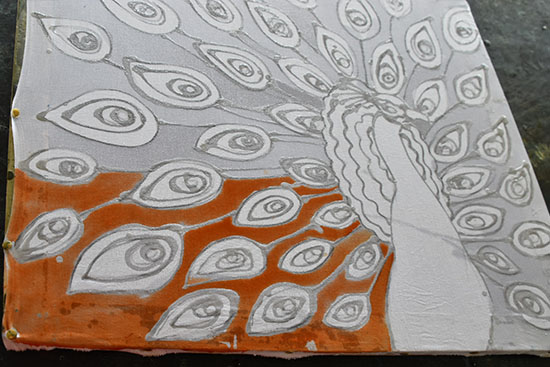
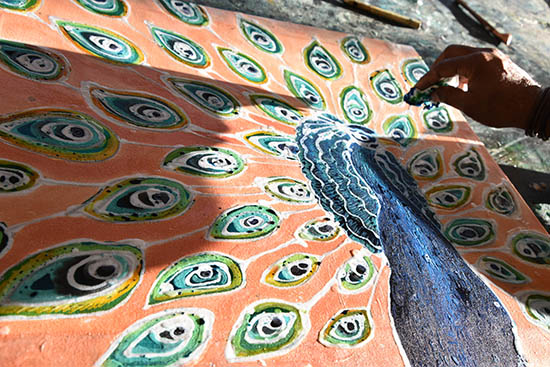
Batik Art Process

Initial wax lines around peacock feathers - Christina Erickson batik
Initial wax lines around peacock feathers
Wax lines complete- now "painting" water on background - Christina Erickson batik
Wax lines complete- now “painting” water on background
Painting dye for background color - Christina Erickson batik
Painting dye for background color
2nd waxing over background - Christina Erickson batik
After background dye dries, apply a new layer of wax over all of the background
Painting dye into the peacock and feathers - Christina Erickson batik
Painting dye into the peacock and feathers
After 1st layer of dye in peacock dries, add detail with more wax and more dye - Christina Erickson
After 1st layer of dye in peacock dries, add detail with more wax and more dye
Detail of final layers with extra dye - Christina Erickson batik
Detail of final layers with extra dye

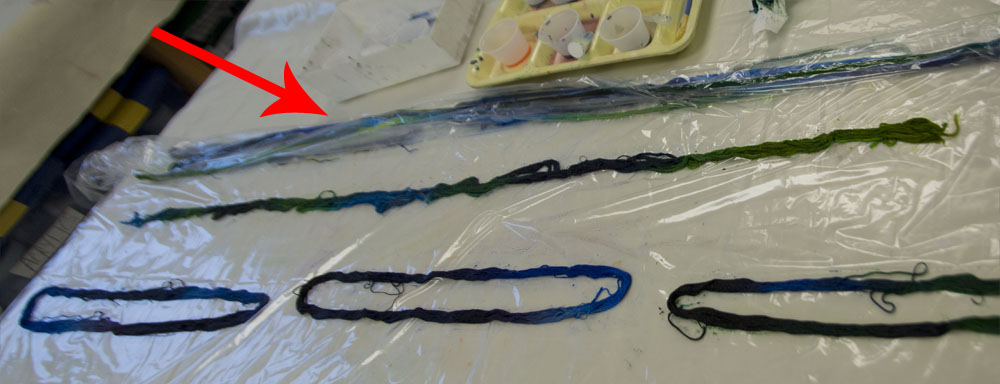
Now the dye on my peacock needs to set, so we went back to my practice piece. We painted wax over anything I wanted to stay white (the practice piece is only using 1 color of dye). Then I scrunched it a bit, to crack the wax and get the organic cracked lines through the piece. We then put it in a bucket with the Procion MX dye and saturated the piece, then hung it to dry.

Adding dye to 1-color batik piece
Batik practice piece on the line to dry with Christina Erickson
Batik practice piece on the line to dry

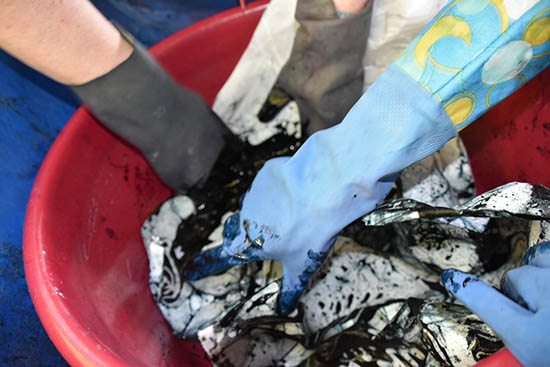
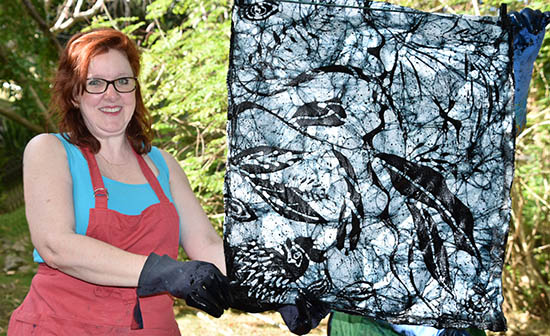
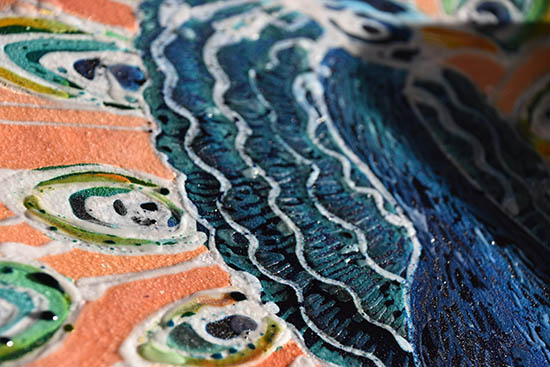
I love the look of the cracks over the piece! The final step in all of this is to boil the piece, which removes the wax.

Christina Fairley Erickson and Henderson Reece with the completed and dried practice batik piece
Christina and Hendy with the completed and dried practice batik piece

Henderson Reese Barbados Batik Workshops

I’d highly recommend taking a class with Hendy if you’re in Barbados! Here’s a link to his workshops page that has a fabulous video showing his work and the batik workshop: http://www.batikartbarbados.com/workshop.php

He also sells his batik artwork, so you can get some masterful batik for yourself, without having to learn to do it! While his typical subject matter is based on Caribbean nature and people, he’s even done commission of a polar bear! Check out his website if you’re interested in getting a piece for your home.

Wow… another fantastic day of mostly working with Procion MX dyeing at the Gail Harker Center for Creative Studies.  To be completely honest, I’m pretty tired… this can be hard work.  So, I’m going to keep it short and sweet tonight, and just put up some images and descriptions of the processes and projects we worked on.

First, our hand-dyed embroidery threads are totally luscious!  Here they are drying in our classroom.  We had to rinse them out and then set the color in hot water with Synthropol today.

We then started dyeing wool-rayon felt, which we’d cut into pieces prior to class, and will be making into hand-stitched books.

Felt with dye poured on (wet)

The felt totally soaks up the dye… you have to pour it on and it looks horrible and dark for the most part.

Rinsing out the felt

After allowing it to sit for a few hours, we rinsed it out and also set the dye with Synthropol.  Since the felt soaks up so much water, we had to carefully wrap it in towels to help dry it.  You don’t want to press or agitate it very much, or it starts the felting process.  We then left it to completely dry overnight.

Felt dyeing

Rinsed felt for hand-made stitch books, laid out to dry

We also worked with painting dyes on sketchbook pages.  We do these in 2-page “spreads” so that they will go together when the book is opened.  We then fuse pages together, to make the pages stiff and able to be stitched on.  We started working on a few pages by drawing a design on them, then punching holes through the paper with a darning needle.  We then can easily put our stitches through the holes.

Some sketchbook pages painted with dye

I believe we’re done with the dyeing now… on to more stitchwork tomorrow!

A two-page spread for a sketchbook, painted with Procion MX dye

  You Might Also Be Interested in:

New 5 x 7 
Challenge Pieces
Complex Threads 2 Developing the 
Creative Habit

Check out these other Great Blogs!
For great ideas on freemotion quilting, check out Leah Day’s FreeMotion Quilting Project

I spent the day literally dyeing to embroider… yes, I am anxiously awaiting getting down to stitching, but I mean “dyeing” with an “e” in it.  Rather than using all commercially available embroidery floss, we spent the day making our own threads, for the first of 5 days in “Experimental Hand Stitch” at the Gail Harker Center for the Creative Arts in LaConner, WA.  I’ve always salivated at the yummy colors of hand-dyed threads.  Now I know how to make them!

First, we had to prepare the skeins of thread.  There are two main types of embroidery thread, pearl (or perle in French) cotton which is a twisted cotton and cotton floss (also known as 6-stranded cotton.)  Pearl cotton comes in many different thicknesses: 3, 5, 8, 12, and 16, with 3 being the thickest and 16 being quite delicate.  Six-stranded cotton is literally that, 6 strands that you can separate, depending upon how thick a piece you want for your project.  Of course there are many other types of threads or yarns you can use for embroidery and any natural fiber will work for dyeing (silk, rayon, bamboo, etc.)  We have several unusual yarns and threads as well as the pearl cotton and cotton floss.

To prepare for dyeing, we had to get the thread into skeins (some of it came on balls or rolls that we had to wind into a skein) and then tie the skeins about every 12 inches (30 cm), to make sure it wouldn’t get tangled up.  We used a figure 8 tie with a square knot, tight enough to hold the skein in place, but not so tight that it would cause a resist and have the thread not take up the dye underneath the tie.

As with any Procion MX dyeing, we then soaked our threads in a soda ash solution, so that the chemical bond would occur in the fiber when the dye  is introduced.

The next step was to use a syringe to “paint” the colors on the thread.  As you inject the dye onto the thread, you then need to smoosh it down to ensure that it is completely saturated, particularly wherever the ties are.    I chose to mainly go with an analogous color scheme from yellow-green, to green, to blue-green, to blue, to blue-violet, to violet.  With sticking to one color scheme, I can be assured that my projects using these dyed threads will go together.

When all the dye is on the threads, you carefully roll the threads up in plastic (see red arrow) and then leave it overnight to process.  I can’t wait to see them in the morning!

My Mom, Nan Lopis, working
on her dyed threads

The best thing of all… my Mom has joined me for the 5 day class at Gail Harker’s!  I was concerned that the dyeing might not be something she’d enjoy (she’ll love the hand-stitching), but she came through like a champ, and made a lovely yellow-olive-greens colorway of threads.

Note: all the threads in the photos above have wet dye on them.  The colors will change somewhat upon the dye setting and washing them afterwards.  One of my favorite parts of dyeing is when you unwrap it the next day and wash it out… it’s like getting a present!

You Might Also Be Interested in:

Making Fabric More Embroidery Samples How to Make a 
Knotted Blanket Stitch 
Video Tutorial