“Corn” by Christina Fairley Erickson
Machine Freehand Embroidery, decorative stitching, freemotion quilting

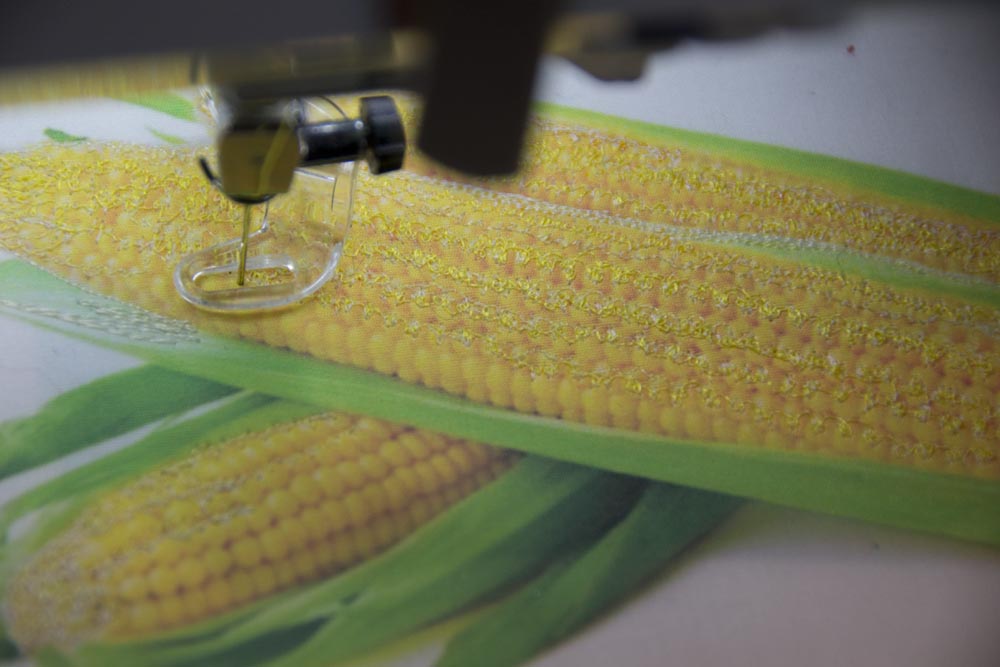
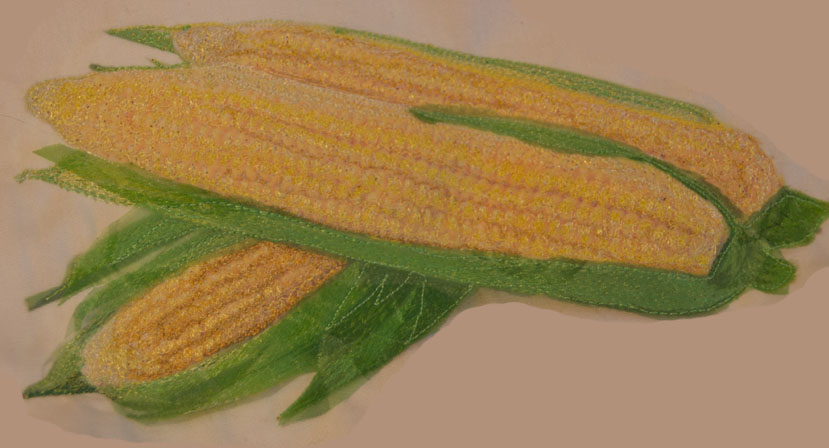
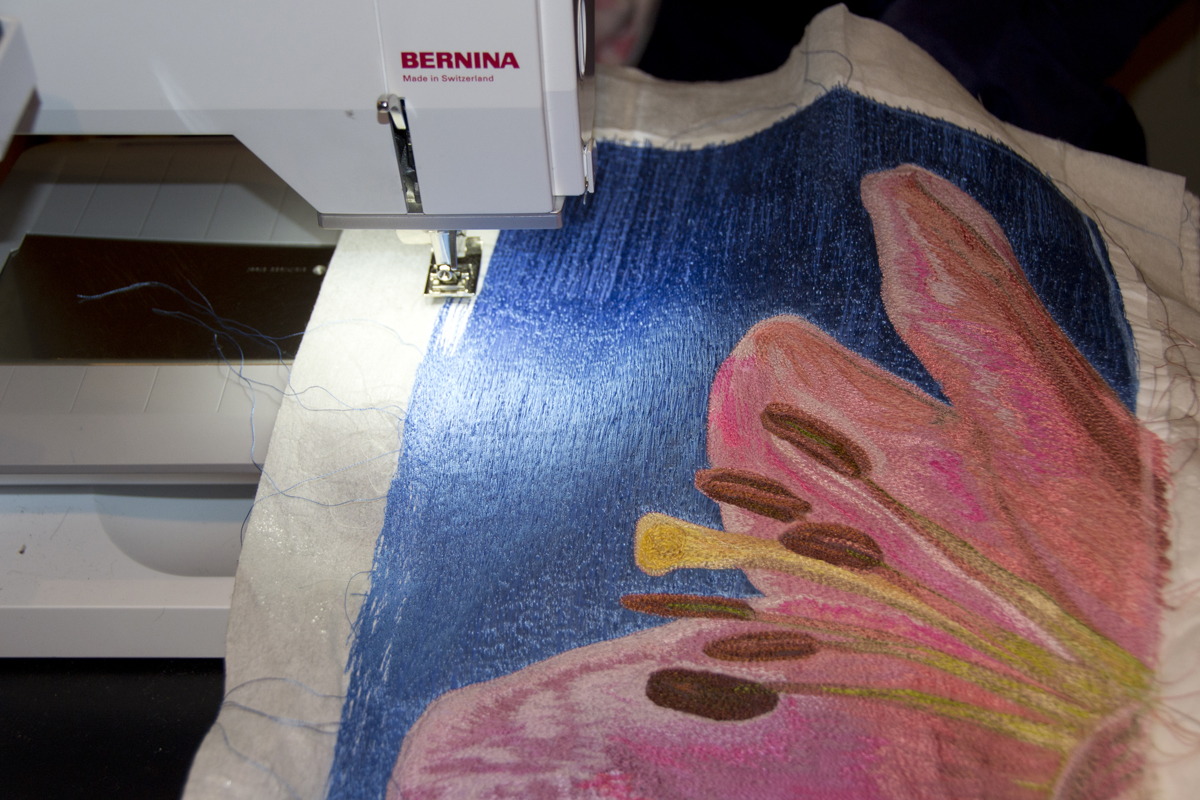
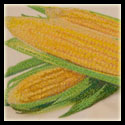
Red!  Thanks for all the comments, encouragement and opinions on the background for my corn piece.  The little ends of the corn husk were challenging to applique down, but you can see a bit of the organza husk standing up in the picture.  What you can’t really tell from the photo is how much the trapunto stands out.  The two longer corn rows have 5 extra layers of batting, making them stand about 3/4″ up from the backing. I cut each of the batting layers a little smaller than the last, so it really has a rounded look.  The lower ear of corn has less trapunto (3 layers), since it is behind the others.


I’m now working on my last piece, chili peppers.  I started with the green stems, then went on to the darker shadowed portions of the chili.

The difficult part of these is that they are so thin, it will be difficult to convey a 3-D effect or to trapunto them.  So I tried to sew both in the long/horizontal direction and also around the width of each chili, to convey the roundness of each.

One of the main things when doing thread painting is to keep on layering your colors to add more dimension and gradation.  If you just fill in one color butted up to the next, it will look flat and like a paint-by-number painting.  Blending the colors is very important.  Also, look for the unexpected colors.  In this chili, I found a small place where the shadow had just a touch of lavender… it adds a lot to the finished piece to have those little bits that your eye might not originally catch.

Finished “Chili” thread painting
Now I just need to do the background and then I’ll be on to putting all 9 of my Salsa blocks together!
You Might Also Be Interested in:

Corn – Red or Orange- 
You Vote!
Piquant Progress Fitting My Challenge 
with Showing

Please check out these other great blogs:

FreeMotion by the River by Connie Kresin

Quilt Story

Well, I’m down to needed to pick out the background and do the freemotion quilting on my latest Salsa block- Corn.  I’m not sure about the background color, however.  Do you prefer the red or the orange?

This may have been the most difficult of my salsa pieces to date.  Trying to get individual kernels of corn was tricky.  I also wanted to have the husk seem more realistic, which I may work on a bit more.

Nylon organza pieces painted with Dye-na-Flow

I started thinking about the husk and how to make it seem like it could be peeled away.  I decided to use a painted nylon organza, which you could get layers of sheer that would build color.  I used Jacquard Dye-na-Flow to paint it, mixing a variety of greens and yellows.

Nylon organza hanging to dry

When you paint the nylon organza, do it on a thin plastic sheet and wait until it is just starting to dry (it will be semi-sticky to the plastic.)  Then, peel it up and hang it to dry with clothes-pins or paperclips to a line.  If you leave it on the plastic, much of the paint will stay on the plastic and the surface of the organza gets a shiny odd texture to it.

After painting my organza, it was time to get going with the thread painting.  Starting with a photo I’d printed on fabric, I began with the very lightest color first.  Much of these pieces were sewn in little circles, to imitate the shape of the corn kernels.  At some places it was more appropriate to make little scallops, to add highlighting or shadowing to the kernels.

I then layered on color after color of a range from pale beige through sunshine yellow to a dark mustard.  In between the rows, oranges predominated to add shadowing… even a touch of a pinkish-orange.

At the end, I added more of the sunshine and lighter colors again, to build up layers and make the kernels a little more dimensional, with the highlights sticking out.

Corn with thread-painting over all, including husk


After the corn itself was complete, I thread-painted the husk.  I’m not completely sure about my process here or whether I need to do more (or even take away some of what I did.  After the thread painting, I laid some of the organza which I had painted on top and stitched it down.  I didn’t stitch it entirely over the husk areas, as I wanted some of the pieces to be able to fold back and move in a breeze, like a real husk would do.  After sewing it down, I cut around the edge of my sewing.

Completed corn with the organza husk

So, what do you think?  Red or Orange for the background?

By the way, as many of you know, I’m a big fan of Leah Day’s FreeMotion Quilting project.  If you’re looking to gain skill in freemotion quilting, Leah has just come out with a new class on Craftsy.  If you go to her blog, you can click a link and get the class for half price!  ($19.99 rather than 39.99.)

You Might Also Be Interested in:

A Slice of Lime Peppers and Avocado Cilantro – Si!

Make sure to check out these other great blogs!

Confessions of a Fabric Addict

Great post on stenciling and thermofax on Nina Marie Sayre’s Art Quilts

Today is the end of the 4th week of our 5 x 7 Artist Challenge and I completed my 2nd piece in my Salsa series: Tomatillo.  This was a little difficult to represent, as not everyone is familiar with these little green beauties.  They have a husk or outer skin that peels back to reveal a small green tomato-like fruit.  They’re delicious fried up or made into their own salsa or green enchilada sauce.

I wanted to represent it both with the husk and showing the fruit inside, so I got a great photo of it with both. I started by hooping my photo which I’d printed on cotton sheets, and “painting” in the lightest areas of the picture.

I slowly worked with freehand embroidering the tomatillos, adding shading and overlapping thread colors to build up and merge the colors.  I didn’t always have exactly the right color of thread, so by putting down a bit darker color and then adding lighter thread on top, the colors give more of the impression of a medium tone of the color I was trying to replicate.

One of the challenges of this piece is there doesn’t originally seem like there is that much variation in color.  However, using slightly more shading than in the original photo can help with creating more of a sense of depth in the object.

The other thing which I handled differently in this embroidery is that I didn’t applique or tack the leaves/husk of the open fruit down, so they become three-dimensional.  Once again, I added an additional 2 layers of batting in the body of each of the fruits, but the husk leaves stand out, as though you just peeled them open.

Here is the finished piece:

You may recognize a couple of the freemotion quilting elements from Leah Day’s FreeMotion Quilting Project.  They are Square Spiral and Radio Static.

You might also be interested in:

5 x 7 Week 3- The
 Start of Salsa!
52 Week – 5 x7 
Challenge to Readers
Scope Creep

Want to see more great projects?  Check out these blogs:

Photobucket
My last week’s project
(Tomato) was featured
on 
Quiltsy

Cool Airbrushing technique on Nina Marie Sayre’s Art Quilting Blog

FreeMotion By the River

Quilt Story

Confessions of a Fabric Addict

Quiltsy

Richard and Tanya Quilts

Freshly Pieced

Sew Much Ado!

Quilter’s Reader’s Garden


Last night I worked on finishing up the machine embroidered piece I started for my small art-quilt group, the Fiber Funsters.  This is the first piece in a series of challenges our group is doing, based on the book Twelve by Twelve: The International Art Quilt Challenge.  Each of us in the group will have a turn choosing a word to base the challenge on.  Then, the group members will make a small art quilt, sized 10″ x 16″, which somehow reflects that word, which we then present to the group in 2 months.  Why did we pick 10 x 16, rather than following the example of the 12 x 12 group?  We wanted to base our compositions on the Golden Mean or Golden Ratio.  This is where you use the ratio of 1 : 1.618 for your composition, making it more appealing to the eye.  If you’re interested in finding out more about about the Golden Ration, check out this YouTube video.

We were first challenged with “Opening”.   Any time I’m designing for a theme, I start with my sketchbook and brainstorm ideas for the concept or topic.  Opening invoked the following ideas for me:

  • Doors
  • Imagination
  • Portals
  • Beginnings
  • Writer’s Block
  • Purse/Luggage/Briefcase
  • Court (opening arguments)
  • Flower
  • Presents
  • Hands
  • Mail
  • Body language (open arms vs open legs)
  • Containers (boxes, food storage, etc.)
  • Windows

Since I love plants and flowers, I decided to go with an opening Stargazer Lily, my favorite flower, and fairly accessible to get at the grocery floral department. After taking photos and thinking through what sort of composition I wanted, I made some sketches. Since I have done a lot of machine stitch, I thought it would be fun to make this completely through thread painting. I broke out all the colors Of pinks that I had for the flower, and chose some spring greens as a complement to the pinks. The background I decided on is blue, to complement the dark rust/orange of the flower’s stamens. Here is a close-up of my stitch work:
Although the threadwork is time-intensive, I do love the result.  I will be practicing this more with my personal 5 x 7 challenge this year!