I finished My “Peppers” last night!  Hooray!  I’m quite happy with how they turned out… I struggled with making the red center one laying down so you are looking down on it.  I think the key was both the shading and sewing directional-ly. By this I mean that I’m trying to capture the shape of the object, by sewing in the direction that the object naturally goes.

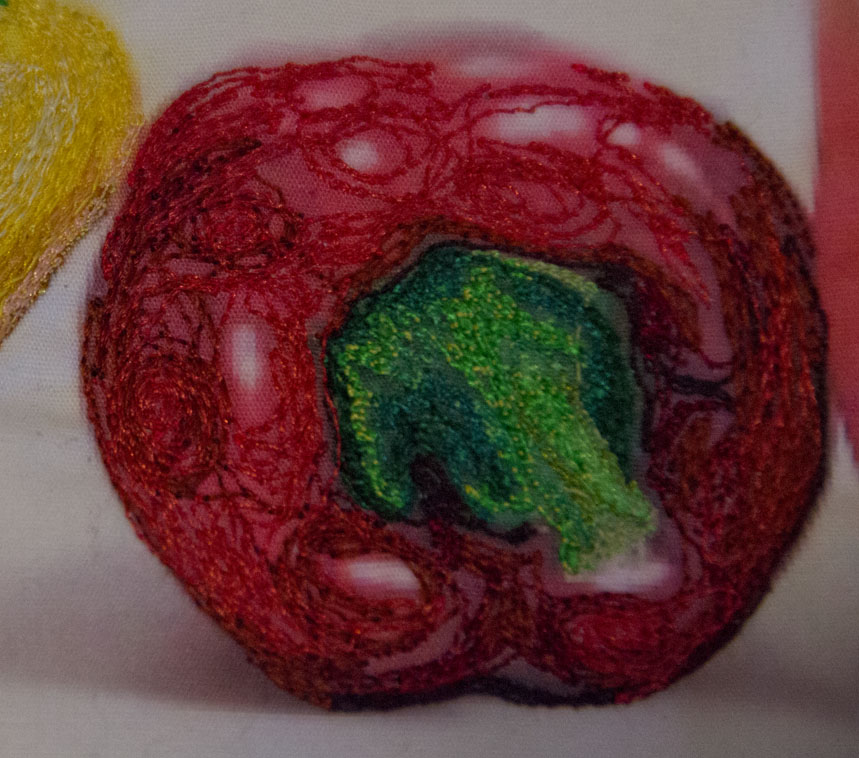
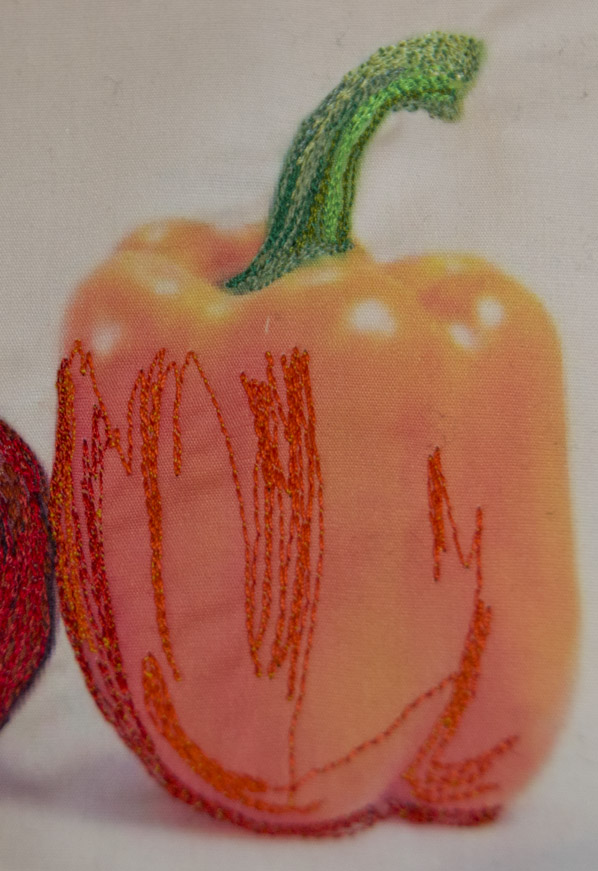
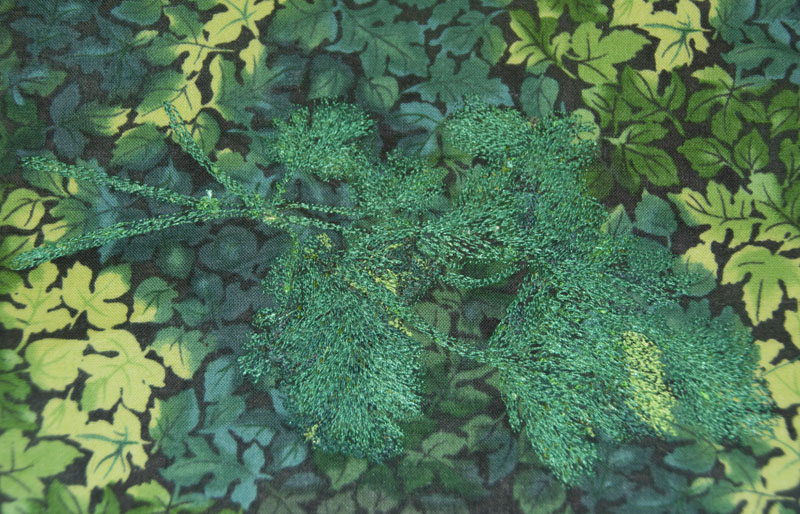
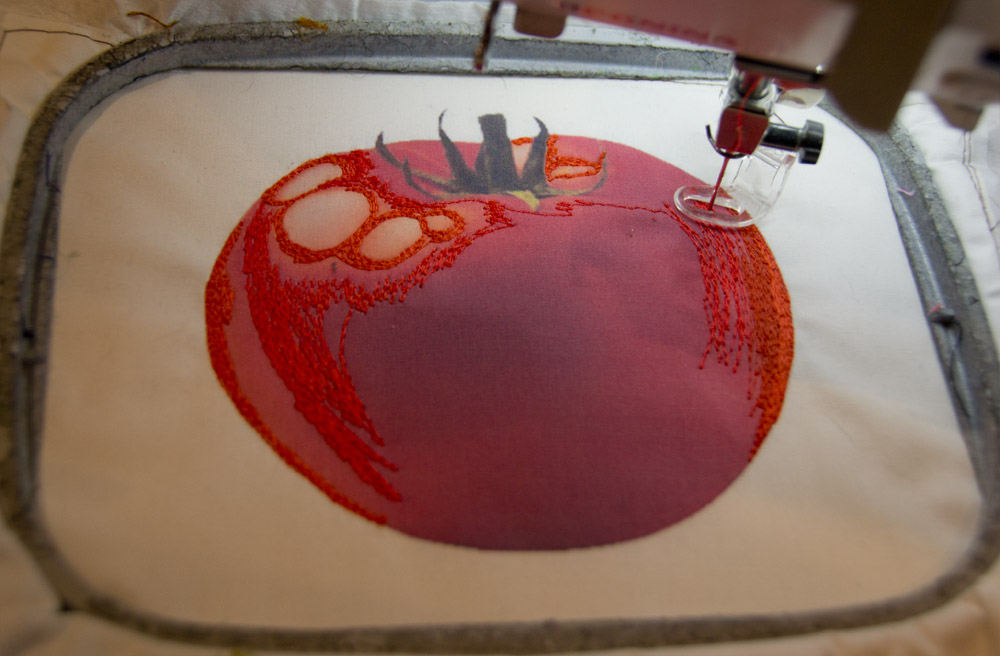
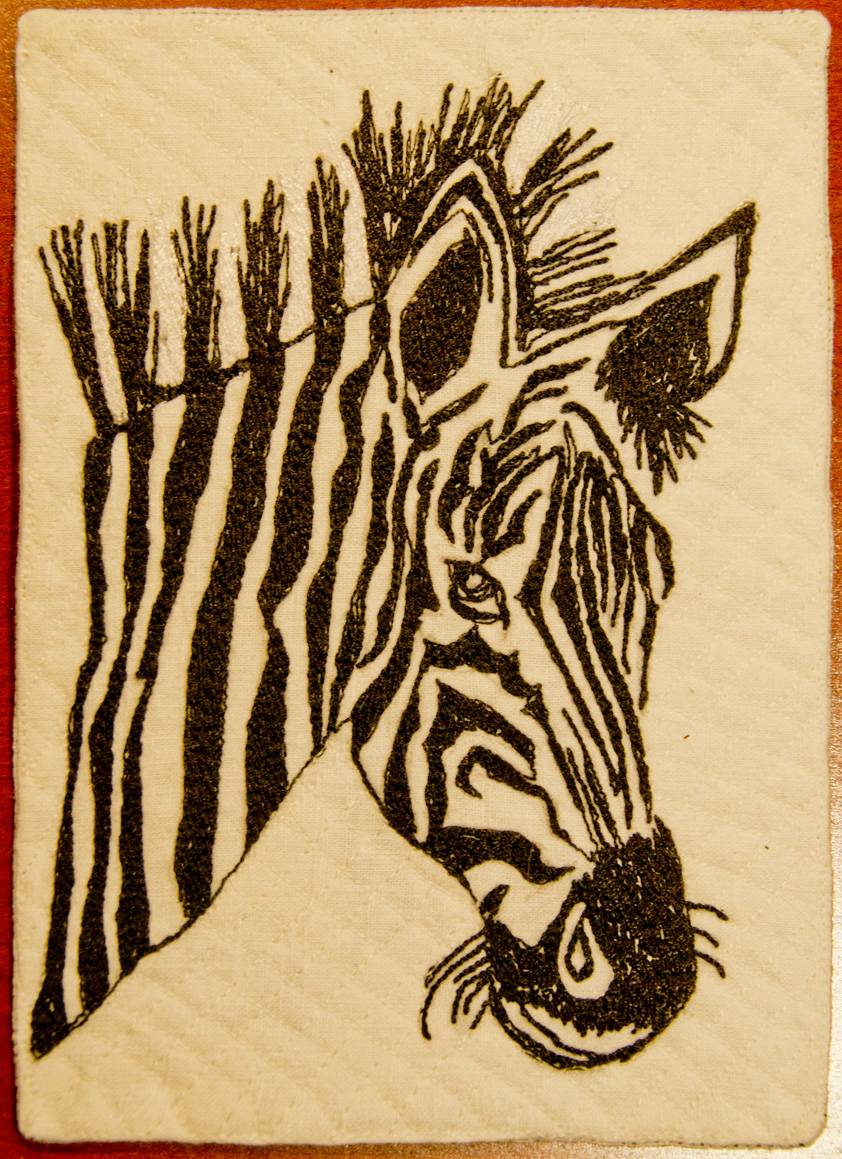
For instance, where there was a buldge in the pepper, I sewed around any bulbous protusion, which, combined with shading, helps give the illusion of depth. Another way of looking at directional sewing is to think of the way something grows or sewing with the grain of an item. For instance, if you want to portray an animal, it won’t look very realistic if you make the hair going in an unnatural manner.  Similarly, petals, leaves, and plant stems look closer to life with a vertical grain and more cartoonish with horizontal filling.

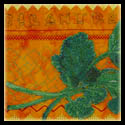
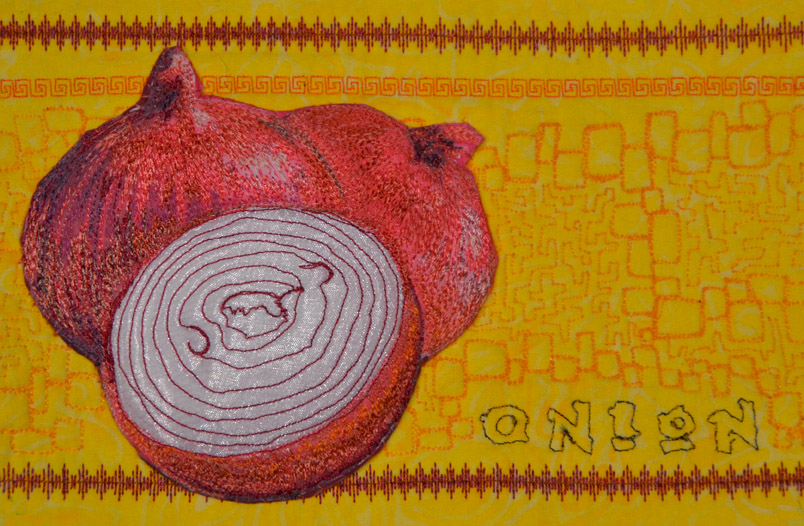
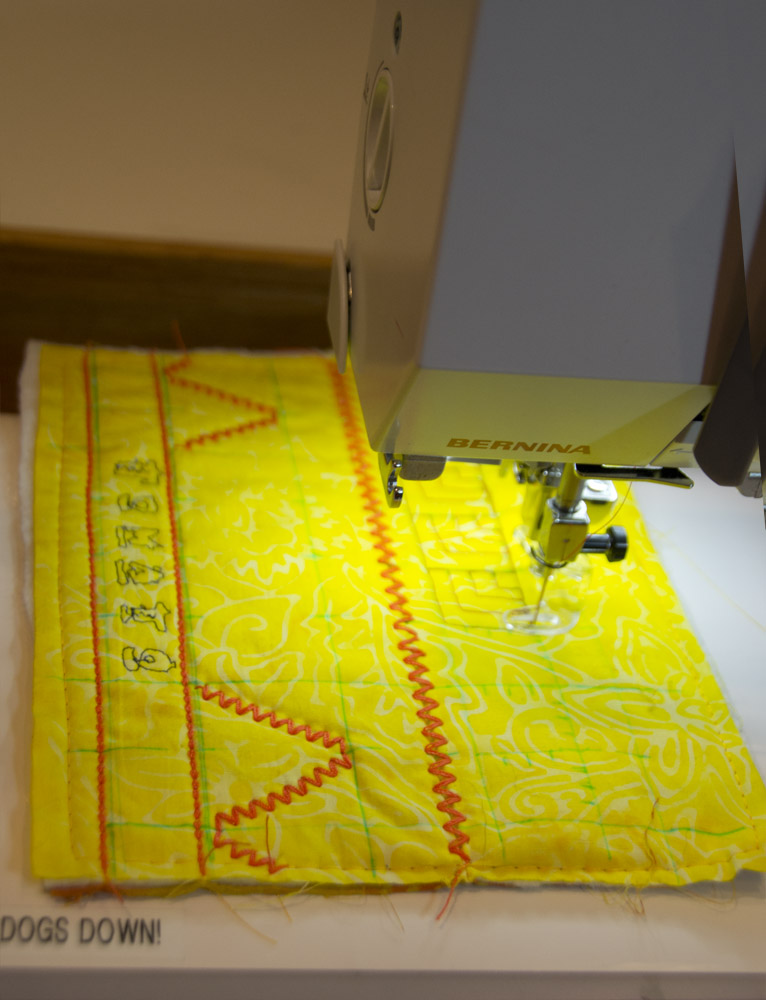
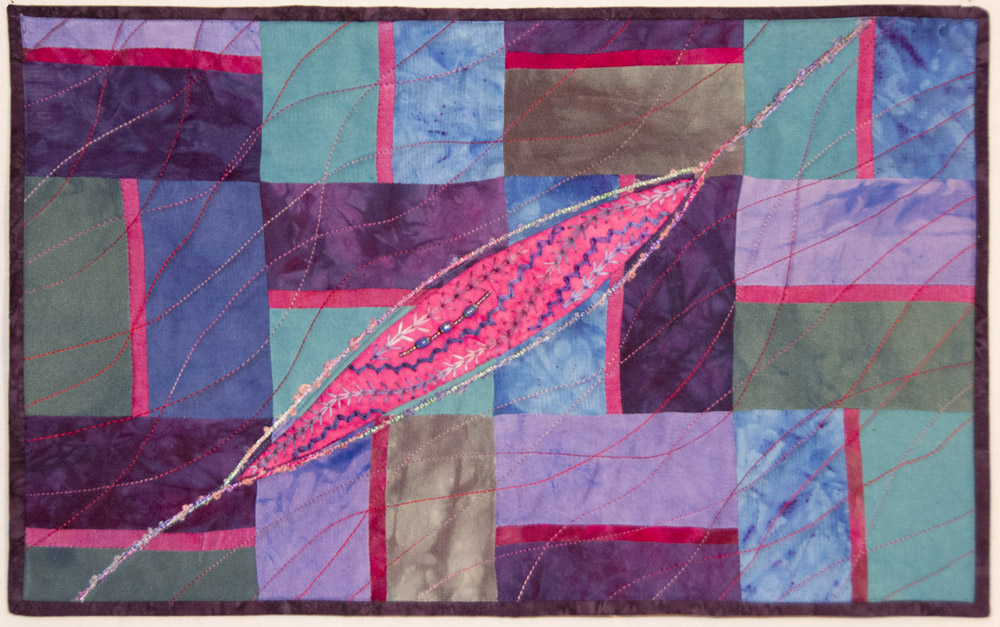
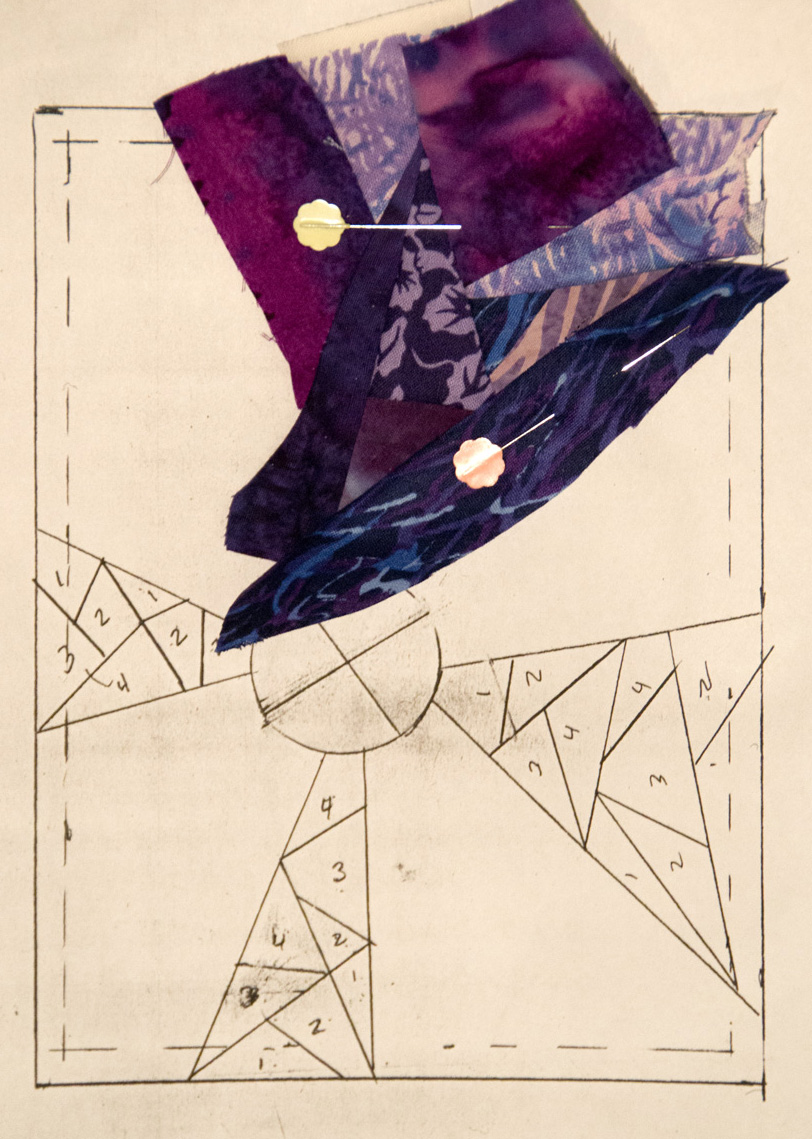
Background before I hand appliquéd the trapunto peppers 

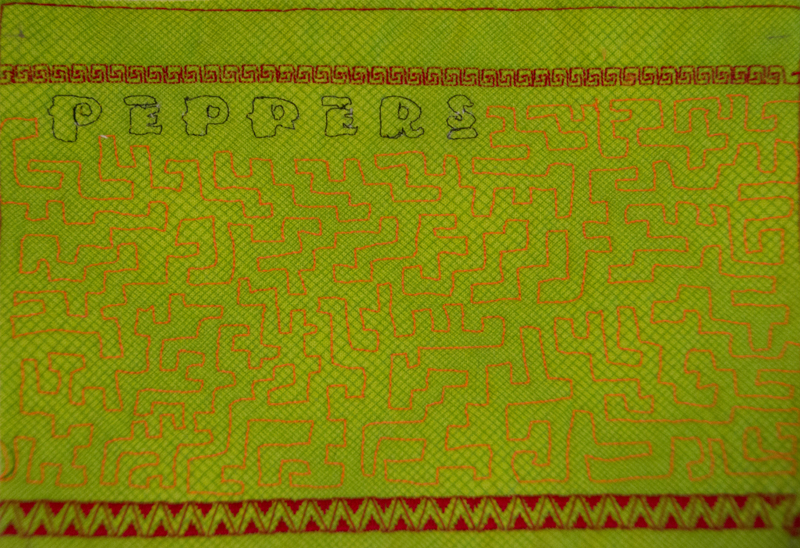
I also made a decision with the background of this piece.  If you’re familiar with design theory, you’ll recognize “repetition” and “unity” as two fundamental  design concepts. Many strong designs utilize repetition- whether they are visual art, writing or in a musical composition.  Repetition aows the viewer to feel more comfortable with the piece-as if the already know something about it, since they’ve seen (or heard) that part of the piece before. Repetition can also help unify a piece. Having too many loose ends that don’t relate anywhere else in the work can be jarring and disquieting.

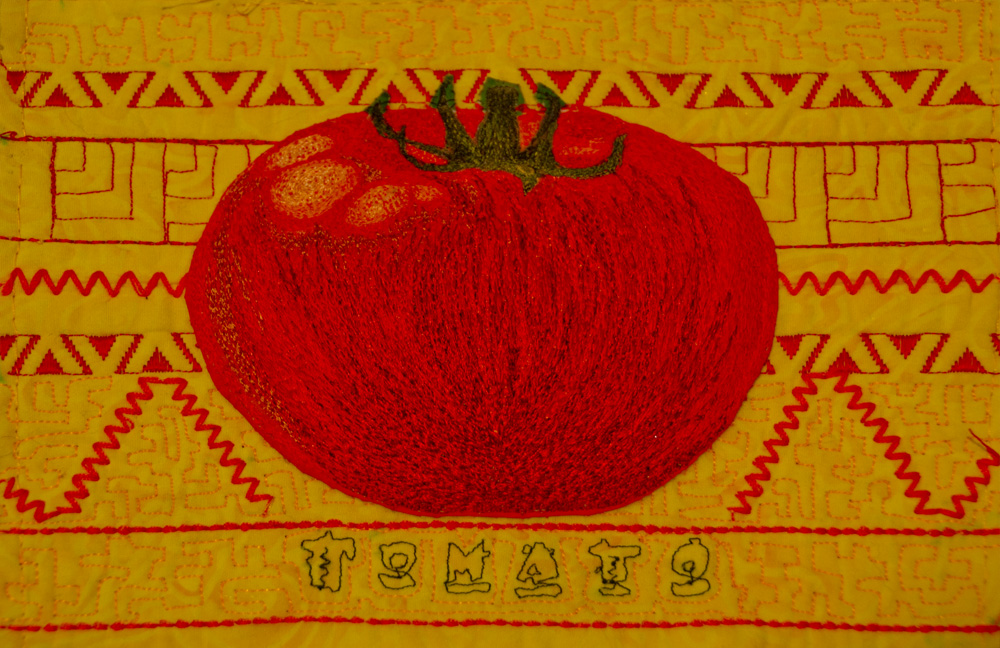
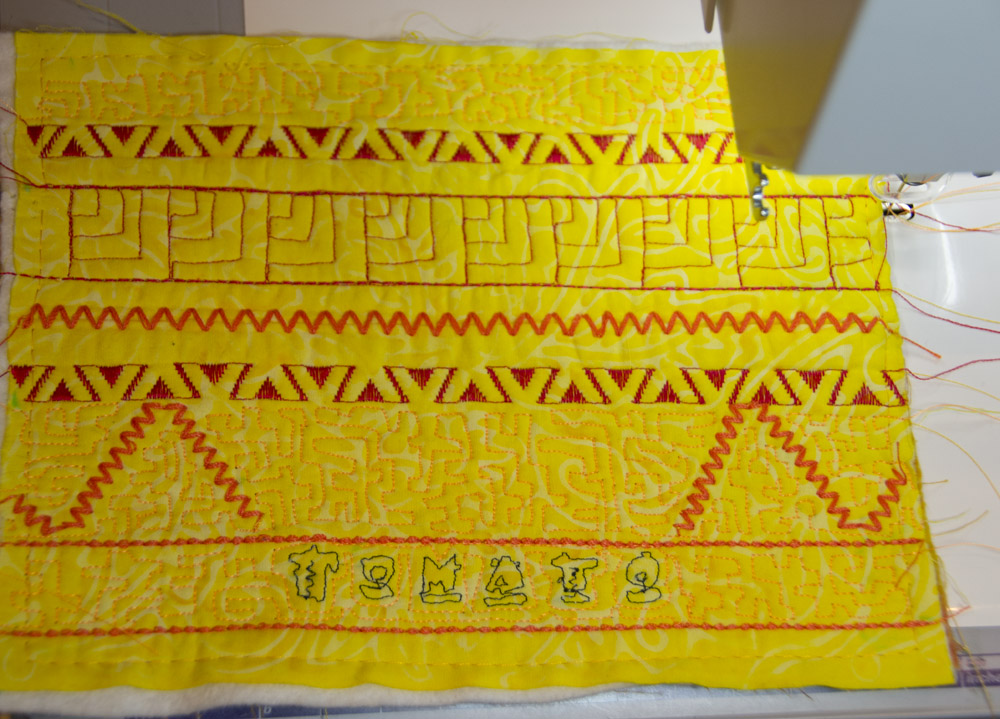
So, for my “Peppers” I used a background fabric which matches the background of my Tomatillo, but in a different color way.  I used the same pattern for the Freemotion quilting as I did on my Tomato. One of the lines of decorative stitch matches another in one of my pieces.

Why is this important? While each piece may be lovely and stand on its own, my plan is to put nine of these “Salsa” pieces together into a quilt. Although I’m doing similar techniques- Machine embroidered veges with decorative stitching and Freemotion quilting, if I’m not careful it will seem like it isn’t unified.  Other ways I’m working to unify the peace and provide repetition include using the same font for the name of each of the vegetables or fruits, using an analagous color scheme (red, orange, yellow, green), and having my quilting and decorative stitching be more sharp angles rather than curves (I think of this being more like Mayan or Aztec patterning.

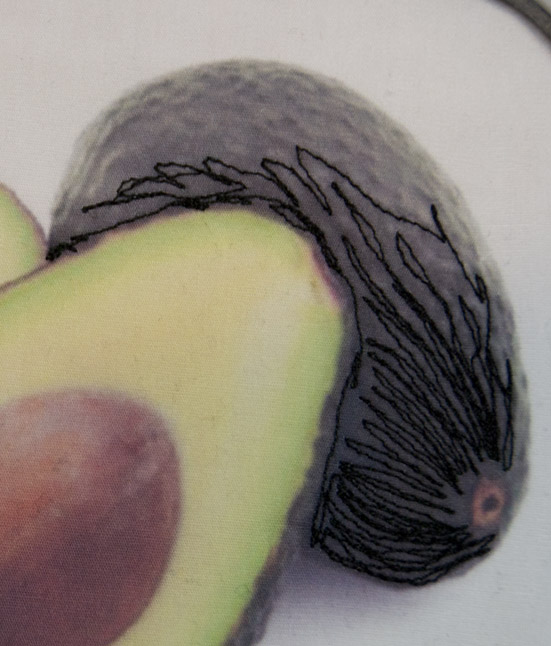
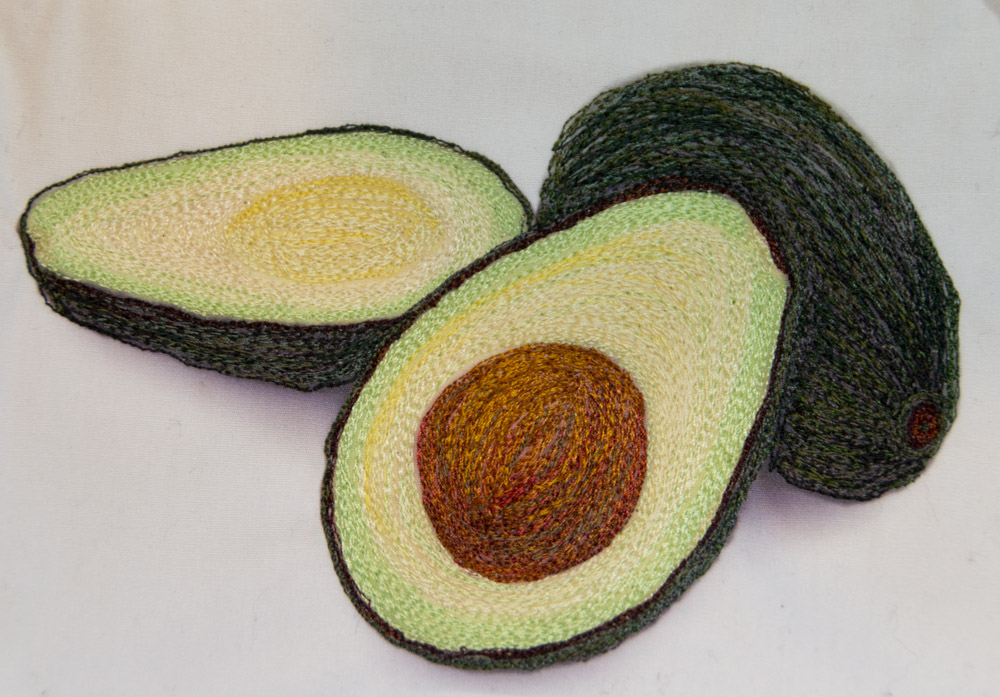
On to my Avocados….!

You Might Also Be Interested in:

New 5 x 7 
Challenge Pieces
5 x 7 Week 3- 
The Start of Salsa
Developing the 
Creative Habit

Check out these other Great Blogs!
For great ideas on freemotion quilting, check out Leah Day’s FreeMotion Quilting Project

To find some wonderful quilting projects, visit Freshly Pieced

Confessions of a Fabric Addict 

Art Quilts by Nina Marie Sayre

Stitch by Stitch by Marelize Ries

Isolation.  It can be really nice to have time to yourself… time to do your projects, eat on your own schedule, stay up as late as you want.  But this weekend was more than time to myself.  Sometime on Friday, a critical piece of equipment broke down cutting off all Internet, email, WiFi and our home and business phones.  Although I still have my cell phone and texting, it’s amazing to find out how connected we are through these other forms of communication.  With my husband and sons away for the weekend, it was more like solitary confinement than a peaceful weekend to myself! Luckily, our computer expert was able to find the piece of equipment and get it installed this afternoon, so we’re back live!

Start of Red pepper- showing underlaying stitches
The good news is that I had little distraction, so I’ve made a lot of progress on my Salsa series.  First, I started with peppers:
This red pepper proved to be particularly challenging, since the perspective.  I started with making the stem, and then doing the darker parts as underlayment.  I made circular shapes, to try to get the sense of the knobby bumps on the top of the pepper.
I think it came out pretty well and like the effect of adding a little violet for the shadows.  
With the orange pepper, I again started with the stem and the darker shading.  As you can see, most of the stitching goes in the direction of the shape of the vegetable.  With the underlayment, I will go across the grain, but most of this stitching will be beneath other layers of color, so it won’t show the cross-grain stitches.  
I then start building layers of color up.  I generally go from dark to light, as the dark is in the shadows, so further away from the viewer and light is closer.
Here are the three finished peppers.  I need to start working on doing the freemotion quilting and decorative stitching on the background today.
Next, I started on avocados.  Same, process, although it is challenging to think through how to be able to show the indentation of the place where the avocado seed was versus the other half with the seed jutting out. The rough texture of the outer skin was a little worrisome as well. 
I started with going over the darkest part in a thick black cotton thread.  I then added layers of dark grays and some dark muted green (basically a green that has dark gray added to it.)
I added the darkest yellow to the texture of the fruit, making it heaviest in the area that the pit was removed.  Then I layered about 10 different shades of light yellow and light green to make the fruit.
The final part of the process was to do the avocado pit or seed and the little area where the stem comes out.  
Because of how I layered the thread, both the pit areas are slightly stretched out, which will give a nice 3-D effect when I add trapunto.
I’ll be looking over Leah Day’s FreeMotion Quilting Project to find some interesting designs for the backgrounds of these two 5 x 7 Challenge pieces!


You May Also Be Interested In:

Cilantro- Si! 5 x 7 Week 3- 
The Start of Salsa
La Cebolla (Onion)

I made it back home from San Francisco late last night and finished up my 5 x7 “Cilantro” piece today.  
“Cilantro” by Christina Fairley Erickson
Freehand machine embroidery, decorative stitching and freemotion quilted
Since I already had the machine embroidered cilantro done, all I had to finish up was the background.  For this, I started with stitching the name “Cilantro” as I had with my other Salsa pieces.  To do this, I printed the word on a piece of paper-piecing paper in a funky font and then just stitched the letters out and tore away to paper.  Then I chose a few different decorative stitches to start with.
Cilantro freemotion quilting design

Next, I wanted to fill the middle space with freemotion quilting.  I drew out this design which I based on cilantro leaves.  I like how it looks and was ready to try it out.

However, I then lay my machine embroidered Cilantro on top of the drawn design.  I don’t think it was complementary at all!  I’d like to try the leaf pattern somewhere, but this wasn’t the right place.

Cilantro freemotion quilting design with cilantro machine
embroidery on top

Background getting filled in with cubing

So, I decided to check my favorite resource, Leah Day’s FreeMotion Quilting Project, and thought that I could slightly modify her “Cubing” design.  I worked the design at an angle or on-point, as well as putting in a lot of rectangular shapes, rather than mostly all squares.

After that, I only had to applique down my machine embroidery.  Due to the thin stalks and ruffled edges of the cilantro, I decided to cut the embroidery along the edge, color in the edges and machine applique it (rather than hand-applique as I did on the others.)  I did put a minimal amount of trapunto batting under a few leaves and left some of the edges loose, so it has a more 3-D effect.

You May Also Be Interested In:

Recognizing Our Limits 
and Not Giving Up
A Sprig Away La Cebolla (Onion)

Also Check Out These Great Blogs!

Confessions of a Fabric Addict

Nina Marie Sayre- Art Quilts

FreeMotion by the River

QuiltStory

Freshly Pieced

The Needle and Thread Network

Today’s project has been working on a sprig of Cilantro for my Salsa quilt.  This has been a little more challenging, as the uneven ruffled edges of the cilantro and the thin, fine stalks are going to make it pretty impossible to turn under the edges to applique.  Unless you know a technique that I don’t!

“Cilantro” freehand machine embroidery by Christina Fairley Erickson
“Cilantro” back

So, I did this one a little differently, in that I decided to put a green, leafy background on the back, below the layers of stabilizer.  This way, I can carefully cut around my machine embroidery and fasten it to the background, but allow some of the leaves to not be completely secured, and the backing fabric will show.  I expect I’ll have to color along the edges where I cut, however.

I’m not quite sure what I’m going to do with the background this time around, though I’m considering putting it on either a red or yellow-orange piece.  While I’m working on this little sprig, here’s something to think about on a much grander scale!

Sea Nettle” by Dina Barzel in foreground
“Bridging Shine” by Jo Hamilton in background

Yesterday, I started talking about the Bellevue Art Museum’s (BAM) current exhibit “High Fiber Diet.”  One of the artists and a friend of mine, Dina Barzel, is an incredible woman in the fiber arts.  Dina has been working as a full-time artist since 1970 and makes fiber sculptures.  I met Dina through the Surface Design Association and am happy to have her join our monthly meetings here in Bellevue.  Dina was born and grew up in the Western Carpathian Mountains of Transylvania.  The traditional uses of fibers were an essential part of everyday life, and made quite an impression on her.

Dina’s sculpture for this show, “Sea Nettle” is made of silk fibers, shaped around molds.  Some of the molds are large and light enough to even hold the artist!  The silken globe rise up to the twenty foot ceiling, some partially open, as though they are allowing others to escape from within.

In the background, you’ll see an oversized male portrait called “Bridging Shine” by Jo Hamilton. This piece is made completely of mixed crocheted yarn and is about twice the size of life.

“Sea Nettle” by Dina Brazel (detail)

“Sea Nettle” by Dina Brazel (detail)

You might also be interested in:

BAM High Fiber Diet La Cebolla (Onion) Developing the 
Creative Habit

For wonderful Tutorials on FreeMotion Quilting and more, go to Leah Day’s FreeMotion Quilting Project

I finished my third piece for my ‘Salsa!’ quilt this evening:
“Onion” by Christina Fairley Erickson – Machine freehand embroidered, freemotion quilted and decorative stitching

Layers of batting for trapunto effect

I had a bit tougher time with getting the trapunto done well, so that the depth perception of the onions in back would be complemented.  So I did several layers of batting which I stitched together to help create this effect.

For the freemotion quilting background, I used “Stone Portals” from Leah Day’s FreeMotion Quilting Project.

I’m not sure that I got quite enough contrast in this piece, particularly for the background.  However, I think once all the pieces are put together, it should hold its own.  You can see the contrast issue, when I compare it with the other two pieces completed so far:

You might also be interested in:

Week 4 – Tomatillo 5 x 7 Week 3- The
 Start of Salsa!
52 Week – 5 x7 
Challenge to Readers

Other great blogs to check out:

Leah Day’s FreeMotion Quilting Project

Nina Marie Sayre’s Art Quilts

Confessions of a Fabric Addict

FreeMotion by the River

QuiltStory

Freshly Pieced

A Quilting Reader’s Garden

Today is the end of the 4th week of our 5 x 7 Artist Challenge and I completed my 2nd piece in my Salsa series: Tomatillo.  This was a little difficult to represent, as not everyone is familiar with these little green beauties.  They have a husk or outer skin that peels back to reveal a small green tomato-like fruit.  They’re delicious fried up or made into their own salsa or green enchilada sauce.

I wanted to represent it both with the husk and showing the fruit inside, so I got a great photo of it with both. I started by hooping my photo which I’d printed on cotton sheets, and “painting” in the lightest areas of the picture.

I slowly worked with freehand embroidering the tomatillos, adding shading and overlapping thread colors to build up and merge the colors.  I didn’t always have exactly the right color of thread, so by putting down a bit darker color and then adding lighter thread on top, the colors give more of the impression of a medium tone of the color I was trying to replicate.

One of the challenges of this piece is there doesn’t originally seem like there is that much variation in color.  However, using slightly more shading than in the original photo can help with creating more of a sense of depth in the object.

The other thing which I handled differently in this embroidery is that I didn’t applique or tack the leaves/husk of the open fruit down, so they become three-dimensional.  Once again, I added an additional 2 layers of batting in the body of each of the fruits, but the husk leaves stand out, as though you just peeled them open.

Here is the finished piece:

You may recognize a couple of the freemotion quilting elements from Leah Day’s FreeMotion Quilting Project.  They are Square Spiral and Radio Static.

You might also be interested in:

5 x 7 Week 3- The
 Start of Salsa!
52 Week – 5 x7 
Challenge to Readers
Scope Creep

Want to see more great projects?  Check out these blogs:

Photobucket
My last week’s project
(Tomato) was featured
on 
Quiltsy

Cool Airbrushing technique on Nina Marie Sayre’s Art Quilting Blog

FreeMotion By the River

Quilt Story

Confessions of a Fabric Addict

Quiltsy

Richard and Tanya Quilts

Freshly Pieced

Sew Much Ado!

Quilter’s Reader’s Garden

Ryan Holdridge, Eagle Scout with Mom, Christina

First and foremost… every mother deserves some bragging rights.  Tonight, my son Ryan completed the final step and earned his Eagle Scout rank!  We’ve been on that journey since 2001, including my being a den leader and assistant scoutmaster.  Woo Hoo!!!

This week has been a bit of a push… Not only did I work on my UFO Waterfall quilt, I wanted to have my 5 x 7 Artist Challenge Piece be able to coordinate into the salsa quilt theme. I’m pretty excited about the result so far. I’ve decided to not finish the edges of these salsa blocks, since I will be piecing them together into a full quilt.

The process for making this started with a photograph of a tomato. Actually, I picked out photos for each of the nine items (tomato, onion, cilantro, peppers, tomatillo, lime, chili pepper, corn, and onion.). I then removed backgrounds and resized the photos to fit the 5 x 7 format in Photoshop. I then printed the photos (2 to each page) on COTTON from VV Prints -(add link and type of cotton).

Start of thread painting the tomato

I keep my thread sorted by color, rather than type, with the exception of metallics. Since I decided to start with the tomato, I pulled out a wide range of reds and oranges, changing in value from tangerine and pinks, through the true hues, up to dark maroons and deep rusts. I placed them in a line of values- light to dark, so it would be easy to pick out which colors would be next in shading.

I then hooped my tomato.  When you are doing machine embroidery, it’s important to use stabilizer (I used two layers-one of  Pellon Stitch N Tear  the second OESD Heavy-weight cut-away Embroidery stabilizer) to help ensure you embroidery won’t get misshapen. You also hoop opposite from the way you do with hand embroidery, so the fabric is laying along the bottom of the hoop, rather than across the top edge. This way the fabric is flush up against the sewing table.

“Tomato” stitched on marked background

I then started freemotion thread painting.  I layered colors, particularly where I wanted to blend shading. I generally try to start with areas that would be further away from the viewer and end with the places that would be closest, the help create a more 3-D effect.

After completing the tomato, I turned to the background on which it would be placed. I knew I waned to have the names of each fruit or vegetable printed out on the background, so I decided to try my friend’s process for text (see note on how to do this with Marylee Drake’s ‘Celebration’ quilt.) I picked  a fun Font to go along with the Salsa theme and stitched it onto the background.

Adding decorative stitching

Added freemotion quilting
Coloring edge of embroidery so it can be turned under

Next, I marked my background with a Dritz Fine Line Water Erasable Marking Pen – Blue to help keep my lines well-spaced.  I then added both machine decorative stitching and Freemotion quilting to the background that would accent and complement both the tomato and the Salsa theme.  For the Freemotion quilting, I turned to Leah Day’s Freemotion Quilting Project and found a few designs that would give me the effect I wanted… To look like Mayan patterns. I decided on Square Shell (without filling in the small square), and a cross between Echo Maze and Circuit Board.

Turning edge under using Roxanne Glue Baste-It

Finally, i colored the edges of the white fabric around the embroidery using a Stained by Sharpie Brush Tip Fabric Markers before I hand appliqued the tomato onto the background.  I added two layers of batting between the embroidered tomato and the backing, with the first just slightly smaller than the size of the tomato, and the second a smaller oval, so it would help add a three-dimensional more rounded shape. I used Roxanne Glue Baste-It to help hold the edges under as I appliquéd.

My completed 5 x 7 piece “Tomato”

The only step, other than finishing the edges, which I still need to decide whether to do or not is whether I’ll paint in the lettering.  I’ve decided to hold off for now, as I want to test painting letters this size, before I try it on my finished piece.

This week my blog was featured on FreeMotion by the River!  Thanks, Connie!


You might also be interested in:

Current Works in 
Progress
Fitting my Challenge 
with Showing
2013 – The 5 x 7 
Artist Challenge

Check out these great blogs I’ve linked up with!

Freemotion by the River

Nina Marie Sayre Quilt Art

Confessions of a Fabric Addict

QuiltStory

Richard and Tanya Quilts

Freshly Pieced- Work In Progress Wednesdays

Made by Me!

Quiltsy Check out the wonderful seed stitch info on their Jan 17, 2013 post.

My first week’s piece for
the 5 x 7 Challenge

For those of you just tuning in, I not only have the 5 x 7 Challenge going on this year, where I make one 5″ x 7″ artwork each week, but I also actively show my fiber art work.  As the Exhibitions Co-Chair (along with Carolyn Hitter) of the Contemporary QuiltArt Association, I do all the planning and production of setting up exhibitions for our 100+ member group.  Currently, we have 19 members with work that will be shown in the Patchwork and Design Festival in both Rio de Janiero and San Paulo, Brazil.  The quilts have arrived there safely and in plenty of time, so my work there is pretty well done until it’s time for the quilts to come home.

Our next exhibition which I’m working on will be at Mighty Tieton, an artistic community in Eastern Washington.  Since the surrounding area is particularly known for their produce and fruit production (in fact the gallery is in an old fruit processing plant!) and the community has a large Hispanic population, they asked for our theme to reflect this if possible.  We’ve named the exhibit “Salsa!” and hope to get member entries that will reflect this theme in numerous ways.

I’m faced with the difficulty of  putting in lots of hours into setting up, doing logistics, getting entries, jurying the quilts and art cloth, etc. and wanting badly to also participate in showing my artwork.  But creating a piece takes time… a commodity that I’m a bit shy on these days!  So, here’s my plan… I thought what I could do is a coordinating 5 x 7 piece each week for 9 weeks, then put these together into a quilt.  I’m planning to do a thread-painting of the following fruits and vegetables:

  • tomato
  • onion
  • cilantro
  • lime
  • corn
  • tomatillos
  • peppers
  • avocado
  • chili peppers
Detail of quilt made from Guatemalan
fabric by artist Priscilla Bianchi
Then, each thread painting will be appliqued (probably with a bit of trapunto) to a quilted coordinating background.  I’m not sure about how they will all fit together yet, possibly with some of my hand-woven Guatemalan fabric, or even with machine-made lace.
What do you think?  I’d really love some comments on this idea… combining my 5 x 7 challenge with the Salsa exhibit seems to kill two birds with one stone, yet maintain the spirit of my challenge to create each week.
You might also be interested in:

The Fiber Funsters, my small art quilt group, met this morning at my home for our monthly meeting. Our group decided last summer to start doing a challenge piece based on a particular word every-other month. Our first word was “Opening” and we shared these pieces with each other in November.     Today I was able to photograph most of our pieces to share here!  
“Convento Santa Catalina” by Carolyn
Hitter

The first piece to the left, “Convento Santa Catalina” was made from a photograph that Carolyn took at a convent in Arcquipa, Peru.  Carolyn’s technique includes the use of tulle to create the shading and shadows.  She built up separate parts of the landscape and then put the different elements together, doing a majority of the stitchwork before backing the piece and keeping the quilting minimal.

Opening by Rebecca Simmons

Next, Rebecca also chose an opening flower (as did I.)  Rebecca made her piece using Tsukineko inks, basically painting both the flower and background.  She uses heavy stitch to accent the petals edges and veins.  The center of her flower has Angelina fiber and beading.

“Opening” by Debbie Hiatt

Debbie’s piece is abstract, using up “leftovers” – scraps of silks most of us would love to have!  She highlights the “opening” in her piece with hand embroidery stitches, while the curved machine quilting echos the shape of the opening.

“Australia Rock” by Sally Simmons

“Australia Rock” in Narooma, Australia has a natural opening that Sally remembers vividly from her trip there. She used one of her photos to complete this piece, adding shading with tulle and very realistic looking greenery with threadwork.

Charo Lopez’s “Open to Love”

What would this theme be without a piece that really opens?  Charo’s heart stays closed with a bit of velcro, but you can also open it to see what is inside… the great loves of her life, her pets.  She says that Devon, the black cat, is her only pet at this point, but the others are waiting for her in heaven.  Charo used a template of hearts with glitter, paint, and rhinestones at different places over the piece, as well as lots of buttons (surrounding the main red heart both outside and inside, giving a real depth to the piece, and little heart buttons interspersed on the front.)  She printed photos on fabric of two of her animal loves, as well as having different charms to represent some of her pets.

“Open to Love” by Charo Lopez with heart opened
Close up of the inside of Charo’s heart

Marylee designed this cute piece with “openings”.  The little round balls seem to be rolling down the planks and through the openings like a pinball or pachinko machine, only to end up being gobbled up by a “Pack-man” shaped object.  Guess this dates me that I know pinball, pachinko and packman, huh?

“Opening” by Christina Fairley Erickson

I’ve shown the piece I made called “Opening” previously on this blog.  It is all machine embroidered.

While some of our newest pieces are still works in progress, I’ll share them soon!

Thanks for all the inspirational projects at Seven-Alive! and Sincerely, Paula.

You might also be interested in:

The Fiber Funster’s 
10 x 16 Group Challenge
Designing for a Theme Designing for a Theme 
– Innovation Part 1
Original sketched design

New week, new project. Well, actually one completely new, one just finished, and another in process. First, I started my next 5 x 7 Challenge piece, which I had sketched out last week.

Paper-piecing pattern

In thinking about how I could most effectively make this, I decided that paper-piecing would probably be the quickest with a nicely finished result. Since most of my art isn’t geometric, I haven’t had a lot of practice with paper-piecing.  

First section completed

This is where those of you who are familiar at this skill will probably laugh.  When you look at my pattern to the left, I have had to build each section with numbering.  However, I’m having to build parts of the sections on separate papers and then combine them, as my lines don’t all match up.  It’s seeming to work however.

“Opening” by Christina Fairley Erickson
100% Freehand Machine embroidered and Freemotion Quilted

I also just completed my first piece for the Fiber Funsters 10 x 16 challenge. Guess I’m all about the challenges this year! finishing off this dense freehand machine embroidery was more difficult than I expected. I decided to do a trap unto effect with a second layer of batting inside the lily, to have it stand out from the background. I then added the backing and freemotion quilted around the flower and in uneven horizontal lines over the blue background. Of course, I realized after doing a good portion that I could have just as well quilted from the back side since the flower was already outline, which would have made it possible to have even spacing of the lines. As it turned out, I couldn’t distinguish my quilting lines from all the thread of the background, which makes it a little less precise when you view from the back side.

“Opening” back – faced and freemotion quilted
See the white
on the edge?
The real difficulty came when I faced the piece and tried to turn the facing to the back. With such dense stitching, it was remarkably stiff and didn’t want to gracefully bend and hide the facing. Also, the process stressed it a bit and little bits of the white under-fabric were showing through.


The edge after painting
with fabric markers
See the difference/?
Well, I steamed and starched and pulled and cajoled, stay-stitched the seam allowance to the facing, and cut away as much of the seam allowance as possible.  I hand stitched the facing down, but still wasn’t fully satisfied with the result.  In the end, I dug out some fabric markers and ‘painted’ the edges and little white spots that shouldn’t be showing!  I think it did the trick!


My final piece to share is the second quilt for Fiber Funsters.  The word we’re using this time is “Celebrate!” as our theme.  I’m not sure what I think of this piece yet or if it has any promise.  I played around with some fabrics I’d hand-dyed and painted and this is how far I’ve gotten.  I don’t really know how I’m going to free-motion quilt it yet… But it’s supposed to be done in a week, so that gives me a little motivation!

“Celebration” – work in progress by Christina Fairley Erickson

You might also be interested in:

52 Weeks of Art The Fiber Funster’s 
10 x 16 Group Challenge
2013 Open 5 x 7 Challenge


Blogs You Should Check Out!
For Fantastic Tutorials on FreeMotion Quilting go to The FreeMotion Quilting Project
Work in Progress Wednesday (Thanks Freshly Pieced!),
Link it Up Thursday  (Thanks Seven Alive!) and
 Can I Have a Whoop Whoop (Thanks, Confessions of a Fabric Addict!)
Off the Wall (Thanks Nina Marie Sayre)
TGIFF (Thanks Diane – FromBlankPages!)