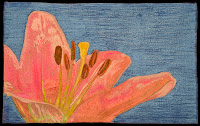
Limes by Christina Fairley Erickson
Freehand machine embroidery, freemotion quilting and decorative stitching

Do you get more and more productive the closer you get to a deadline?  This is a pet peeve of mine (not to mention my husband’s!)  Why is it that we have to get right up to a deadline before we get motivated?  I really thought that with my finishing each of the 5 x 7 pieces each week, I’d be looking great for the Salsa show’s deadline of April 6.  Perhaps I am doing fine… it’s a bit hard for me to know, since I’ve never made a quilt-as-you-go quilt.  I suppose I’m worried that putting it all together will prove a bit harder than I’ve imagined.  Two more 5 x 7 blocks to go.

Here are the other pieces completed so far:

Any thoughts on what I should do for sashing and putting them all together?
The lime seemed like it might be a bit tricky- there was a lot of reflective light in the photo and the juiciness of the cut lime.  I decided to start with the darker parts of the sliced half, and then added progressively lighter colors.  For the whole lime, I began with the outer edges (the parts furthest away) and worked my way towards the center.  
When I finished the machine embroidery, I completed the background with more decorative stitching and freemotion quilting.  I used the same sort of squared stippling that I’d used with the Peppers, which I’d learned on Leah Day’s FreeMotion Quilting Project.

Finally, I added the limes on top with extra batting to give them dimension (hand applique.) 

Working on the freemotion quilting
Quilted background completed

You Might Also Be Interested In:
5 x 7 Week 3- The
 Start of Salsa!
New 5 x 7 Challenge
Pieces 
Juggling Many 
Projects

Blogs I Recommend and Link-up:

Freemotion Quilting Project

Freshly Pieced

Nina Marie Sayre’s Art Quilts

Quilt Matters

Richard and Tanya Quilts

Confessions of a Fabric Addict

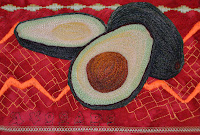
Only 3 more 5 x 7 pieces to go for my Salsa series!  They’re looking good all together.  I was a little worried that this red background might be too dominant with the rest of them, but it turned out fine.  I wanted the complementary color to the green of the avocado, and the dark skin of the fruit allowed me to use something quite bold… there’s no way that the pieces will fade into the background.  I’m still trying to figure out how I’m going to tie all the pieces together- I’m leaning towards black sashing that is freemotion quilted throughout.  I’d love to hear any thoughts or suggestions you might have about putting these pieces together into a quilt.

Yesterday I was reading one of my old favorite inspirational books, Simple Abundance: A Daybook of Comfort and Joy by Sarah Ban Breathnach.  Each day of the year has a separate little essay that looks for finding joy in your everyday life.  I’ve had this book and referred to it for probably about 15 years (it was published in 1995.)  It’s a lot like a wonderfully inspirational blog!  Anyway, the entry for March 4 is called “Priming the Pump for Inspiration” and uses the analogy of how you used to have to pour water into a pump to get it started.  Likewise, as artists, we need to feed ourselves images and experiences to keep the flow of creativity.

Similarly, Twyla Tharp, the famous dancer and choreographer, talks about setting rituals to get your creativity flowing.  If you set up a structure of doing the same thing each time you sit down in your studio (or on the way to your studio)… something that is inspirational, or centering, or creates peace for yourself… you will start to get greater access to your creative side.

I can’t say that I’ve got this process of ritual down at all.  I do lots of things to “prime my pump”, whether it be taking photos, cutting out images from magazines and putting them in sketchbooks, or reading books and blogs which I find inspirational.  But, typically I feel a little pressed for time and that I need to produce when I’m in my studio.  I’m rethinking this.  Perhaps I would be better served creatively to take the extra time, slow down a little bit, and follow a set ritual each day to start opening up my right-brain creative side.

You Might Also Be Interested In:

Developing the 
Creative Habit
Peppers and Avocado Cilantro – Si!

Some of my Favorite Blogs:

Leah Day’s FreeMotion Quilting Project

Connie Kresin’s Freemotion by the River

Nina Marie Sayre’s Art Quilts

Freshly Pieced

Quilt Story

Confessions of a Fabric Addict

Quiltsy

I finished My “Peppers” last night!  Hooray!  I’m quite happy with how they turned out… I struggled with making the red center one laying down so you are looking down on it.  I think the key was both the shading and sewing directional-ly. By this I mean that I’m trying to capture the shape of the object, by sewing in the direction that the object naturally goes.

For instance, where there was a buldge in the pepper, I sewed around any bulbous protusion, which, combined with shading, helps give the illusion of depth. Another way of looking at directional sewing is to think of the way something grows or sewing with the grain of an item. For instance, if you want to portray an animal, it won’t look very realistic if you make the hair going in an unnatural manner.  Similarly, petals, leaves, and plant stems look closer to life with a vertical grain and more cartoonish with horizontal filling.

Background before I hand appliquéd the trapunto peppers 

I also made a decision with the background of this piece.  If you’re familiar with design theory, you’ll recognize “repetition” and “unity” as two fundamental  design concepts. Many strong designs utilize repetition- whether they are visual art, writing or in a musical composition.  Repetition aows the viewer to feel more comfortable with the piece-as if the already know something about it, since they’ve seen (or heard) that part of the piece before. Repetition can also help unify a piece. Having too many loose ends that don’t relate anywhere else in the work can be jarring and disquieting.

So, for my “Peppers” I used a background fabric which matches the background of my Tomatillo, but in a different color way.  I used the same pattern for the Freemotion quilting as I did on my Tomato. One of the lines of decorative stitch matches another in one of my pieces.

Why is this important? While each piece may be lovely and stand on its own, my plan is to put nine of these “Salsa” pieces together into a quilt. Although I’m doing similar techniques- Machine embroidered veges with decorative stitching and Freemotion quilting, if I’m not careful it will seem like it isn’t unified.  Other ways I’m working to unify the peace and provide repetition include using the same font for the name of each of the vegetables or fruits, using an analagous color scheme (red, orange, yellow, green), and having my quilting and decorative stitching be more sharp angles rather than curves (I think of this being more like Mayan or Aztec patterning.

On to my Avocados….!

You Might Also Be Interested in:

New 5 x 7 
Challenge Pieces
5 x 7 Week 3- 
The Start of Salsa
Developing the 
Creative Habit

Check out these other Great Blogs!
For great ideas on freemotion quilting, check out Leah Day’s FreeMotion Quilting Project

To find some wonderful quilting projects, visit Freshly Pieced

Confessions of a Fabric Addict 

Art Quilts by Nina Marie Sayre

Stitch by Stitch by Marelize Ries

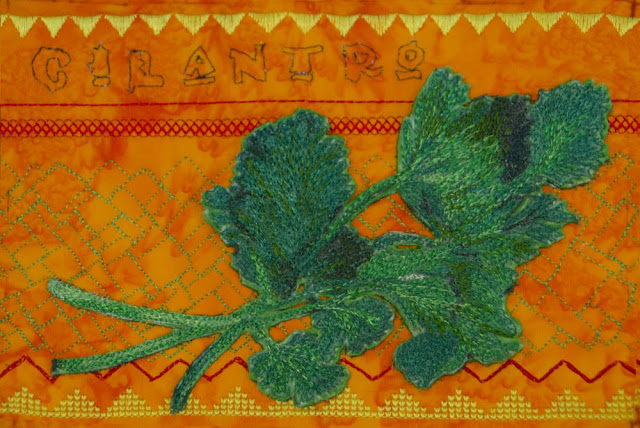
I made it back home from San Francisco late last night and finished up my 5 x7 “Cilantro” piece today.  
“Cilantro” by Christina Fairley Erickson
Freehand machine embroidery, decorative stitching and freemotion quilted
Since I already had the machine embroidered cilantro done, all I had to finish up was the background.  For this, I started with stitching the name “Cilantro” as I had with my other Salsa pieces.  To do this, I printed the word on a piece of paper-piecing paper in a funky font and then just stitched the letters out and tore away to paper.  Then I chose a few different decorative stitches to start with.
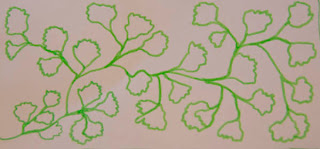
Cilantro freemotion quilting design

Next, I wanted to fill the middle space with freemotion quilting.  I drew out this design which I based on cilantro leaves.  I like how it looks and was ready to try it out.

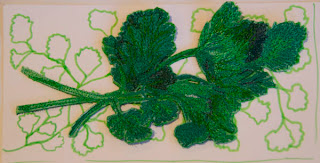
However, I then lay my machine embroidered Cilantro on top of the drawn design.  I don’t think it was complementary at all!  I’d like to try the leaf pattern somewhere, but this wasn’t the right place.

Cilantro freemotion quilting design with cilantro machine
embroidery on top

Background getting filled in with cubing

So, I decided to check my favorite resource, Leah Day’s FreeMotion Quilting Project, and thought that I could slightly modify her “Cubing” design.  I worked the design at an angle or on-point, as well as putting in a lot of rectangular shapes, rather than mostly all squares.

After that, I only had to applique down my machine embroidery.  Due to the thin stalks and ruffled edges of the cilantro, I decided to cut the embroidery along the edge, color in the edges and machine applique it (rather than hand-applique as I did on the others.)  I did put a minimal amount of trapunto batting under a few leaves and left some of the edges loose, so it has a more 3-D effect.

You May Also Be Interested In:

Recognizing Our Limits 
and Not Giving Up
A Sprig Away La Cebolla (Onion)

Also Check Out These Great Blogs!

Confessions of a Fabric Addict

Nina Marie Sayre- Art Quilts

FreeMotion by the River

QuiltStory

Freshly Pieced

The Needle and Thread Network

I finished my third piece for my ‘Salsa!’ quilt this evening:
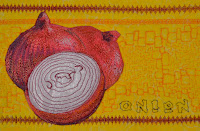
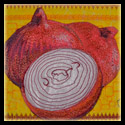
“Onion” by Christina Fairley Erickson – Machine freehand embroidered, freemotion quilted and decorative stitching

Layers of batting for trapunto effect

I had a bit tougher time with getting the trapunto done well, so that the depth perception of the onions in back would be complemented.  So I did several layers of batting which I stitched together to help create this effect.

For the freemotion quilting background, I used “Stone Portals” from Leah Day’s FreeMotion Quilting Project.

I’m not sure that I got quite enough contrast in this piece, particularly for the background.  However, I think once all the pieces are put together, it should hold its own.  You can see the contrast issue, when I compare it with the other two pieces completed so far:

You might also be interested in:

Week 4 – Tomatillo 5 x 7 Week 3- The
 Start of Salsa!
52 Week – 5 x7 
Challenge to Readers

Other great blogs to check out:

Leah Day’s FreeMotion Quilting Project

Nina Marie Sayre’s Art Quilts

Confessions of a Fabric Addict

FreeMotion by the River

QuiltStory

Freshly Pieced

A Quilting Reader’s Garden

Today is the end of the 4th week of our 5 x 7 Artist Challenge and I completed my 2nd piece in my Salsa series: Tomatillo.  This was a little difficult to represent, as not everyone is familiar with these little green beauties.  They have a husk or outer skin that peels back to reveal a small green tomato-like fruit.  They’re delicious fried up or made into their own salsa or green enchilada sauce.

I wanted to represent it both with the husk and showing the fruit inside, so I got a great photo of it with both. I started by hooping my photo which I’d printed on cotton sheets, and “painting” in the lightest areas of the picture.

I slowly worked with freehand embroidering the tomatillos, adding shading and overlapping thread colors to build up and merge the colors.  I didn’t always have exactly the right color of thread, so by putting down a bit darker color and then adding lighter thread on top, the colors give more of the impression of a medium tone of the color I was trying to replicate.

One of the challenges of this piece is there doesn’t originally seem like there is that much variation in color.  However, using slightly more shading than in the original photo can help with creating more of a sense of depth in the object.

The other thing which I handled differently in this embroidery is that I didn’t applique or tack the leaves/husk of the open fruit down, so they become three-dimensional.  Once again, I added an additional 2 layers of batting in the body of each of the fruits, but the husk leaves stand out, as though you just peeled them open.

Here is the finished piece:

You may recognize a couple of the freemotion quilting elements from Leah Day’s FreeMotion Quilting Project.  They are Square Spiral and Radio Static.

You might also be interested in:

5 x 7 Week 3- The
 Start of Salsa!
52 Week – 5 x7 
Challenge to Readers
Scope Creep

Want to see more great projects?  Check out these blogs:

Photobucket
My last week’s project
(Tomato) was featured
on 
Quiltsy

Cool Airbrushing technique on Nina Marie Sayre’s Art Quilting Blog

FreeMotion By the River

Quilt Story

Confessions of a Fabric Addict

Quiltsy

Richard and Tanya Quilts

Freshly Pieced

Sew Much Ado!

Quilter’s Reader’s Garden

I’m working on getting my studio cleaned up, since I have a studio tour coming up… in April!  OK, maybe that seems like a lot of time, but I need it to be ready.  The studio tour is one way that we’re raising money for the LaConner Quilt and Textile Museum through StashFest.  Different artists are offering studio tours which people can purchase as and “Insider Visit” at StashFest.  So I’m really motivated to get my studio in tip-top shape.

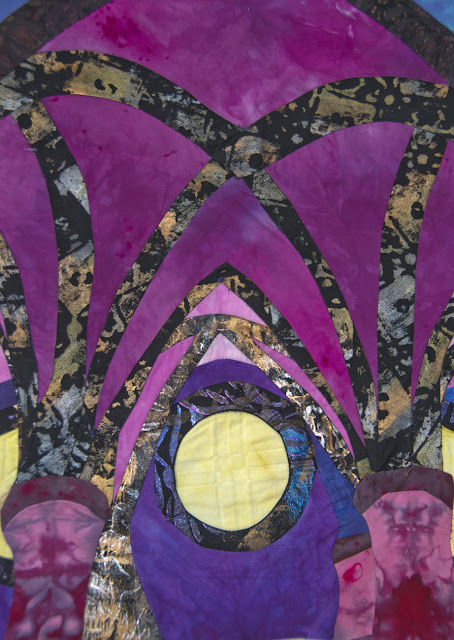
Cathedral Visions – designed and machine pieced
by Christina Fairley Erickson

Part of cleaning up is to go through my UFO’s and figure out what I need to finish them off… or if I should even bother.  Sometimes a project just doesn’t speak to you anymore.  If that’s the case, let it go.  There are plenty of groups who make charity quilts who would love your unfinished bits and pieces.  It’s quite a relief to give things away.  Give yourself permission to get rid of pieces that you really don’t want anymore.  Many people are even selling partially completed items on eBay… then they can take their earnings and go get more fabric!

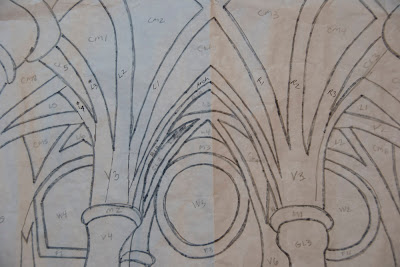
My original drawing from my photograph

So, here is today’s UFO: Cathedral Visions.  I started this quilt for a show (Sacred Spaces) but didn’t finish it on time… so it was put on a shelf and has sat there about 2 years.  It is completely machine pieced (not appliqued) and I made all the fabrics myself (hand-dyed and painted.)

Each section was numbered to cut out the pieces

I’ve done quite a bit of traveling and this comes from a photo of an inside of a cathedral which I took.  The values represent the darks from all the beams and shadows of the convoluted spaces, as well as the light coming through some stained glass windows.

I’m sure you can see the challenges this piece presented when looking at all those curves and sharp angles!

While I like this piece, I feel like it doesn’t entirely work somehow.  I can’t quite get my finger on it… I know that adding freemotion quilting will help it to a certain extent.  I’ll be checking Leah Day’s FreeMotion Quilting Project for inspiration.  


Detail view of Cathedral Visions

I’d love any comments, critique and feedback you might offer!


You Might Also be Interested In:

Curved Piecing Tutorial – 
Waterfall Quilt
Fireworks Freemotion 
Quilting Design
2013 – Artist 5 x 7 
Challenge

For Wonderful Tutorials on FreeMotion Quilting and other quilting topics

Ryan Holdridge, Eagle Scout with Mom, Christina

First and foremost… every mother deserves some bragging rights.  Tonight, my son Ryan completed the final step and earned his Eagle Scout rank!  We’ve been on that journey since 2001, including my being a den leader and assistant scoutmaster.  Woo Hoo!!!

This week has been a bit of a push… Not only did I work on my UFO Waterfall quilt, I wanted to have my 5 x 7 Artist Challenge Piece be able to coordinate into the salsa quilt theme. I’m pretty excited about the result so far. I’ve decided to not finish the edges of these salsa blocks, since I will be piecing them together into a full quilt.

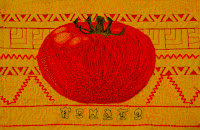
The process for making this started with a photograph of a tomato. Actually, I picked out photos for each of the nine items (tomato, onion, cilantro, peppers, tomatillo, lime, chili pepper, corn, and onion.). I then removed backgrounds and resized the photos to fit the 5 x 7 format in Photoshop. I then printed the photos (2 to each page) on COTTON from VV Prints -(add link and type of cotton).

Start of thread painting the tomato

I keep my thread sorted by color, rather than type, with the exception of metallics. Since I decided to start with the tomato, I pulled out a wide range of reds and oranges, changing in value from tangerine and pinks, through the true hues, up to dark maroons and deep rusts. I placed them in a line of values- light to dark, so it would be easy to pick out which colors would be next in shading.

I then hooped my tomato.  When you are doing machine embroidery, it’s important to use stabilizer (I used two layers-one of  Pellon Stitch N Tear  the second OESD Heavy-weight cut-away Embroidery stabilizer) to help ensure you embroidery won’t get misshapen. You also hoop opposite from the way you do with hand embroidery, so the fabric is laying along the bottom of the hoop, rather than across the top edge. This way the fabric is flush up against the sewing table.

“Tomato” stitched on marked background

I then started freemotion thread painting.  I layered colors, particularly where I wanted to blend shading. I generally try to start with areas that would be further away from the viewer and end with the places that would be closest, the help create a more 3-D effect.

After completing the tomato, I turned to the background on which it would be placed. I knew I waned to have the names of each fruit or vegetable printed out on the background, so I decided to try my friend’s process for text (see note on how to do this with Marylee Drake’s ‘Celebration’ quilt.) I picked  a fun Font to go along with the Salsa theme and stitched it onto the background.

Adding decorative stitching

Added freemotion quilting
Coloring edge of embroidery so it can be turned under

Next, I marked my background with a Dritz Fine Line Water Erasable Marking Pen – Blue to help keep my lines well-spaced.  I then added both machine decorative stitching and Freemotion quilting to the background that would accent and complement both the tomato and the Salsa theme.  For the Freemotion quilting, I turned to Leah Day’s Freemotion Quilting Project and found a few designs that would give me the effect I wanted… To look like Mayan patterns. I decided on Square Shell (without filling in the small square), and a cross between Echo Maze and Circuit Board.

Turning edge under using Roxanne Glue Baste-It

Finally, i colored the edges of the white fabric around the embroidery using a Stained by Sharpie Brush Tip Fabric Markers before I hand appliqued the tomato onto the background.  I added two layers of batting between the embroidered tomato and the backing, with the first just slightly smaller than the size of the tomato, and the second a smaller oval, so it would help add a three-dimensional more rounded shape. I used Roxanne Glue Baste-It to help hold the edges under as I appliquéd.

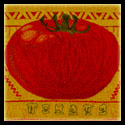
My completed 5 x 7 piece “Tomato”

The only step, other than finishing the edges, which I still need to decide whether to do or not is whether I’ll paint in the lettering.  I’ve decided to hold off for now, as I want to test painting letters this size, before I try it on my finished piece.

This week my blog was featured on FreeMotion by the River!  Thanks, Connie!


You might also be interested in:

Current Works in 
Progress
Fitting my Challenge 
with Showing
2013 – The 5 x 7 
Artist Challenge

Check out these great blogs I’ve linked up with!

Freemotion by the River

Nina Marie Sayre Quilt Art

Confessions of a Fabric Addict

QuiltStory

Richard and Tanya Quilts

Freshly Pieced- Work In Progress Wednesdays

Made by Me!

Quiltsy Check out the wonderful seed stitch info on their Jan 17, 2013 post.

“Opening” by Christina Fairley Erickson

A small favor to ask… I’ve entered my quilt “Opening” in a online gallery of challenge quilts which viewers can vote on their 4 favorites.  Please check it out and vote for your favorites!  http://quiltinggallery.com/2013/01/18/vote-challenge-quilts/

Last Wednesday, I showed the quilts that our small art quilt had made for our first challenge around the word “Opening.”  Today, I have the next set, which were made with the prompt “Celebrate.”  Due to the holidays, not everyone had either finished a piece, but we have quite a bit of diversity in what we do have!

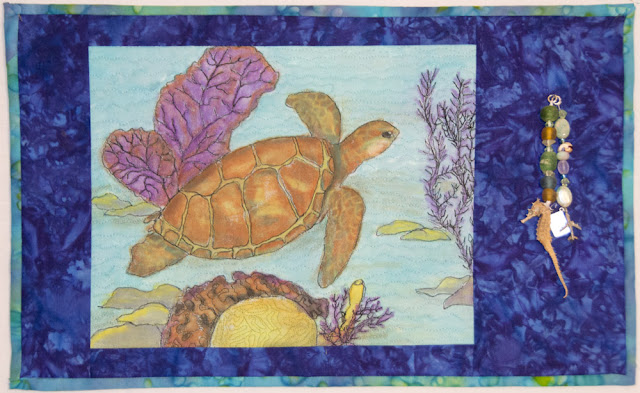
The first piece, made by Sally, is entitled “Celebrate! Belize Anniversary.”  Sally and her husband went to Belize for their 40th anniversary and really enjoyed the snorkeling.  Sally had recently taken Lola Jenkins‘ Thread Art Class through Craftsy, and used her know knowledge to make the incredible picture in this quilt. She layered the color using Crayon d’Arche Swiss water soluble pastels and encapsulated it with Textile medium.  The beads hanging on the left include gifts of a dried seahorse which Sally had received from her family and a mini plane and passport.

“Celebrate! Belize Anniversary” by Sally Simmons
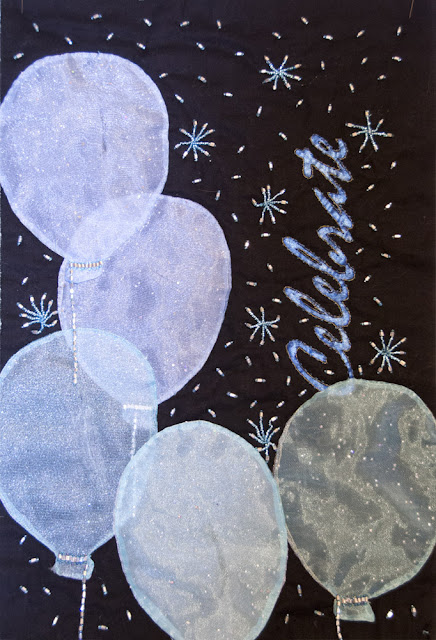
“Celebrate!” by Marylee Drake

 Marylee and I were on the same wavelength, inspired by the incredible fireworks show at the Space Needle for New Years Eve.  See my post “Fireworks Freemotion Quilting Design” for a great photo from that show.  Marylee’s piece is hand-stitched and beaded for the fireworks.  Her balloons are double layers or organza–she didn’t quilt them down, so they are puffy, semi-transparent and add a great texture.  She had a fantastic tip for getting lettering on a quilt- print out the word(s) you want in the font and size you want from your computer.  Then put that paper on the right side of your quilt and stitch over it.  Tear away the paper (you might want to use paper-piecing paper which runs through your printer).  Then you can either add additional stitching or paint in the lettering, as Marylee did here using Lumiere fabric paints.  Marylee still has some work to complete, including possibly adding in a small Space Needle to finish the piece off.

I used my hand-dyed and painted fabrics to make an abstract piece that reminded me of New Years.  I quilted the piece with the fireworks design I created, then quilted over the right-side fireworks with silver thread, to echo the silver in the painted section in the center.  I also added a decorative machine stitch in the center portion and some fuzzy, metallic yarns.

“Fireworks” by Christina Fairley Erickson
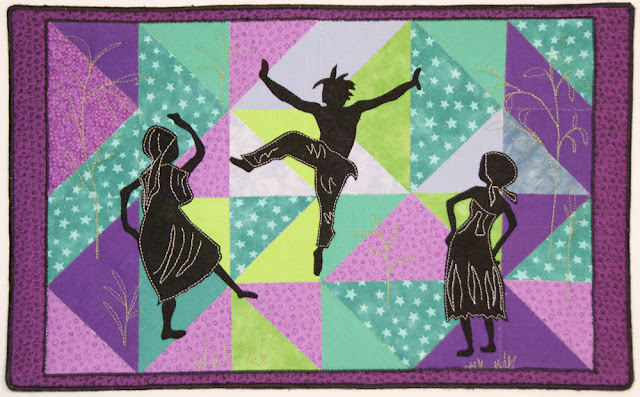
Caroline has lived a fascinating life with lots of travel to remote places and living abroad while in the Peace Corp.  When she lived in Africa, it would be completely dry for 6 months.  When the rain finally came, it was something worth celebrating!  Children would go out and dance naked in the rain, mothers would hold their squealing little babies out from under the eaves in the downpour, everyone would sing and be joyous.
“The Rain He Done Come” by Carolyn Hitter

You might also be interested in:

Fireworks FreeMotion 
Quilting Design
“Opening” 
The Fiber Funsters 
Group Reveal 1
The Fiber Funster’s 
10 x 16 Group Challenge

Fantastic Blogs to Check Out:
For great ideas on how to freemotion quilt your projects, go to the Freemotion Quilting Project.  Leah Day’s tutorials are fantastic!
Get inspired with different quilter’s completions at Confessions of a Fabric Addict!

Nina Marie Sayre’s great art quilting blog shares a great way to transfer a drawing onto fabric for redwork or other stitching

See some great projects and quilts recently finished on Richard and Tanya Quilts

This week I’ve completed this windmill design for the 5 x 7 Challenge. As I mentioned previously, I haven’t done a lot of paper-piecing before, but it seemed like the perfect technique for the background color splashes which I wanted.

Week 2 completed piece for the 5 x 7 Challenge
Designed and made by Christina Fairley Erickson
Original hand-drawn design
Back side

I ended up change quite a few things from my original hand-drawn design. First, I had small triangles around the center circle of the windmill, which I decided would simply be too small to be done effectively for the size of the finished piece. As I was going through my fabrics for the yellow color section, I found one with the circular motif which I decided would work well as the center, and chose to hand-appliqué it on. The other major change is that I didn’t add any struts to the windmill blades. I was going to machine appliqué some red fabric, but it looked too heavy. I then thought I’d machine quilt lines in, but once I finished quilting the colored background areas, the result was that the “windmill blades” and center stand or puff out since they haven’t been stitched. I like the look this way and think the result of stitching in strut lines may ruin this effect.  The other obvious change is that I decided to change the placement of the colors.

Sample/tester I made of Leah Day’s freemotion
quilting design “Sharp Angled Maze

I tested out a freemotion quilting design which I thought would work well for my background colors which I found from Leah Day’s Freemotion Quilting Project which she calls “Sharp Angled Maze.”  Overall, I think the design worked well within my piece.  The one problem that you can catch glimpses of is that with using a different color of thread on the back side of the piece, you can occasionally see bits of the bobbin thread on the front.  In the practice piece, you can see this in the lower half (particularly lower right), but I was able to adjust my machine tension to get rid of the problem.  I’m not sure whether it was the additional thicknesses of the seam allowances, but even with my top tension adjusted all the way down as far as it goes, I still had a little bit of bobbin thread showing.  If I were doing this for a large piece for competition, I’d probably work with it more.  Perhaps a smaller needle size?  Different thread?  Tighten the bobbin tension?

The other criticism I would have of this piece is that when you are further away from it, the blue and purple sections are a bit too close in value to the black/red/orange/yellow windmill blades.  If I were to do it on a larger scale, I would want to add more light values into those sections.

I welcome your comments and critiques on my pieces!

Thanks to other participants this week in our challenge!  Here are what others are working on:

“Wet” –  Hand-painted, thread-sketched and discharged
with bleach pen by Carol

Carol “LandscapeLady” has created this wonderful piece entitled “Wet”.
Check out her blog to see her photos of working on this piece throughout the process from photo to completed 5 x 7 art piece.

I really love the movement in the piece… you can feel, as well as see, the drops of water being joyfully shaken off this dog!

“Indonesian Dancer” – Work in Progress by Lise

Lise has this work in progress called “Indonesian Dancer.”  She is planning to add more to it, so we’ll look forward to seeing more- next week?   The repetition in this piece: wavy lines, musical notes, headdress elements, and sets of eyes all building the theme.  The wavy lines and lines surrounding the face particularly add to the primitive, ethnic feeling.  I can’t wait to see it finished!

Other blogs to check out:
Work in Progress Wednesdays at Freshly Pieced – delightful modern quilts

Wow Us Wednesdays at Savvy Southern Style… there are some really amazing projects here!

A Lovely Year of Finishes from Sew Bittersweet Designs has a great monthly goal-setting and project-finishing challenge

You might also be interested in:

Week 1 of the 5 x 7 
Artist Challenge
Getting Started May be 
the Hardest Part
52 Week 5 x 7 Challenge 
to Readers