
 |
| Christina standing below hand-dyed embroidery threads |
I’m back from five days in “stitch heaven” with Gail Harker. The class, “Experimental Hand Stitch” focuses on Procion MX dyeing of embroidery thread and a wool/acrylic felt to stitch on, and then learning some of the basic embroidery stitches and how to use them in a contemporary context.
 |
| My friends”, Debbie and Rebecca, dyed felts and threads |
The felt and threads are vibrant and beautiful. Gail feels that having your materials inspire you is important, so she helps her students understand their color choices and combinations to be successful with the dyeing process.
 |
| Some of my dyed felts and threads |
I basically stuck with an analogous color scheme from yellow-green through red-violet. If you’re unfamiliar with analogous color schemes, it means that you pick colors that are adjacent to each other on the color wheel. So the colors I worked with were greens, blues, and violets.
After our dyeing days, we started doing small stitch samplers. Each stitch will have its own page in a small stitch book (we even learned how to bind our books!) We also worked on documenting our samples within a sketchbook, including what threads we used, any observations we have, needles that were chosen, etc.
 |
| Some of my incomplete pages with the sketchbook documentation pages and sample threads |
Some of our samples were also worked on sketchbook pages which we dyed and then fused together, so they are quite stiff. We then poked holes in the sketchbook pages along the line which we wanted to stitch, and then added the stitch afterwards. It was so fun… it reminded me of when I was a little girl and had cards with pictures on them and holes to “stitch” through (really it was more like lacing.)
 |
| French Knots (in process) by Christina Fairley Erickson |
While none of these samples is complete yet, you can get an idea of what they’ll look like here. I have additional ones started, but these are the most complete. The other thing which was different and interesting was the freedom which we were encouraged to take with each piece. For instance, in years past, French knots were expected to have the thread wrapped neatly around the needle two times. With contemporary hand stitching, however, we can make a variety of sizes and different textures and effects by wrapping a thread more times around the needle, or by wrapping it loosely, rather than tight.
 |
| Running Stitch (in process) by Christina Fairley Erickson |
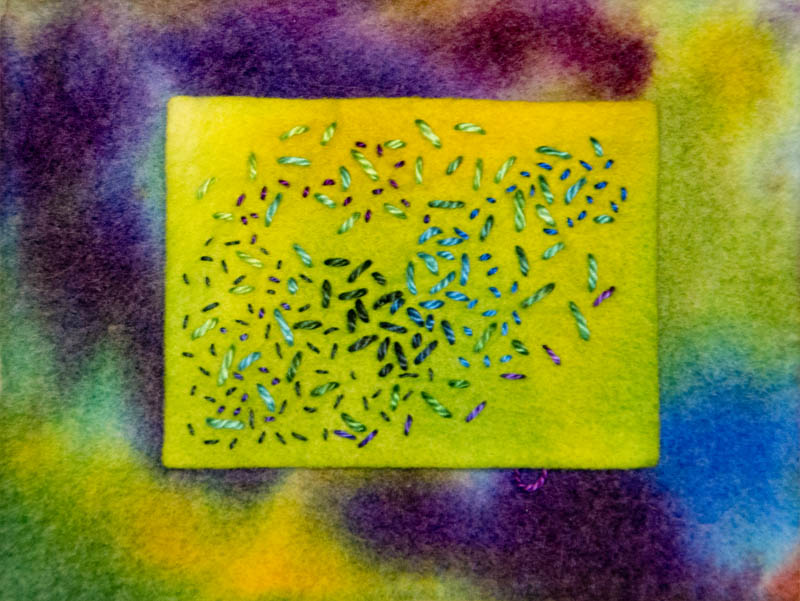 |
| Seed Stitch (in process) by Christina Fairley Erickson |
 |
| Blanket Stitch by Christina Fairley Erickson |
 |
| Open Chain Stitch (in process) by Christina Fairley Erickson |
Each of the pages is about 5″x 7″, so they fit in well with my 5 x 7 Challenge! I’ll be getting my final Salsa piece finished up this week, then I’ll need to work on the sashing and binding of all the Salsa blocks into a finished quilt.
You Might Also Be Interested In:
 |
 |
 |
| Dyeing to Embroider; | Recognizing our Limits & Not Giving Up |
Hand Stitch Variations |
Check Out these other Great Blogs:
Anything Goes – Quilt ‘n Sew at Stitch by Stitch
Wow… another fantastic day of mostly working with Procion MX dyeing at the Gail Harker Center for Creative Studies. To be completely honest, I’m pretty tired… this can be hard work. So, I’m going to keep it short and sweet tonight, and just put up some images and descriptions of the processes and projects we worked on.
 First, our hand-dyed embroidery threads are totally luscious! Here they are drying in our classroom. We had to rinse them out and then set the color in hot water with Synthropol today.
We then started dyeing wool-rayon felt, which we’d cut into pieces prior to class, and will be making into hand-stitched books.
 |
| Felt with dye poured on (wet) |
The felt totally soaks up the dye… you have to pour it on and it looks horrible and dark for the most part.
 |
| Rinsing out the felt |
After allowing it to sit for a few hours, we rinsed it out and also set the dye with Synthropol. Since the felt soaks up so much water, we had to carefully wrap it in towels to help dry it. You don’t want to press or agitate it very much, or it starts the felting process. We then left it to completely dry overnight.
 |
| Felt dyeing |
 |
| Rinsed felt for hand-made stitch books, laid out to dry |
We also worked with painting dyes on sketchbook pages. We do these in 2-page “spreads” so that they will go together when the book is opened. We then fuse pages together, to make the pages stiff and able to be stitched on. We started working on a few pages by drawing a design on them, then punching holes through the paper with a darning needle. We then can easily put our stitches through the holes.
 |
| Some sketchbook pages painted with dye |
I believe we’re done with the dyeing now… on to more stitchwork tomorrow!
 |
| A two-page spread for a sketchbook, painted with Procion MX dye |
You Might Also Be Interested in:
 |
 |
 |
| New 5 x 7 Challenge Pieces |
Complex Threads 2 | Developing the Creative Habit |
Check out these other Great Blogs!
For great ideas on freemotion quilting, check out Leah Day’s FreeMotion Quilting Project
I’ve been continuing to explore hand-stitch this last week and completed another sampler. I’m not really sure where I’m going to be using this in my work this year, I’m just certain that I am. I’ve seen so many spectacular pieces that were enhanced by using hand-stitch. I’ve also noticed that show judges seem to appreciate the extra effort that an artist has put in, when there are hand-stitch elements. Here are the stitches (on acrylic felt- not hooped):
Top row:
- Double Knot Stitch (aka Old English knot, Palestrina or Smyrna Stitch)
- Cable Chain Stitch. This is like chain stitch, but with a link in between the chains
- Fern Stitch (aka Fern Leaf Stitch)
- Paris Stitch (aka Open Square Stitch)
- Fence Stitch (aka Bosnian Stitch)
- Tnorn Stitch
- Cross Stitch (aka Berlin or Sampler Stitch)
- Braid Stitch
- Singalese Chain
- Wheatear Stitch
- Fishbone Stitch (on leaves)

Bottom row:
- Whipped Backstitch
- Threaded Backstitch
- Double Threaded Backstitch
- Chain Stitch with Backstitch running through center
- Double Knot Stitch
- Petal Stitch
- Scroll Stitch
- Ladder Stitch
- Long Armed Cross Stitch
- Vandyck Stitch (aka Flat Variable Stitch)
- Long & Short Stitch (top leaf in oranges)
- Stem Filling Stitch (bottom leaf in blues)
I’m partially doing this work as I’m taking another hand-stitch course at the Gail Harker Center for Creative Arts in March. I’m looking forward to getting more ideas in how to incorporate the hand stitches into my work.
Speaking of Gail’s classes, this Thursday, Jan 10 from 5-8 pm, the opening of “Complex Threads: Students of Gail Harker Center for Creative Arts” will be happening at the Schack Art Center in Everett WA. If in the area, be sure to check it out!
You might also be interested in:
How to make a knotted blanket stitch (video)
More embroidery samples
Stitchwork Samplers
 |
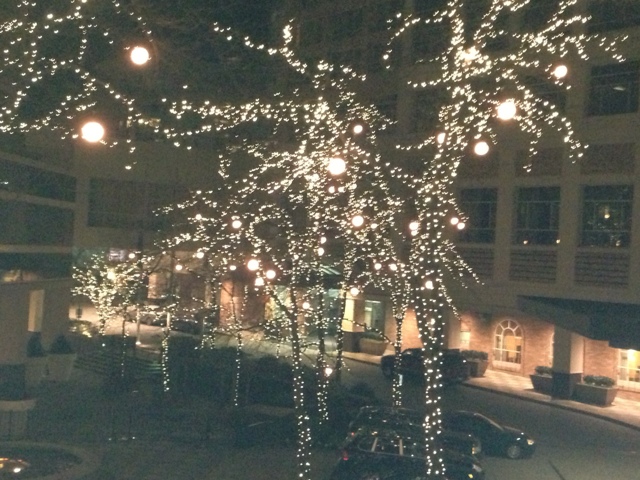
| Christina in Winter White Cape at Snowflake Lane |
Randy and I finished up our shopping at Bellevue Square where they have “Snowflake Lane” each night during the holidays. He’s now entertaining us playing an assortment of Christmas music, Broadway show tunes, and pieces from the 20’s to the 50’s. I’m at a distinct disadvantage with “Name That Tune” for that era, since I wasn’t even born yet, but my Mom is having a great time!
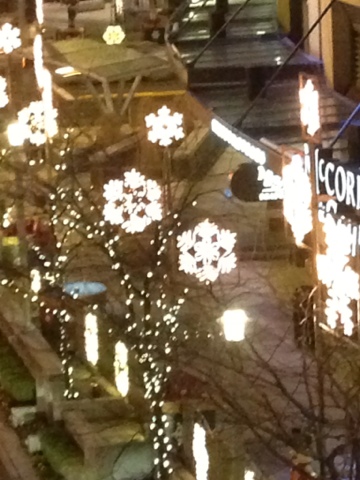 |
| Snowflake Lane |
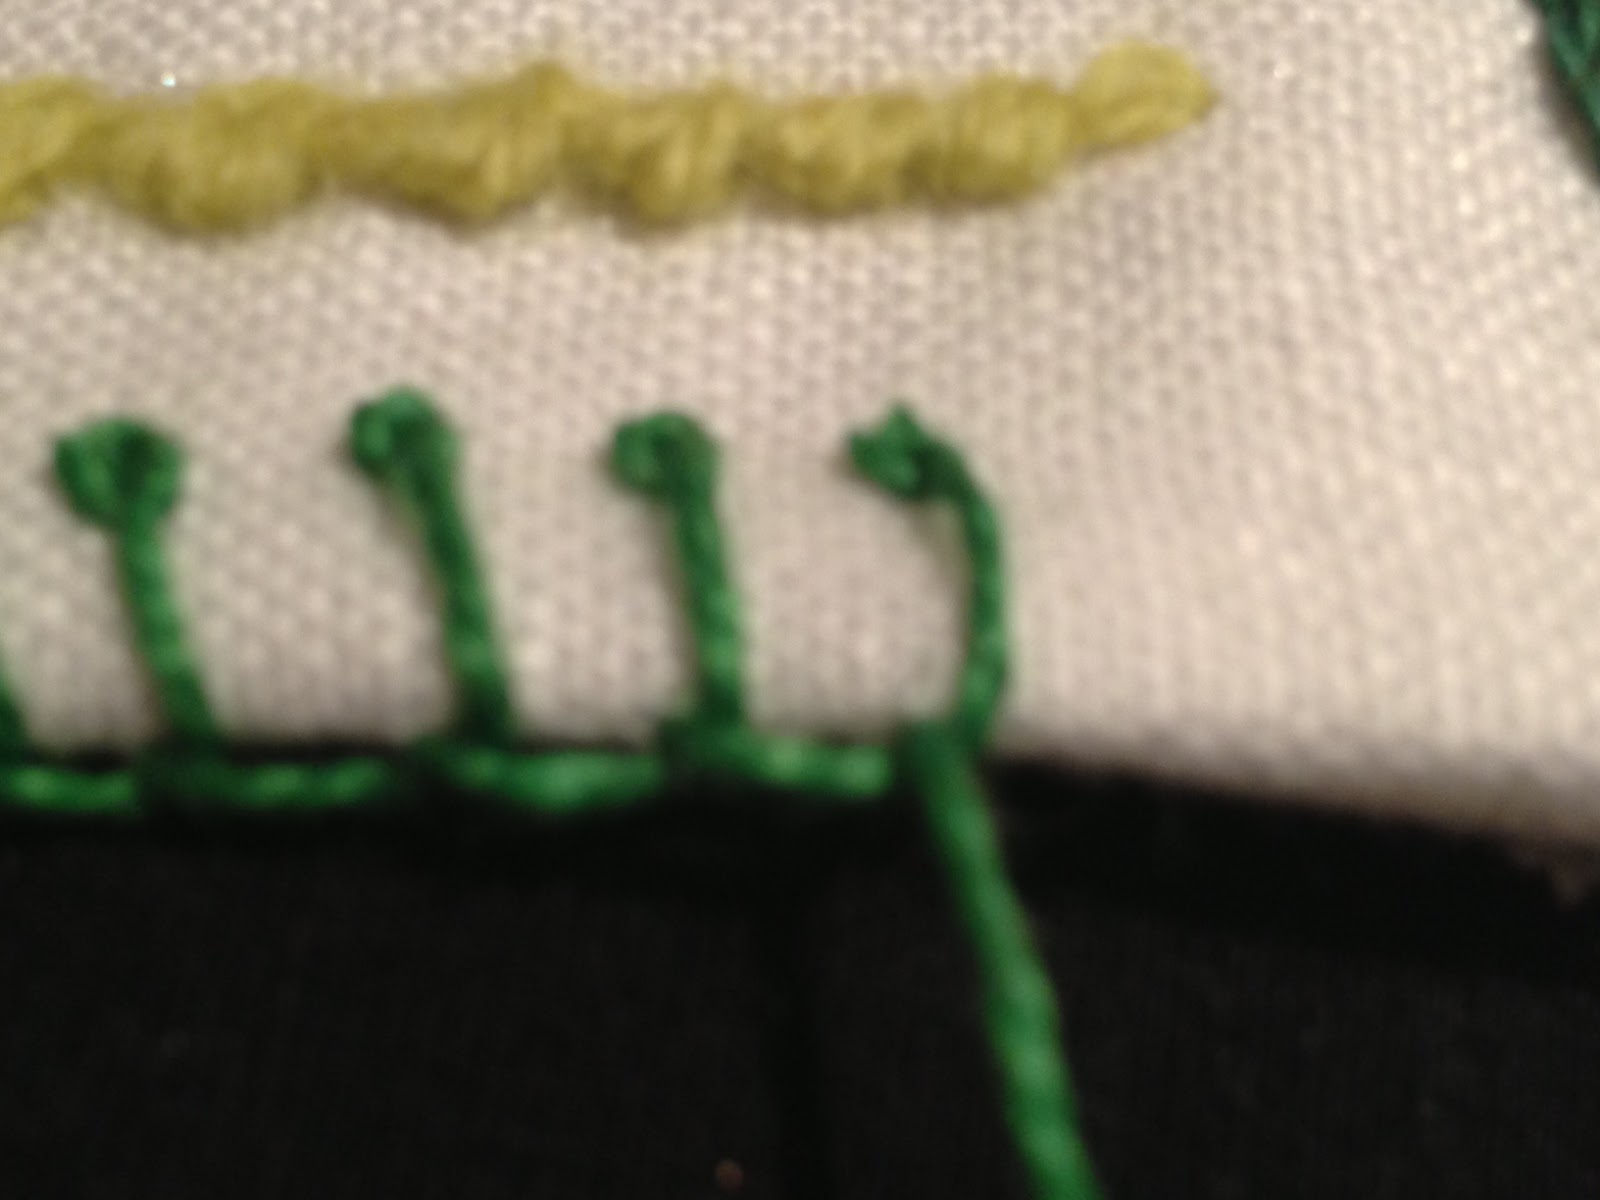 |
| Knotted Blanket Stitch |
Since I always like to keep my hands busy, I’m working on an edging stitch for one of my embroidery samplers. I decided to do a Knotted Blanket Stitch, which I’ll show how to do here:
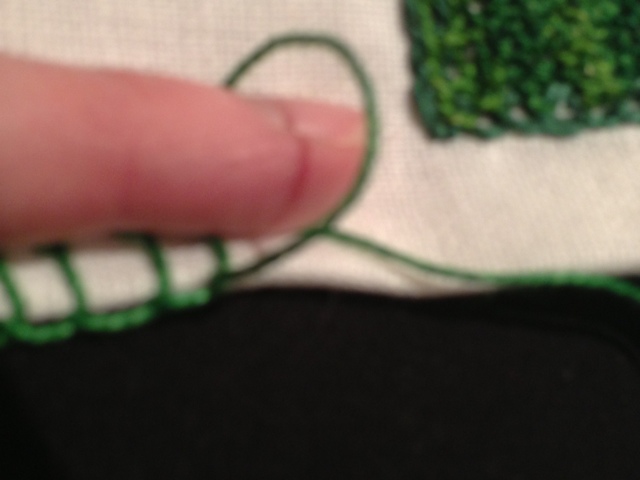 |
| Step 1- Make a loop |
 |
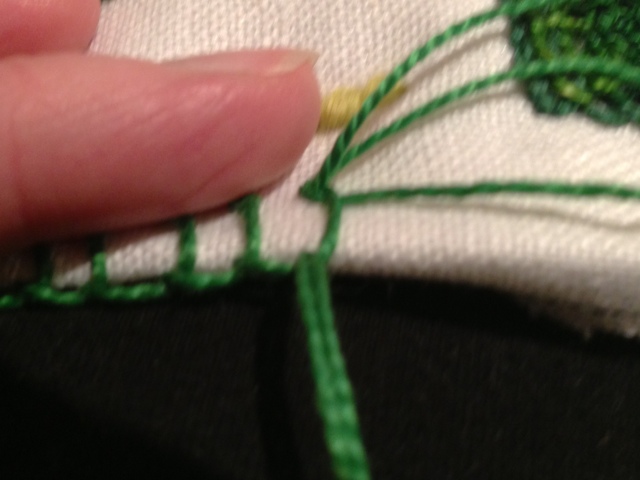
| Step 2 – Needle through loop and above the lower thread from last stitch |
 |
| Step 3- Pull loop tight around needle |
 |
| Step 4 – Pull thread through, making sure that loop stays tight to form knot |
You might also be interested in:
Stitchwork Samplers
More Embroidery Samples
Merry Christmas from our family to yours and wishing us all Peace on Earth.
Christina
 |
I’ve spent some evenings working more on hand embroidery. Let me know if you want instructions or thread types on any of the stitches!
Top Row:
- Herringbone stitch
- Herringbone stitch
- Cretan stitch – similar to herringbone, but with a twist
- Cable stitch
- Laced running stitch – simple but looks nice!
- Pekinese stitch – while this isn’t very difficult, you need to work at keeping loops the same size
- Laid trailing stitch – very thick raised couched cording
- Feather stitch
- Heavy Chain stitch- this is almost a braided stitch
- Twisted Chain stitch
- Chevron stitch
- Open chain stitch -this fine wool (DMC Medicis) is a bit tough to see- looks like a ladder

Bottom Row:
- Double Chain stitch
- Feathered Chain stitch – nice vine-like look
- Crested Chain stitch
- Top: Rosette Chain stitch Bottom: Buttonhole Wheel
- Two Color Chain stitch – this is done with two threads in your needle, but just catching one each stitch
- Rope stitch
- Raised Stem stitch
- Blanket stitch
- Whipped Blanket stitch
- Long & Short Blanket stitch
- Closed Blanket stitch
- Up & Down Blanket stitch – make a nice little knot along with two strands to side
You might also be interested in:
Stitchwork Samplers
Snowflake Lane and How to make a Knotted Blanket Stitch (with video!)
Stitchwork Samplers
Snowflake Lane and How to make a Knotted Blanket Stitch (with video!)
 |
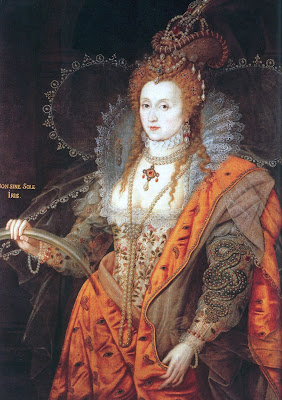
| Queen Elizabeth 1 in stunningly embroidered dress |
We started the Elizabethan embroidery class today with a slide show of incredible examples both from paintings and surviving pieces of embroidery. Of course, fashion followed the monarch herself. Her intricately embroidered dresses were masterworks and sometimes were so heavily jeweled that she would have to be carried, rather than walking. In this picture to the right, the embroidery depicts all sorts of wildlife, some quite realistic and others from imagination.
 |
| Botanical & natural themes in Elizabethan gold work |
 Themes for embroidery during the 16th century generally tended to coincide with what people knew: botanical and animal life. In this piece of gold-work (where the thread is wrapped with pure gold), undulating vines with leaves, flowers, caterpillars moths, and other bugs are depicted. However, Queen Elizabeth had a penchant for being one of a kind (she even had laws against others being able to wear things as grandiose as hers… like the size of their neck ruffs!)
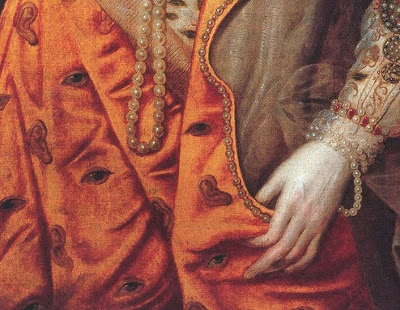 |
| “I always feel like somebody’s watching me…” |
In this painting, the embroidery design covering her dress is of eyes and ears, to imply that she could see and hear all and was omniscient over her subjects. Wouldn’t that strike terror into the hearts of her court, servants, and the general populace!

On the left sleeve, a jeweled serpent wraps and entwines itself, holding a heart-shaped ruby from it’s mouth, representing the queen’s passions (the heart) being controlled by her wisdom (the serpent.)
Looking at examples from the Victoria and Albert Museum’s textile collection in London, as well as other British sources, we came to a greater understanding of the sheer magnitude of the embroidery movement during the Elizabethan era.
Other objects which I found interesting that were heavily embroidered were caskets (a type of box… not a coffin), books, and intricate gloves and mittens. Maybe more on those another time.
After whetting our appetite with amazing image, we got down to stitchwork for the rest of the day. So many stitches are able to be seen, but historians don’t always know exactly how they were done. There are often more than one way to create the same stitch. So, we’re learning many stitches, but not doing them necessarily in the same way which the were stitched in the past.
We are using authentic materials: wool, linen, and cotton for threads and fabric the most part, although some silk fabric was also used in that era. I didn’t realize that the term “crewel embroidery” means stitching with wool. Hopefully I’ll have a finished sampler or more done by the end of class tomorrow, so I can share some photos!